

James,
This is the first of my hopefully! help notes and concernes the replacement of worn parts in the fuel line "petcock". This is the item that you control with the handle for "on" "off" and "reserve".
1). The "petcock" certainly in my case proved to be very reliable for 49 years till I noticed last year the aluminium casing at the area where the control handle swivels the internal parts was damp with fuel. I continued to use the car until one day after leaving it for a few days there was a small puddle of fuel on the rubber matting!
At that time I rarely if at all turned the fuel control handle to the "off" position. ( Something I always do now especially if parked on steep hills)
2). My car is a 59 A T2 and directly the leak happened I purchased from www.stoddard.com the correct repair gaskets to suit the late 356 A petcock. ( there are differences between early 356 and the last 356C cars but their online catalogue allows you to make the right decisions.
Actually for around $95 - you can buy a complete new petcock ready to fit or a full repair kit for around $20-. ( They say modern fuels can affect the aluminium petcock so often a new one is required. This was not so in my case the internal aluminium was as new.
3). The 356 registry site has also some instruction on repairing the petcock but I was confused about a few points so I make a point of trying to make those things clear below. I have never seen instruction for doing this repair in any of the manuals I have.
4). Method to try:
- It's advisable to drive the car to get a very low fuel level. When thats the case, turn the petcock to "off" and having a 2-3 foot length of rubber fuel pipe handy remove at the back of the petcock the rubber fuel pipe and place the long one on and obtain a suitable container. Turn the petcock on and drain the tank its a slow job unless the fuel is low!
- When empty, remove the bottom split pin connecting the on/off handle to the petcock and remove the handle and unscrew the nut holding the petcock to the tank. ( I did not change the fuel filter in the petrol tank)
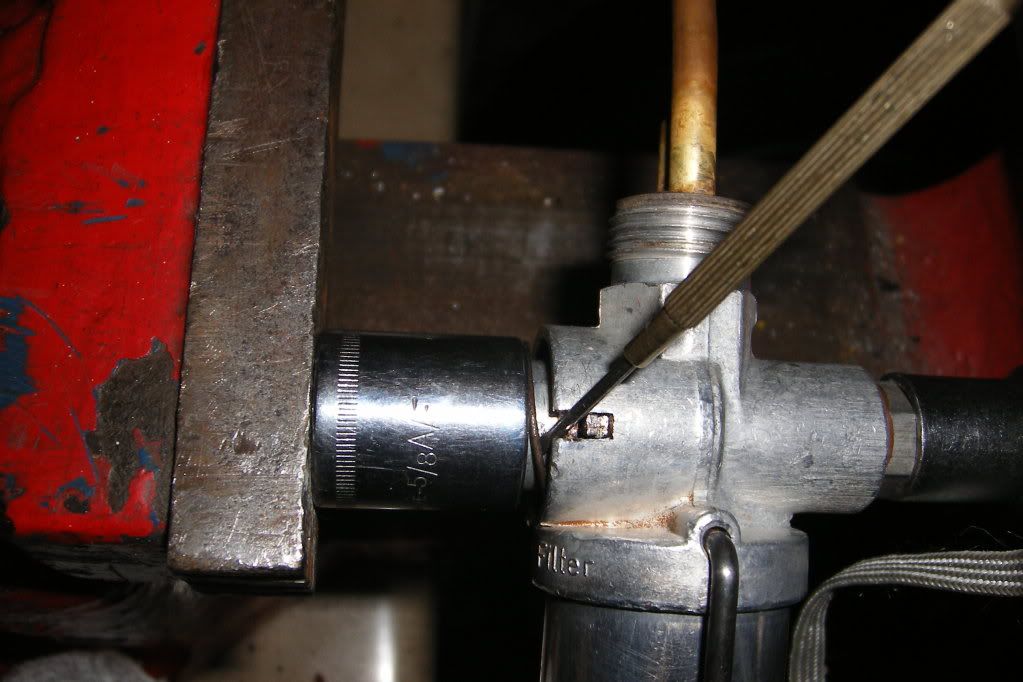
- If you look closely at the petcock's internal working area you will see all the internal parts are held in place with a small diameter "snap ring" that fits into a undercut. The internal parts are held in place by spring pressure. ( please note, the Stoddard pages do not show the coil spring!)
- To remove the snap ring you must compress the internal coil spring. I achieved this by the use of two "sockets" and a vice. It's important to make sure you can get to the snap ring when the compression takes place ( see photo ) Use a small screw driver like I did to prise it out of the undercut.
- Please make sure when you have removed the snap ring and then the internals you note exactly in which order they went and their orentation
other wise the item will not work correctly.
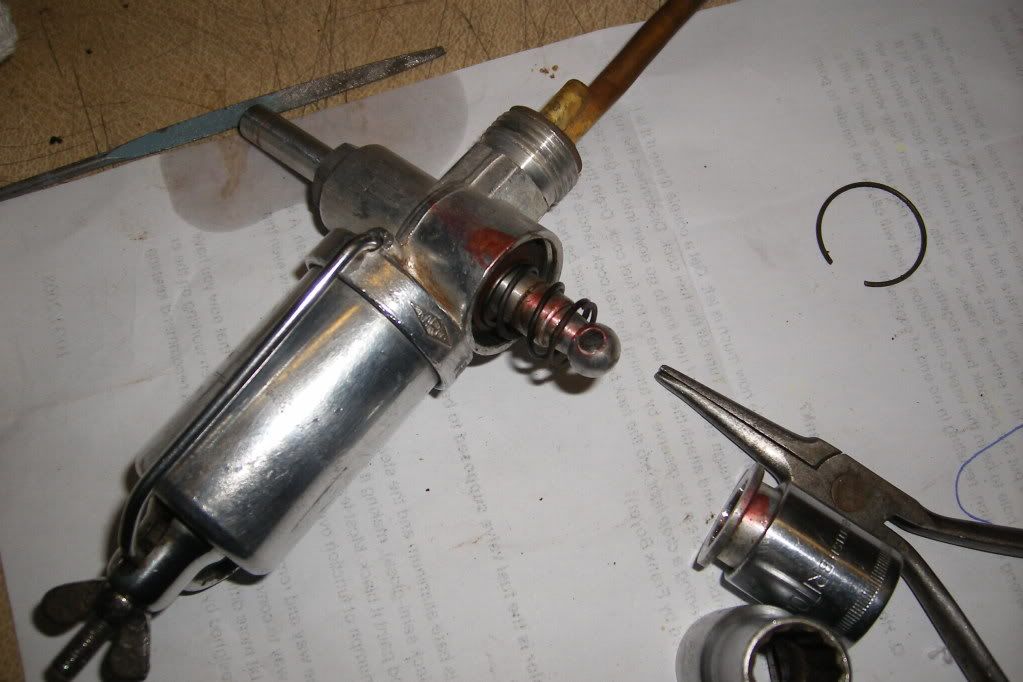
- The main internal cork gasket with the holes ( see photo) had almost turned to a hard wood in my 49 year old petcock! I had to prise it away from its seat and it collapsed into many pieces when I did.
- A part that confused me was the 25mm x 8mm diameter approx rubber
plug. This actually fits inside the operating handle and the top "split pin" is there to position it so it presses on the ball end of the petcock shaft.
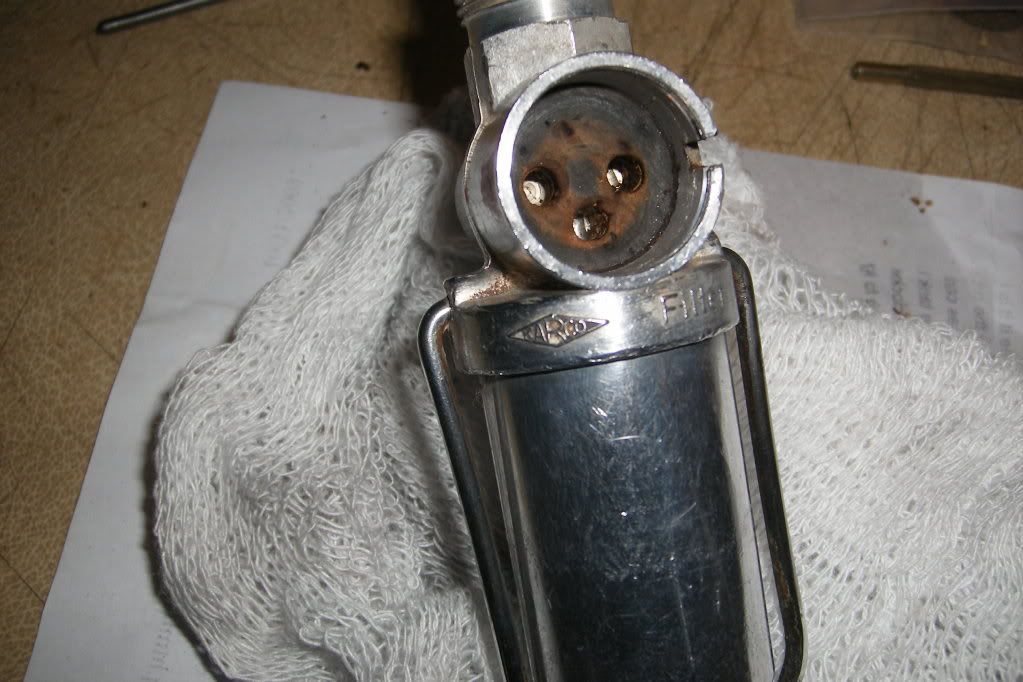
- When the items are fitted and the snapring very carefully inserted into the small undercut, the item can be checked to a degree by turning the valve and blowing down the fuel pipe on the pet cock.
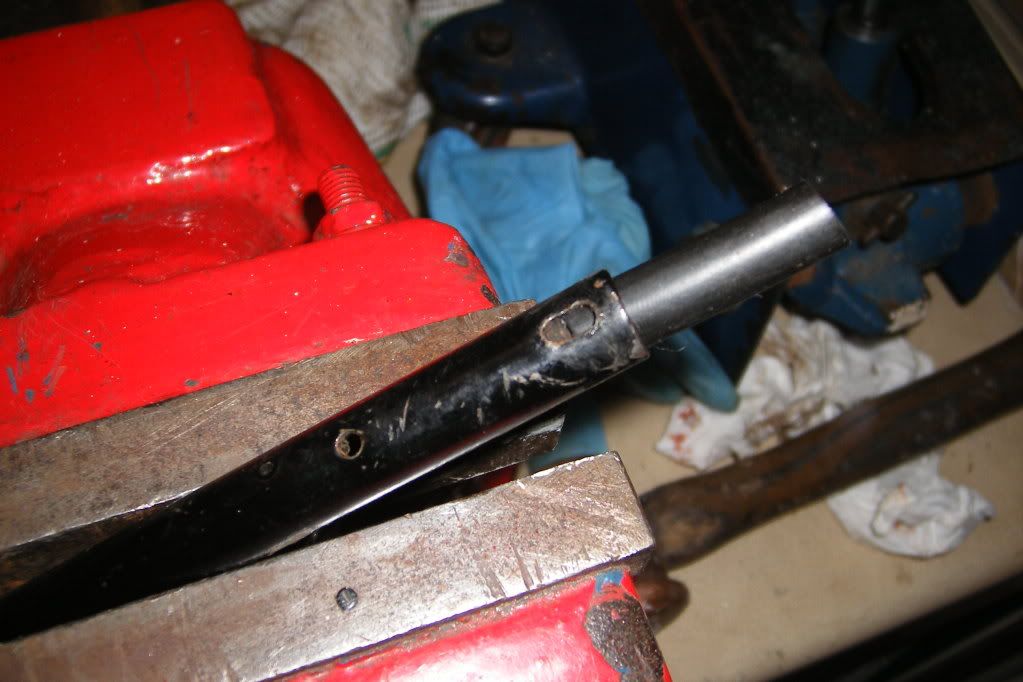
- Please note the small length of rubber fuel pipe at the back of the pet cock could be very worn or cracked if it's very old. Better to replace now rather than later.
I won't describe all the 4 photos below as the text does this. The process worked for me and if you have the same problem hope it does for you!
[img][img]http://i443.photobucket.com/albums/qq15 ... ap0009.jpg[/img][/img]
[img][img]http://i443.photobucket.com/albums/qq15 ... ap0010.jpg[/img][/img]
[img][img]http://i443.photobucket.com/albums/qq15 ... ap0015.jpg[/img][/img]
[img][img]http://i443.photobucket.com/albums/qq15 ... ap0018.jpg[/img][/img]
Roy
356A T2 petcock overhaul
-
roy mawbey
- Put a fork in me, I'm done!
- Posts: 1871
- Joined: Thu Dec 25, 2008 2:28 pm
- Location: sunny sussex
356A T2 petcock overhaul
RHD 356A coupe super 75 106954
-
roy mawbey
- Put a fork in me, I'm done!
- Posts: 1871
- Joined: Thu Dec 25, 2008 2:28 pm
- Location: sunny sussex
356a petcock overhaul missing photos
Roy, I've edited the original for you. Bootsy
RHD 356A coupe super 75 106954
-
roy mawbey
- Put a fork in me, I'm done!
- Posts: 1871
- Joined: Thu Dec 25, 2008 2:28 pm
- Location: sunny sussex
Bootsy,
Thanks very much for doing that! I have tried to imagine why those photos did not show and just how did you manage that? Also are the text line lengths dictated by the size of photo?? It a pain to keep scrolling across the page to see the full content and impossible?? to print out the full linage of text.
The trouble is with technical items the larger pictures are invaluable to see every item clearly. Any ideas on that or do we have to accept larger pictures mean longer text lines?
Thanks again
Roy
RHD 356A coupe super 75 106954
-
call911
- DDK Newbie
- Posts: 3
- Joined: Thu Mar 01, 2007 10:08 pm
- Location: USA
-
roy mawbey
- Put a fork in me, I'm done!
- Posts: 1871
- Joined: Thu Dec 25, 2008 2:28 pm
- Location: sunny sussex
Henry,
Stoddards sell the petrol pipe by length. I believe I last purchased a length of around 6ft. ( very useful to have handy ) The small length behind the petcock is a devil to change as its not easy to get your fingers on the part at the back of the floorboards. However with the tank drained if the original is suspect with cracks better now than later!!
Best of luck
Roy
RHD 356A coupe super 75 106954