

My Burgundy 69 912
Moderator: Bootsy
-
Matt black70
- DDK forever
- Posts: 510
- Joined: Fri Aug 04, 2006 9:40 pm
- Location: Wolverhampton
OK, I've been doin a bit of resto work on my fuchs recently so thought I'd add an update. I've wanted to refurb them for a while and a small push from Bazz has made me pull my finger out and get them sorted.
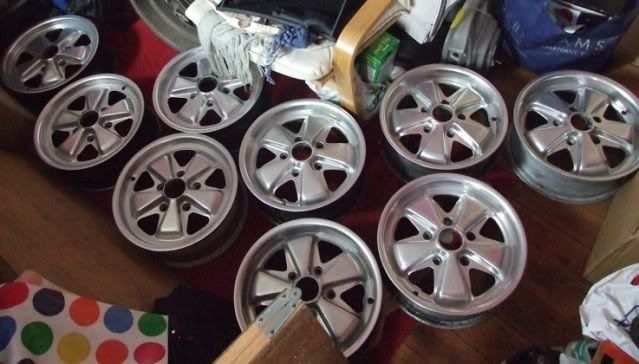
Looking a little rough and ready from years of use.
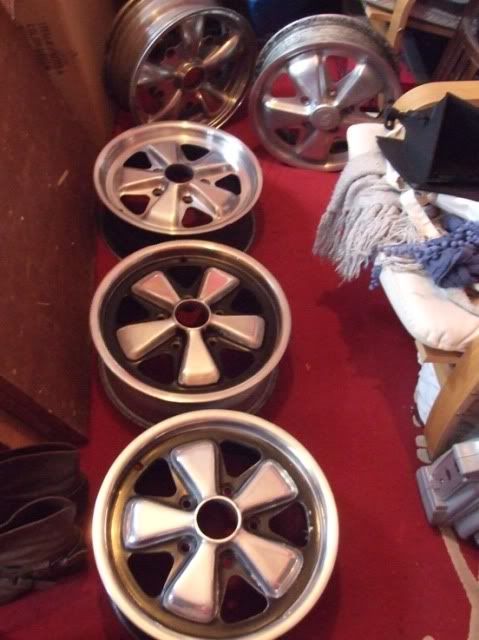
This was pretty much my starting point. My rims were reasonably tidy but most of the anodise had been removed over the years and I just wasn't happy with the polished finish and wanted to go back to basics and get them anodised as per factory finish and then re detail around the spokes in satin black.
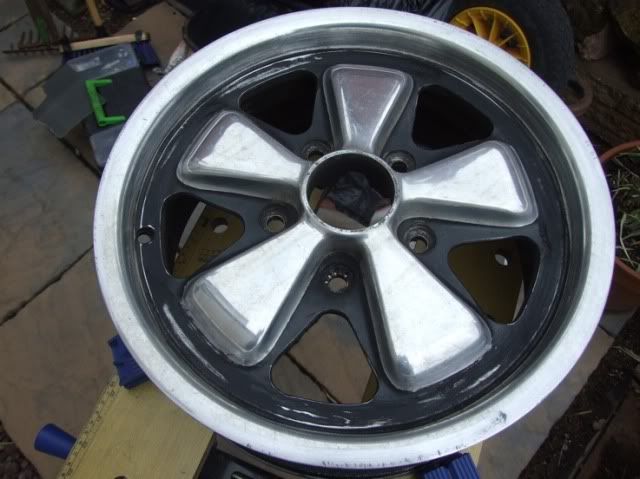
So this pic is taken shortly after I started stripping the paint off the first wheel. 80 grit wet and dry being the weapon of choice

After I'd worked my way up to about 800 grit wet and dry
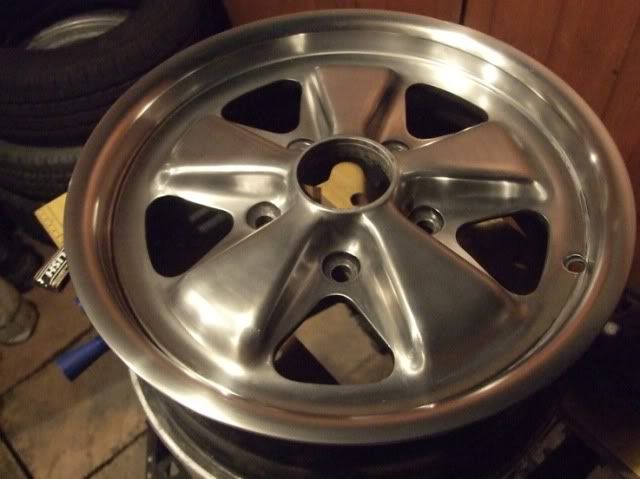
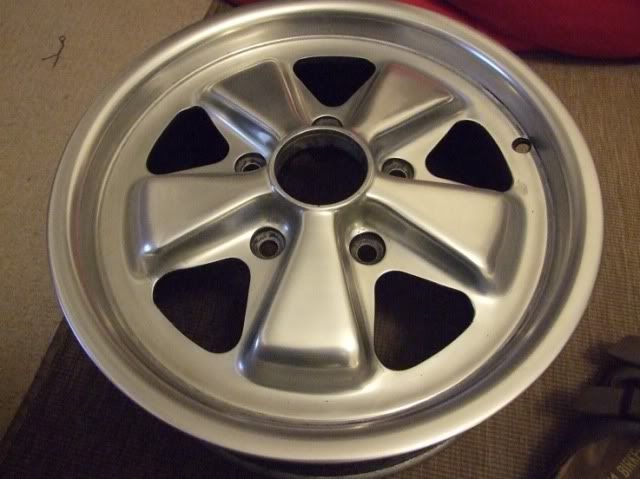
and then after I'd gone to work with a mop and several different grades of polishing compound. Finishing off with a quick wipe down by hand with some autosol.

and after a lot of work, some annoyed neighbours, and no more finger tips here we are.
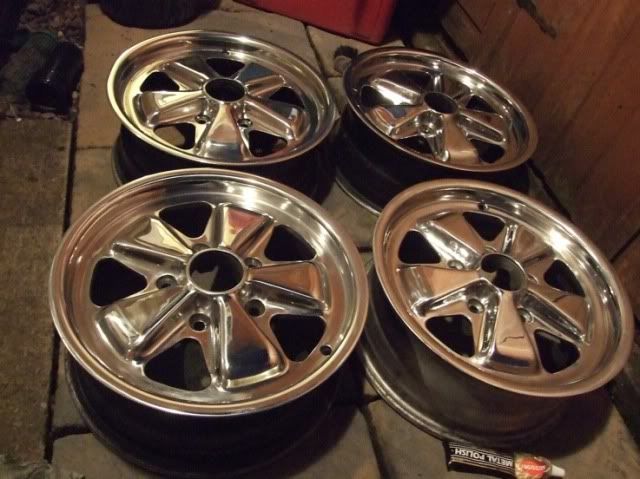
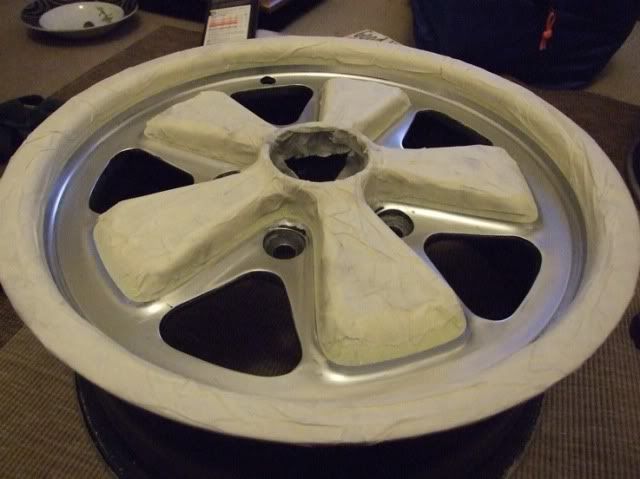
Ready to be re anodised
anyone need a chimney sweep?
They've now been shipped off for anodising. Hopefully they should return very soon when I'll finish off with a bit of re detailing of the satin black sections.

Looking a little rough and ready from years of use.
This was pretty much my starting point. My rims were reasonably tidy but most of the anodise had been removed over the years and I just wasn't happy with the polished finish and wanted to go back to basics and get them anodised as per factory finish and then re detail around the spokes in satin black.
So this pic is taken shortly after I started stripping the paint off the first wheel. 80 grit wet and dry being the weapon of choice
After I'd worked my way up to about 800 grit wet and dry
and then after I'd gone to work with a mop and several different grades of polishing compound. Finishing off with a quick wipe down by hand with some autosol.
and after a lot of work, some annoyed neighbours, and no more finger tips here we are.
Ready to be re anodised
anyone need a chimney sweep?
They've now been shipped off for anodising. Hopefully they should return very soon when I'll finish off with a bit of re detailing of the satin black sections.
Burgundy 69 912
Audi A4 1.8T sport avant
VW T25 magnum multivan
Audi A4 1.8T sport avant
VW T25 magnum multivan
-
impmad2000
- I need to get out more!
- Posts: 3302
- Joined: Fri Nov 14, 2003 8:31 am
- Location: Leicester, a convenient mid point !
- Contact:
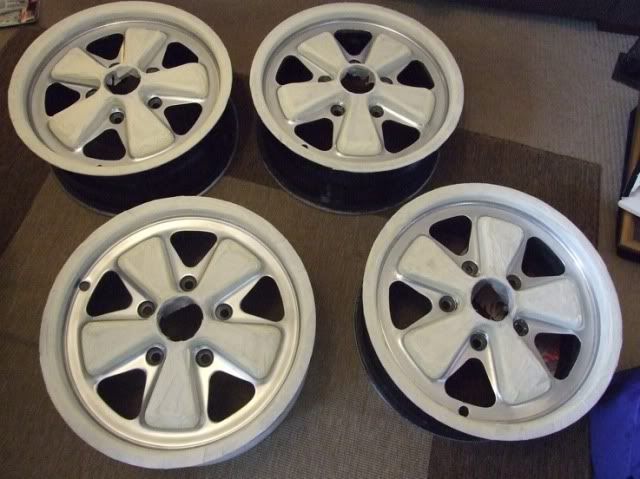
OK, thought I'd update this thread now the rims are finished and back on the car
Here are Mine and Bazz's rims after collection from Alans place, re anodised and ready for the next step - re detailing.
Ok so masking up wasn't going to be easy due to all the curved faces and choosing the correct product was a bit of a gamble which in the end fortunately paid off!
I went for the stretchy masking tape which is designed to go round corners without creasing. Really good stuff for getting sharp edges on contoured faces but also fairly thin and I wasn't absolutely confident that the 2pk paint we had planned wouldn't bleed on the edges so I ended up going over with a second coat of mask to be sure.
The other thing worth noting is that my rims had been repainted over the years (like most fuchs) and the black paint stopped where the face of the rim meets the dish. I had initially thought that this was correct for flat 6's but after a bit of research I found that the original finish did go about a third of the way up the dish of the rim (obviously its easier to mask into the crease which is why so many are painted incorrectly now) I really wanted to recreate the factory appearance on my rims so I went to the effort of getting the masking just right here.
In contrast Bazz chose to use fine line tape (like a thin electrical tape) for the edges on his and then filled the gaps with regular masking tape.
At this point I handed my wheels over to Bazz to apply the 2pk satin black paint. We ended up having to add quite a bit of extra matting agent to the paint in order to get the finish where we wanted it but after a few test runs on an old wheel we were happy that the finish was very close to the original factory finish so a couple of coats were applied and left to dry over night. The next day we removed the masking tape and to our great relief there was no bleeding of the paint on either of our rims.
(unfortunately the pics I took of the wheels freshly painted were on an old phone which shortly after I took them died a horrible and rather final death!)
So here are the wheels after getting the tyres fitted and back on the car.
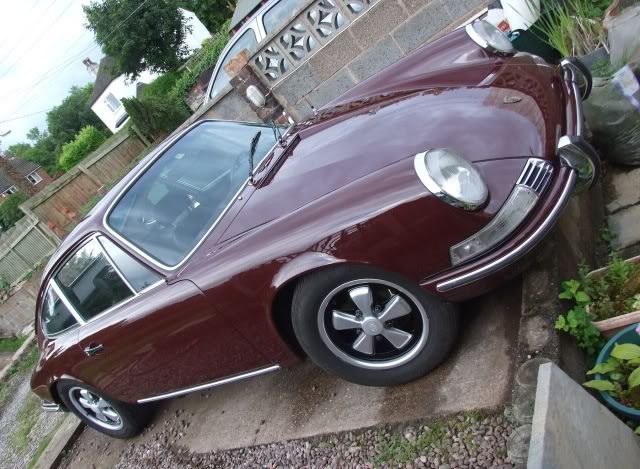

Overall I'm really pleased with the result, it has been quite a bit of work getting them prepped but the end result is really worth the effort.
Here are Mine and Bazz's rims after collection from Alans place, re anodised and ready for the next step - re detailing.
Ok so masking up wasn't going to be easy due to all the curved faces and choosing the correct product was a bit of a gamble which in the end fortunately paid off!
I went for the stretchy masking tape which is designed to go round corners without creasing. Really good stuff for getting sharp edges on contoured faces but also fairly thin and I wasn't absolutely confident that the 2pk paint we had planned wouldn't bleed on the edges so I ended up going over with a second coat of mask to be sure.
The other thing worth noting is that my rims had been repainted over the years (like most fuchs) and the black paint stopped where the face of the rim meets the dish. I had initially thought that this was correct for flat 6's but after a bit of research I found that the original finish did go about a third of the way up the dish of the rim (obviously its easier to mask into the crease which is why so many are painted incorrectly now) I really wanted to recreate the factory appearance on my rims so I went to the effort of getting the masking just right here.
In contrast Bazz chose to use fine line tape (like a thin electrical tape) for the edges on his and then filled the gaps with regular masking tape.
At this point I handed my wheels over to Bazz to apply the 2pk satin black paint. We ended up having to add quite a bit of extra matting agent to the paint in order to get the finish where we wanted it but after a few test runs on an old wheel we were happy that the finish was very close to the original factory finish so a couple of coats were applied and left to dry over night. The next day we removed the masking tape and to our great relief there was no bleeding of the paint on either of our rims.
(unfortunately the pics I took of the wheels freshly painted were on an old phone which shortly after I took them died a horrible and rather final death!)
So here are the wheels after getting the tyres fitted and back on the car.
Overall I'm really pleased with the result, it has been quite a bit of work getting them prepped but the end result is really worth the effort.
Burgundy 69 912
Audi A4 1.8T sport avant
VW T25 magnum multivan
Audi A4 1.8T sport avant
VW T25 magnum multivan
hooooo !
Very nice wheels....and of course, great work !
Congrat's....the anodized finish is the best look for the fuchs wheels !
JLC
Congrat's....the anodized finish is the best look for the fuchs wheels !
JLC
JLC 1328
viewtopic.php?t=8120&highlight=story
69 912 barn find !
https://www.flickr.com/photos/27602244@N08/sets/
at WAR against R to RSR
viewtopic.php?t=8120&highlight=story
69 912 barn find !
https://www.flickr.com/photos/27602244@N08/sets/
at WAR against R to RSR