My Burgundy 69 912

The place to post image of your PORSCHES

Moderator: Bootsy

Timo
Put a fork in me, I'm done!
Posts: 1649
Joined: Wed May 16, 2007 9:52 pm
Location: Shropshire

My Burgundy 69 912

Post by Timo »

OK, I thought it was time I added my car to the gallery. I've had it a couple of months now, most of you will recognise it as bullett's old car but I'm slowly trying to stamp my own identity to it. The reason I bought this car was because my girlfriend/family were sick of me always working on project vehicles and never spending any time restoring our house so I bit the bullet and went for a car that would need little work. Having said that I've already spent loads of time (probably more than previously) going through it trying to sort out some of its little problems :roll: Work so far has included fitting a new pair of weber 40 idf's after realising the originals were scrap, fitting new boge rear shocks, new battery, freeing off the sticky brakes all round, trying to remove all of the corrosion from the inside of the petrol tank :cry:, and taking the battery boxes and other under bonnet areas back to shiny metal before re protecting them again. I have a few plans for it over the winter so I thought I would post up some pics of how it is now so's people could see the difference when it re-emerges in the spring 8)

Image

Image

Image

Image[/code]
58A - 71E
Put a fork in me, I'm done!
Posts: 1842
Joined: Tue Nov 28, 2006 1:49 pm
Location: Yorkshire

Post by 58A - 71E »

8) Nice looking motor, glad to hear someone else calling them "little problems" :lol:
Last edited by 58A - 71E on Sun Oct 07, 2007 11:19 pm, edited 1 time in total.
James

'58 356A 1600n
'71 911E 2,2


#0335
bazz55
DDK slapper chatter
Posts: 327
Joined: Thu Dec 25, 2003 1:54 pm
Location: midlands, sunny telford

Post by bazz55 »

lookin seriously sweet timbo, still got that big grin on your face 8)
User avatar
bjmullan
Me and DDK sitting in a tree! KISSING
Posts: 2986
Joined: Fri Apr 30, 2004 2:15 pm

Post by bjmullan »

Looking nice and of course Burgundy is the nicest colour 8)
Brendan
1969 911T
2007 2.7 Boxster

Pray, hope and don't worry - Padre Pio
Timo
Put a fork in me, I'm done!
Posts: 1649
Joined: Wed May 16, 2007 9:52 pm
Location: Shropshire

Post by Timo »

Big grin still firmly intact mate :)
User avatar
louis356
I luv DDK!
Posts: 832
Joined: Tue Dec 30, 2003 11:14 pm
Location: Sunny Milton Keynes'ish

Post by louis356 »

watch those maestro tapes over the winter and drive the car!!
-Macs speed shop-
V dubs and Porsche tubs
87 924S (Now dead or is it?)
62 356 (Working on it!)
66 912 (Sadly gone - but have you seen the price of it!!)
Apal speedster (Sadly gone)
BSA Bantam in bits
A35 Race car in the making (peanutracing)
Timo
Put a fork in me, I'm done!
Posts: 1649
Joined: Wed May 16, 2007 9:52 pm
Location: Shropshire

Post by Timo »

watch those maestro tapes over the winter and drive the car!!
Have watched a couple already (couldn't manage all 6 at once :shock: )
Unfortunately the car has now been tucked up for winter. I've managed to get myself a cheap winter hack so at least I can get a few jobs done on the 912 whilst its inside in the warmth :) Hopefully should re emerge in spring better, stronger, and faster :)
Burgundy 69 912
Audi A4 1.8T sport avant
VW T25 magnum multivan
Timo
Put a fork in me, I'm done!
Posts: 1649
Joined: Wed May 16, 2007 9:52 pm
Location: Shropshire

Post by Timo »

Thought I'd add some more up to date pics as quite a few updates have happened since my last pics.

First a few pics of some of my progress. When I first got the car there were several little things that needed seeing to so I started working my way through them last winter.

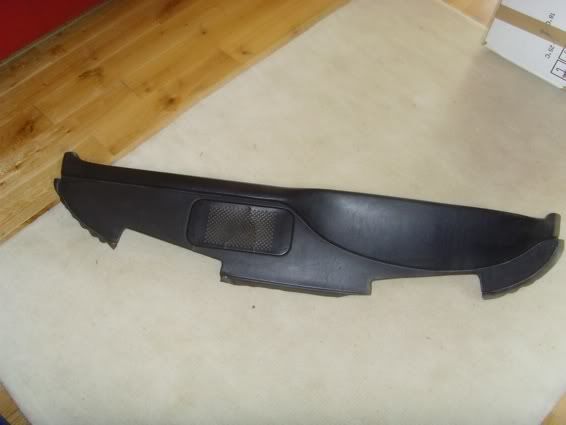
First job was to replace the leaking repro windscreen seal with a nice new genuine Porsche seal and whilst I was at it fit the dashtop I'd purchased from sdelan off here.
After 40 years of San mateo sun the original dashtop had pretty much turned to dust by now :(

Image

Next job was to attend to the very rusty petrol tank. When I first got the car the petrol filter was literally brown with a thick sludge of rusty crud. After changing several filters, and having each one promptly clog up in a matter of days I decided the tank was ripe for a refurb. I pulled it from the car and started to strip it of all its old exterior sealant and rust.

Image

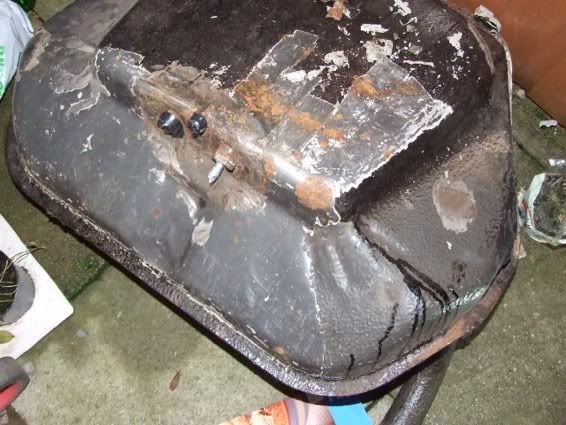
I completely bare metalled it and then treated the inside with Frosts POR 15 petrol tank renovation kit. This was quite time consuming and I ended up having to treat it several times with metal ready before all of the interior rust had been cleared. The tank has to dry out fully between stages which can be tricky, luckily I found an old hair dryer which fit over the end of the filler neck perfectly allowing me to leave the hair dryer airing the tank whilst I got on with other jobs. Finally once all of the metal ready had done its job I applied the final tank sealant coat.

Image

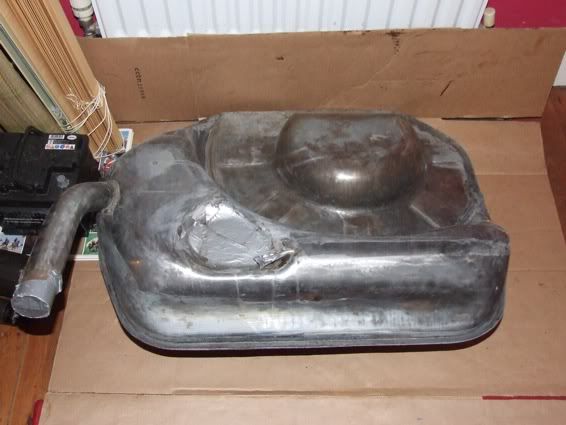
The exterior of the tank was then also treated with metal ready before getting a fresh top coat of black POR15.

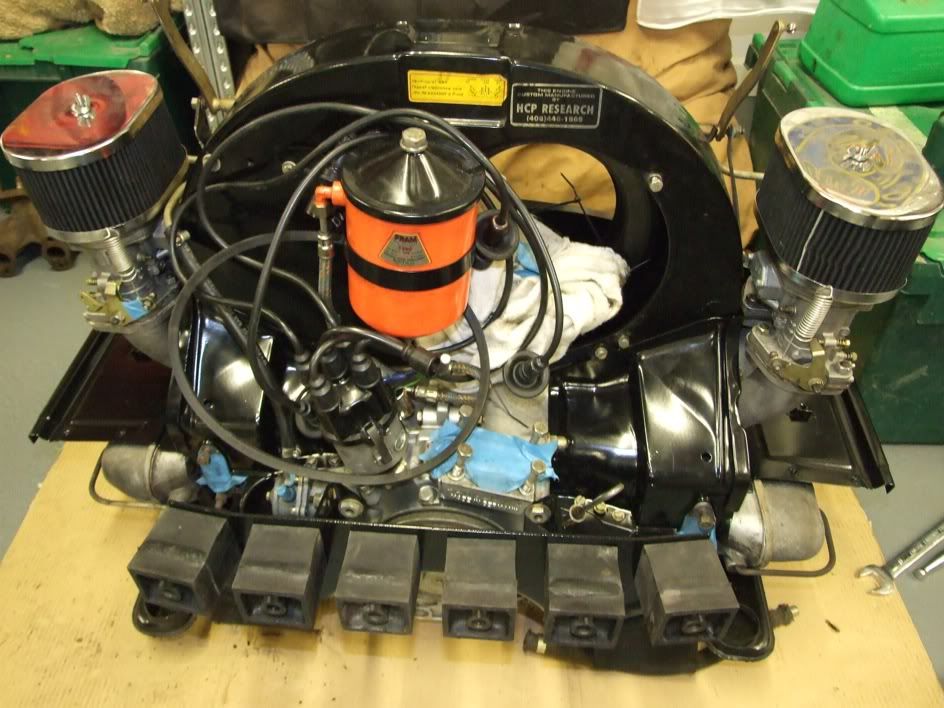
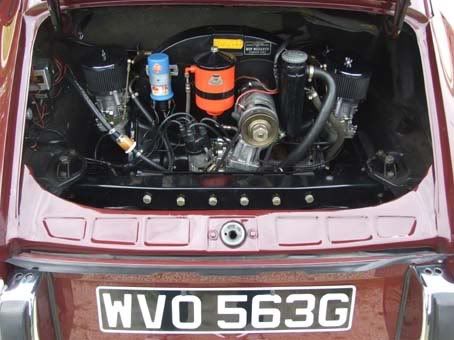
Next job was to look at sorting out the weber carbs. The carbs looked OK apart from a few fuel stains on the outside in places but there had been a small popping and occassional back fire from time to time. I removed the carbs and ordered a couple of rebuild kits from webcon. I took 2 days off work and very meticulously cleaned the carbs inside and out and fitted the rebuild kits to them. The old needle valves were shot and the float levels were all over the shop (I'm surprised they'd worked as well as they did) I discovered they were also jetted completely incorrectly. They had the usual Weber 40 idf 'outta the box' setup - 28mm venturis, 55mm idles, 115mm mains and 200mm air correctors. I fitted them up with new gaskets, inlet filters, needle valves, corrected the float levels and dropped in some 32mm venturis along with 52mm idles, 130 mains, and 180 air correctors. I fitted the carbs back up to the motor re balanced them and ran it for a while. Strangely it was still giving an occassional pop so I decided to check everything was tight. It was when I got to the screws holding the top part of the carbs to the main body that I realised the screws were not actually tightening. I looked closer and noticed that 3 out of 4 screws on each carb had cracks around them in the top part of the carb. This meant that the carb top could never be tightened sufficiently and that probably explained why there had been fuel stains down the sides of the carbs and the float levels had been set in a virtually closed positon to prevent excess fuel entering the chamber and leaking. When I looked closely I could see that there were actually thread marks on the body of the carb (underneath where the top section attaches) If the correct screws were used they should not protrude through this far and although the screws that were in there were correct I concluded that at some point a previous cowboy had decided to fit incorrect screws to them which had clashed with the carb bodies and cracked the aluminium of the top sections :roll: After spending so long rebuilding them I was not happy but unfortunately was left with a pair of scrap carbs. So rather than risk buying another dodgy used set that would need work I bit the bullet and bought a pair of new 40 idf's from VW speedshop. I strapped these on and after swapping the jets and balancing them up they ran beautifully - at last :|

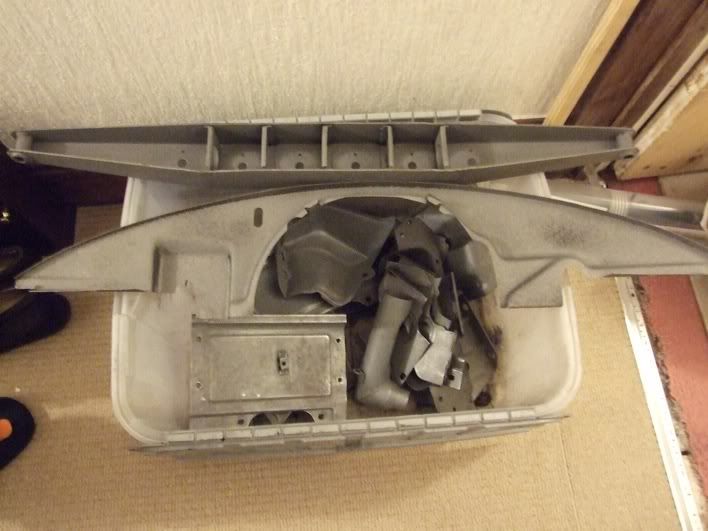
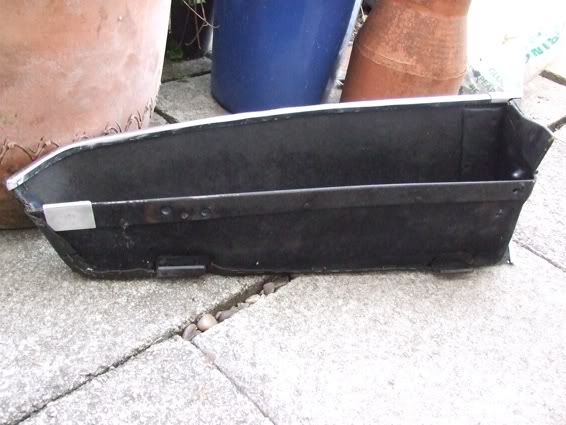
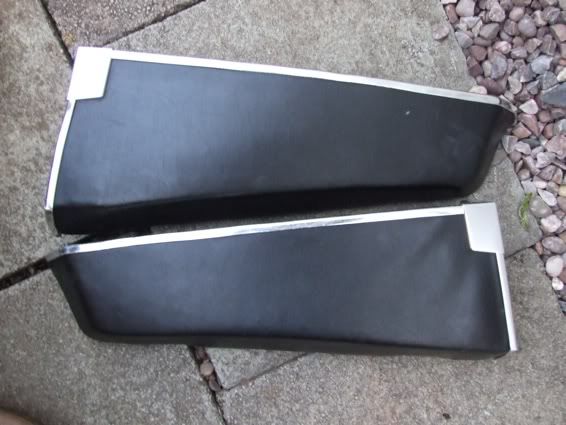
Next I looked at repairing the old interior door pockets. These had become bent and distorted over the years as is usual for these items. Once they were removed from the car it became clear that both pockets were actually quite badly cracked where the top support strap comes to an end and creates a stress point.

Image

The passsenger pocket was looking particularly sorry for itself having lost its aluminium deco trim from its top edge. Luckily the deco trim was still with the car but was quite badly bent as if it had fallen off and been run over at some point in its life.

Image

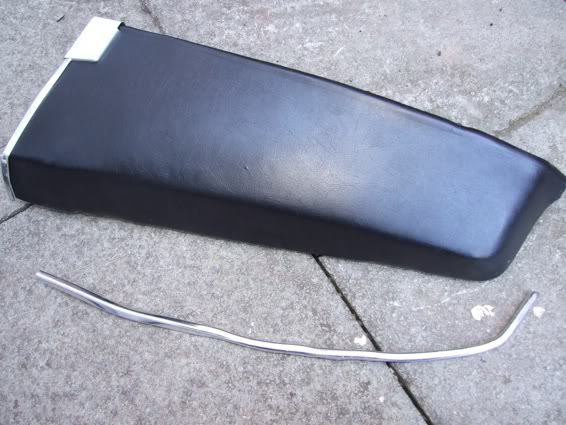
I decided that the best plan of attack was to use a decent wood adhesive along with some steam and several G clamps to hold things in place. I opened up each crack as far as possible whilst trying not to cause more damage and applied wood adhesive into the cracks. Both corners were badly distorted so next I applied steam to these whilst I eased the pockets back to their original shape. Then the pockets were left to cure over night with several clamps applied around the cracked areas and some weight on the corners to ensure they kept their correct shape whilst the steam evaporated. The next day I inspected the results and was pretty pleasantly surprised. Once the clamps were removed the pockets held their new shape easily and looked ready to be re installed. However I felt that due to the previously cracked areas they would always be weak here and may over time split again. I decided to fabricate a small support strap from aluminium which would sit over each of the previously split areas and provide extra support for the repaired pockets. Each strap consists of a dutch bend about 50mm wide which slides tightly into place and gives some extra support where its needed.

Image

Next I carefully straightened the bent aluminium deco trim from the passenger side pocket and fitted it back to the top of the pocket.

Both pockets ready for re install.

Image

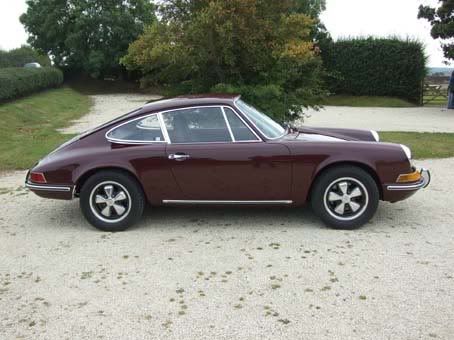
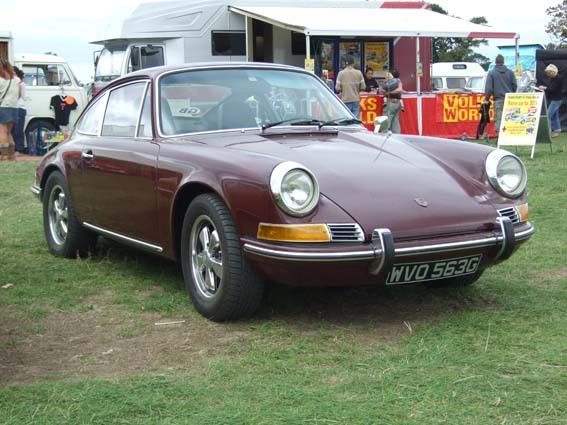
Next on the list was to sort out the lighting. My 912 came into my ownership with full US spec lighting :roll: this had to be sorted so I managed to source some euro spec headlights and clear front indicators - much better 8)

Then it was into the paintshop to get a couple of paint defects sorted out which had been bugging me. Luckily I managed to track down the guy that painted the car 5+ years ago and he had some of the original mix left over which was a major stroke of luck :drunken: I got the n/s rear wing and the o/s front wing repainted to match perfectly and she was looking much better. Next I gave her a tickle with the lowering stick at the front and she was ready to roll. (for now at least :lol: )

Image
Burgundy 69 912
Audi A4 1.8T sport avant
VW T25 magnum multivan
Timo
Put a fork in me, I'm done!
Posts: 1649
Joined: Wed May 16, 2007 9:52 pm
Location: Shropshire

Post by Timo »

OK, few more pics of my recent progress.

Dropped the engine to fix the slipping starter motor problem and give it a bit of a freshen up. I'd already taken out the starter motor and bench tested it which revealed no problems so I was counting on it being worn ring gear on the flywheel.

Image

Some of the tinware had got fairly badly damaged at some point and was starting to look a bit shabby so I decided whilst the engine was out I'd get it redone

Image

It was straight off to the blasters for the tinware. Who did a great job (after they found the 2 pieces they lost!) Luckily I took pics of everything before it went so had a proper record of what was there.

Image

I sent the tinware off to be re powder coated in a fresh coat of satin black. Mean while I got to inspecting the dodgy old flywheel which I suspected had been causing me so much grief. My suspicions were indeed correct, the flywheel was quite badly worn in 2 places

Image

After speaking to Andy Prill I managed to get a good replacement flywheel to replace my old worn out item and after a day spent cleaning it up it was looking nearly new and ready to be bolted in place.

Image

Much better 8)

Some of my tinware back from the powder coaters

Image

and slowly getting it back where it belongs

Image
Burgundy 69 912
Audi A4 1.8T sport avant
VW T25 magnum multivan
User avatar
Bootsy
Site admin and the Boss
Posts: 23904
Joined: Sat Nov 08, 2003 6:09 pm
Location: Norwich
Contact:

Post by Bootsy »

Stunning work
1972 911T | 1994 993 Carrera | 1999 986 Boxster | 1990 T25 Camper

Vintage Heuer, Omega, Zenith and other vintage watches - http://www.heuerheritage.co.uk
Matt black70
DDK forever
Posts: 510
Joined: Fri Aug 04, 2006 9:40 pm
Location: Wolverhampton

Post by Matt black70 »

Great Tim, looking good. Did you send the engine with the tinware as it looks like they've lost a couple of cylinders as well,can't believe you didn't notice :lol:
If you're working on it on Sunday give me a shout, I need an excuse for a ride out.

Matt
Black 70T
72 Beetle 1302s
70 Triumph TR6
Corrado VR6 storm(kindly written of by a friendly police officer)
BMW E92 335D
Volvo V70 D5
Timo
Put a fork in me, I'm done!
Posts: 1649
Joined: Wed May 16, 2007 9:52 pm
Location: Shropshire

Post by Timo »

Cheers fella's. Matt I won't be working on it this sunday, coxy is a miserable git and only lets me get into work on it during the week so unfortunately friday afternoons is all I get to spend on it hence the slow progress at the mo. :( Should be ready sometime 2011!
Burgundy 69 912
Audi A4 1.8T sport avant
VW T25 magnum multivan
saxon
DDK forever
Posts: 579
Joined: Tue Feb 10, 2004 4:41 pm
Location: Kelvedon North Essex

Post by saxon »

Hats off looks great 8)
2010 mini mayfair cooper s
1999 mini cooper works s


Peter
Timo
Put a fork in me, I'm done!
Posts: 1649
Joined: Wed May 16, 2007 9:52 pm
Location: Shropshire

Post by Timo »

Thanks Peter.
Burgundy 69 912
Audi A4 1.8T sport avant
VW T25 magnum multivan
Timo
Put a fork in me, I'm done!
Posts: 1649
Joined: Wed May 16, 2007 9:52 pm
Location: Shropshire

Post by Timo »

OK, finally managed to get hold of a correct 30 amp dynamo from a friend, unfortunately it came with a chrome backing plate as it had lived most of its life on a vw van so I thought I'd strip my old and new dynamo/fan bits off and swap them over.

Image

Once I'd got everything off however I noticed the paint on my old backing plate was looking a bit shabby in places. Having had all my tinware blasted and re powder coated I didn't want the scabby backing plate to mess the whole thing up so I decided to strip it back to bare metal and get it powder coated. Whilst I was at it I had my gearbox front mount off the car which I had planned on stripping and painting so I thought I might as well strip that back too and send them both off for powder coating together. Due to its position on the car it was properly caked up with crud but after a good scrapping and wipe down with some diesel it was just about recognisable again.

Image

After a full session with a wire brush fitting on the angle grinder both parts were looking nice and shiny again and ready to be shipped off for a dose of powder coating.

Image

Even the replacement dynamo came in for a bit of treatment. Although its internals are fine its exterior gave the impression it had been buried under Fred Wests patio for a few years.

Image

A quick session with the wire brush, 240 grit wet and dry and some autosol and it was looking almost like new again.

Image

Thats it for today, time for a cuppa now 8)
Burgundy 69 912
Audi A4 1.8T sport avant
VW T25 magnum multivan
Post Reply