Burned 1972 911t > RS Wannabe

Ongoing and archived Porsche (and other marques) restoration threads from DDK members

Moderator: Bootsy

Post Reply
1972_911t
DDK forever
Posts: 688
Joined: Tue Aug 16, 2005 8:21 pm
Location: Yorkshire

Burned 1972 911t > RS Wannabe

Post by 1972_911t »

Bought this car back in 2004 (carnt belive ive been at it that long), imported it myself from LA. It was for sale in a salvage yard due to an engine fire. Had only seen the pics below so took a bit of a risk as I didnt know the extent of the fire damage and if the structure had been affected.

Image

Image

Image

Image

Image

Image

Image

Image

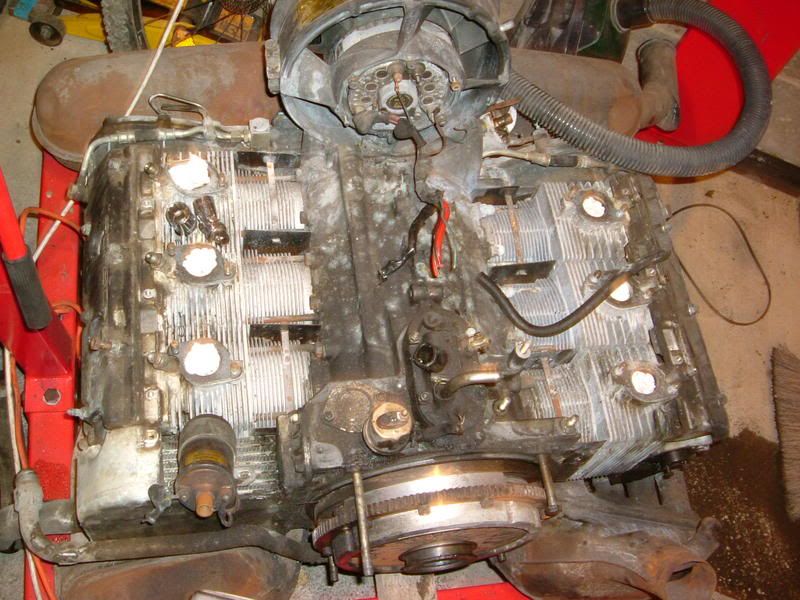
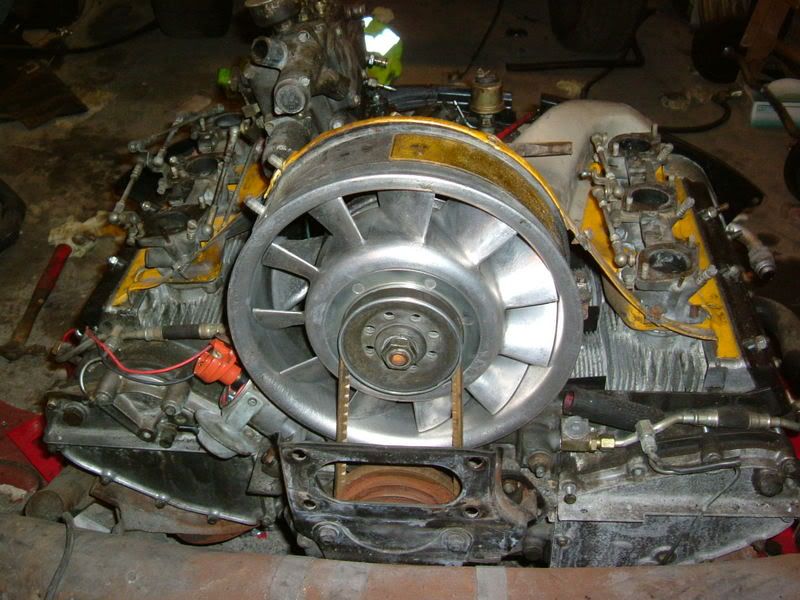
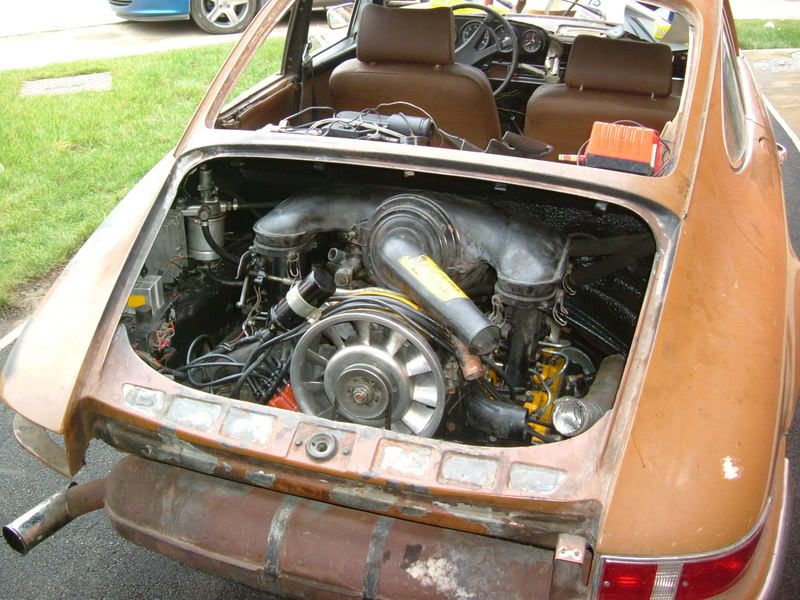
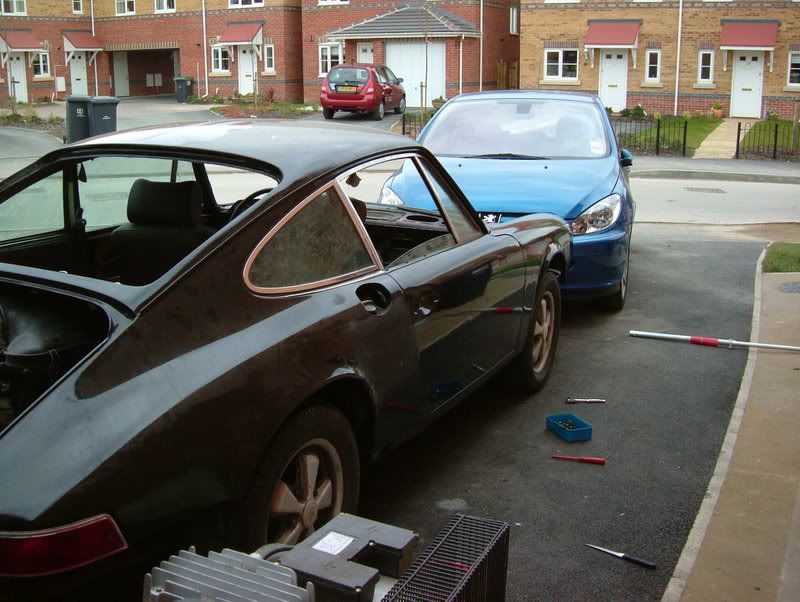
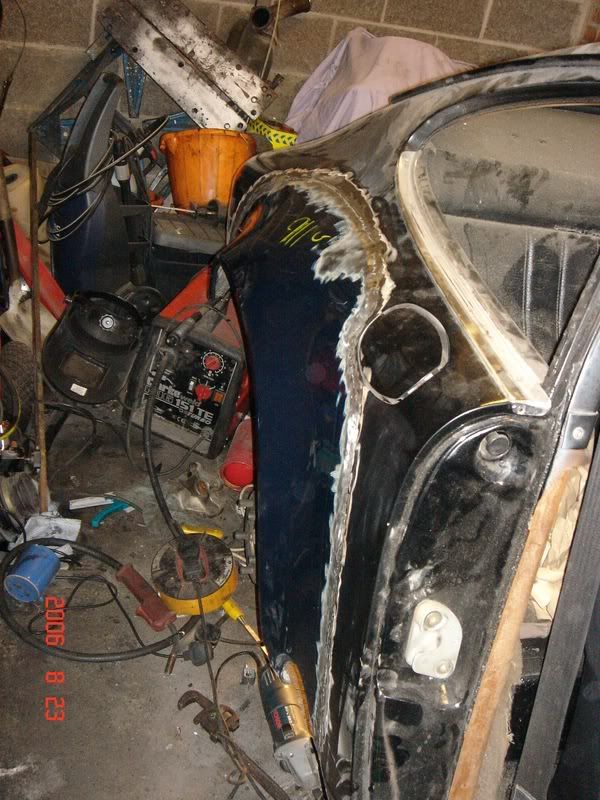
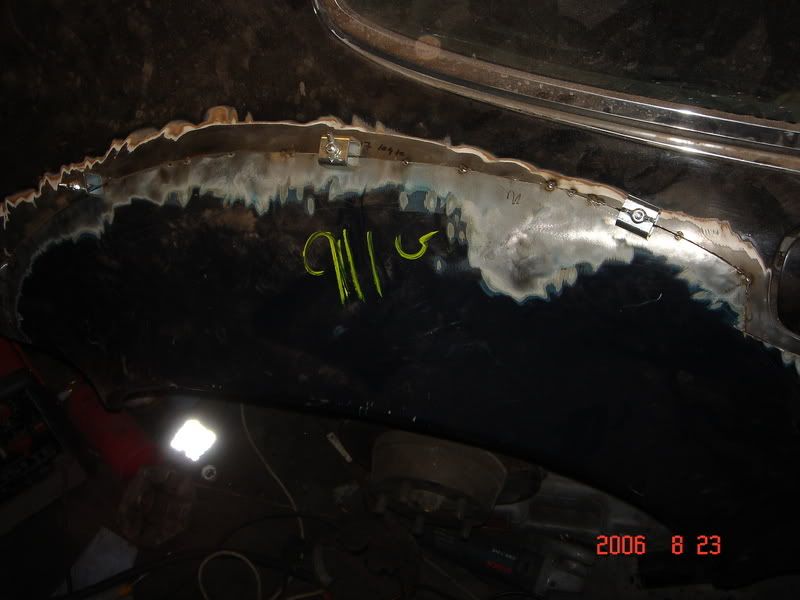
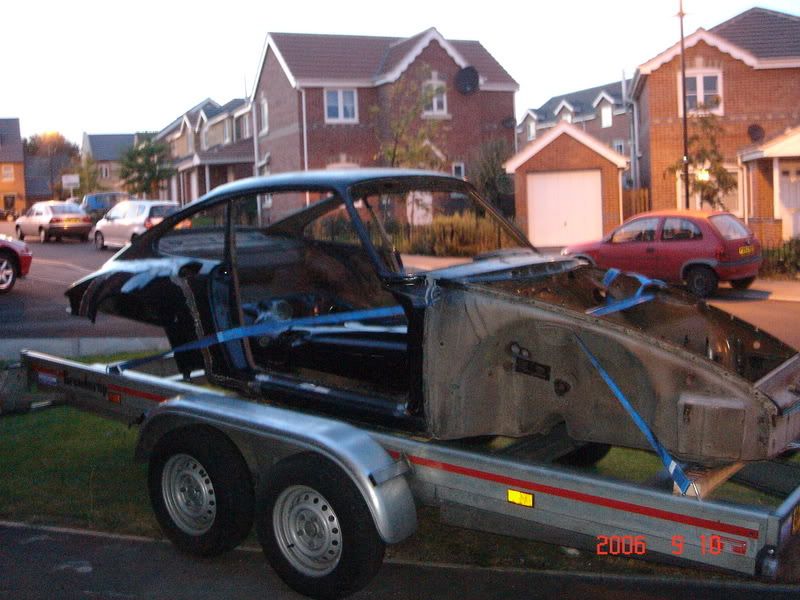
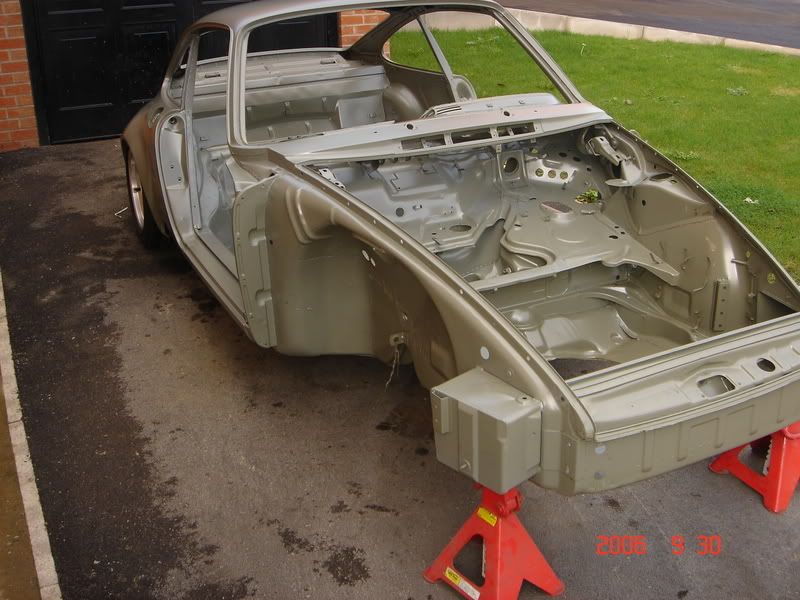
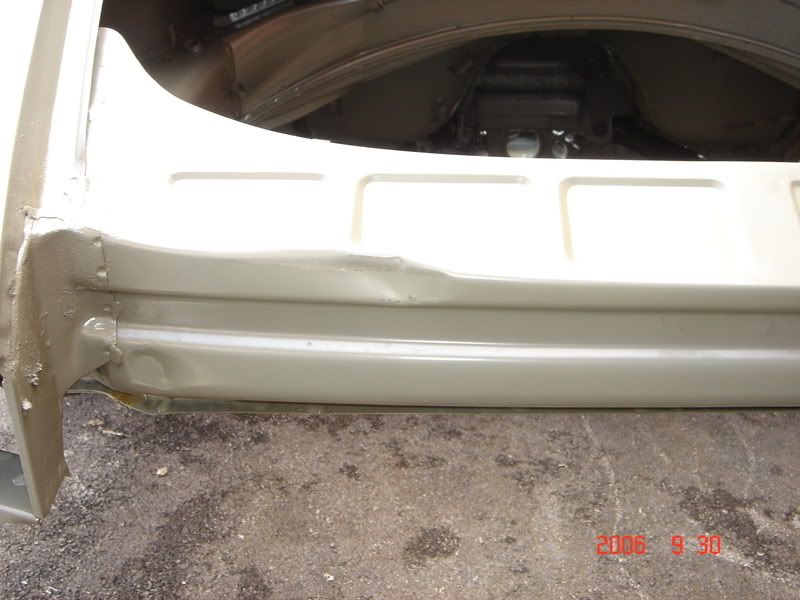
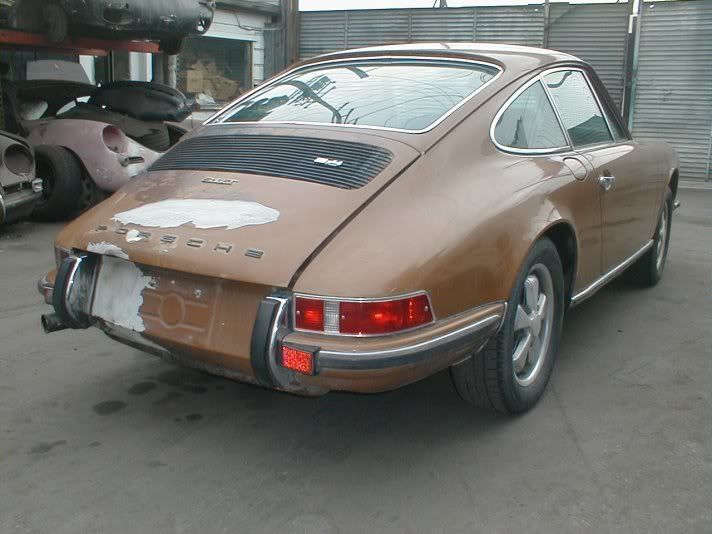
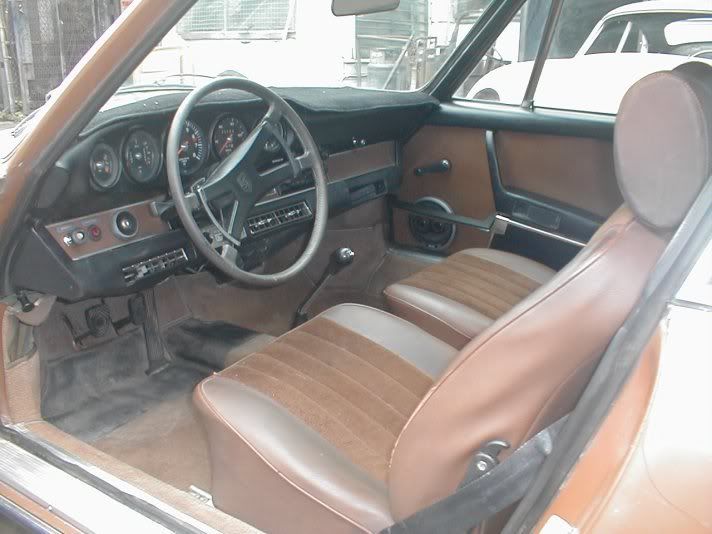
I collected the car from knigstown shipping in october 2004 and proceded to strip out the interior and the engine. Much to my suprise most of the damage was superficial and the car generally was in good nick. The only issues with rust was to the parcel shelf which seamed to have been caused by a leaky screen seal.

Image


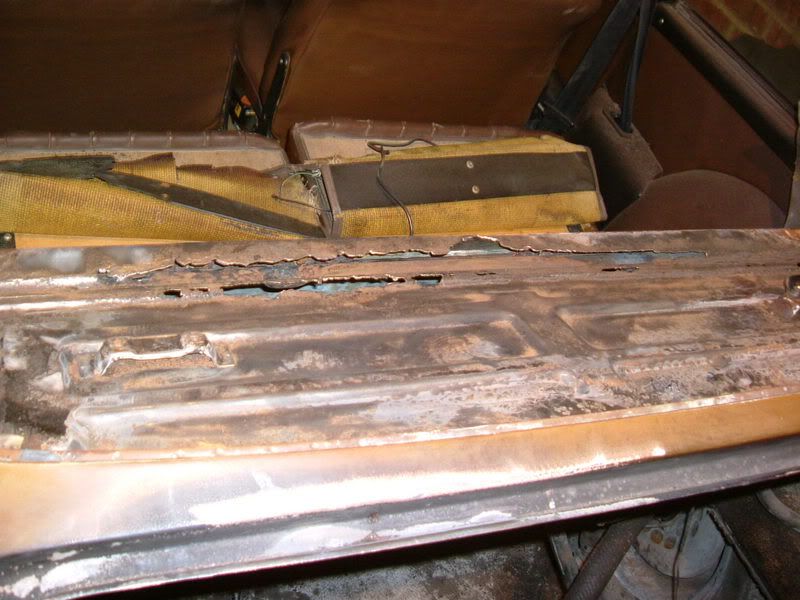
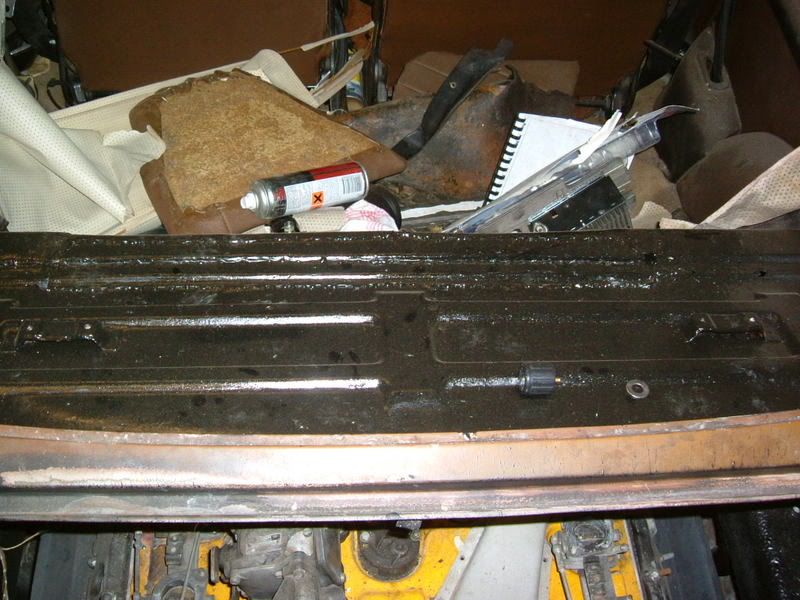
As it was never my intention to do a full on resto at this point I did a quick repair on the shelf with some old bits of steel I had laying around and por 15'd it all. My main priority was getting the car on the road and getting the mot so I could get the car insured and registered.

Image

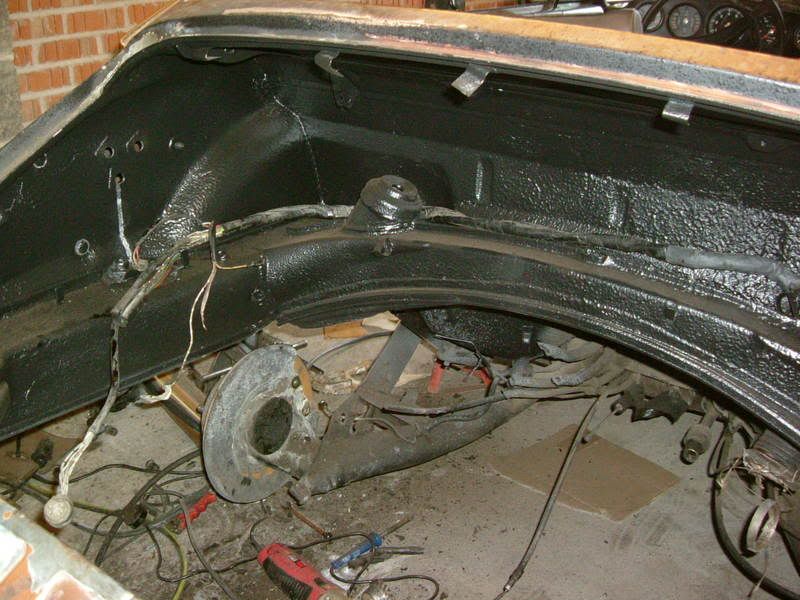
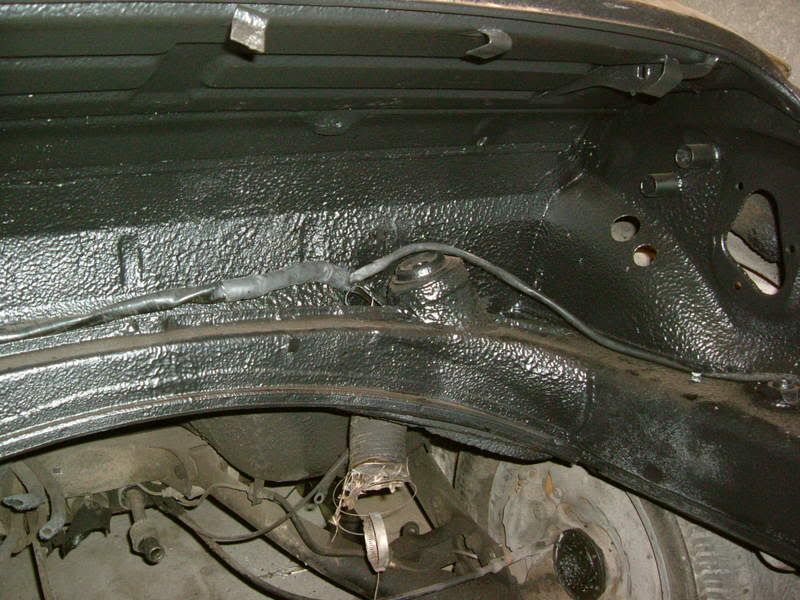
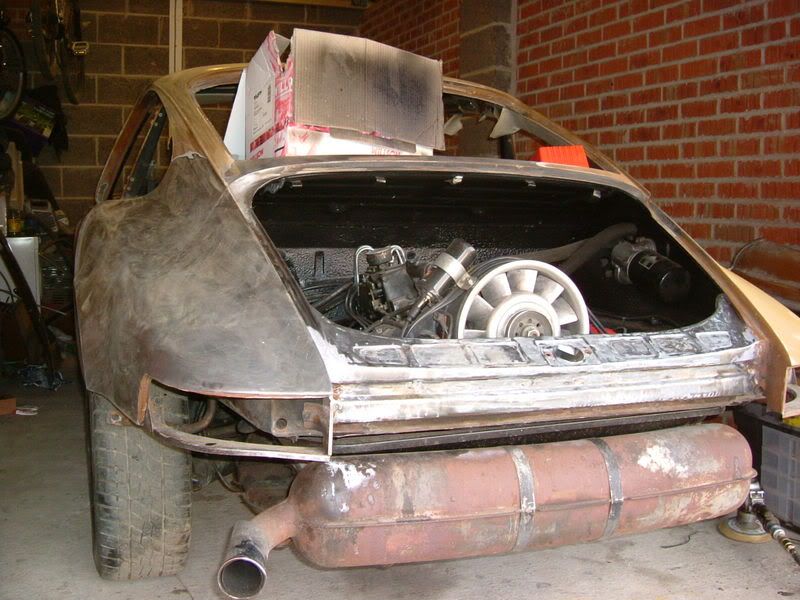
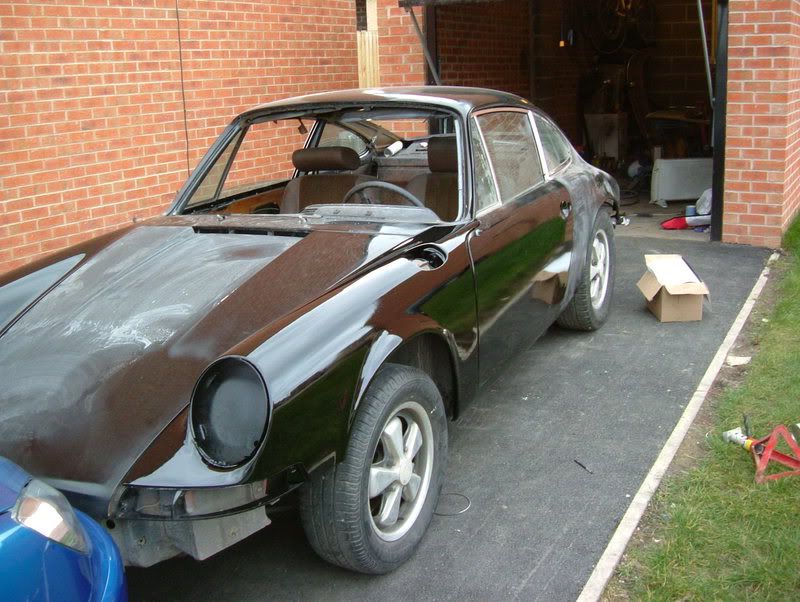
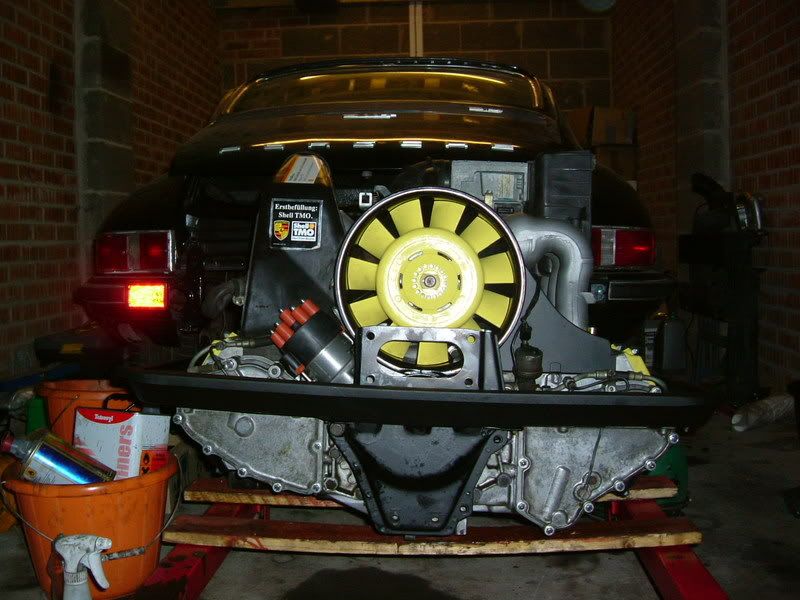
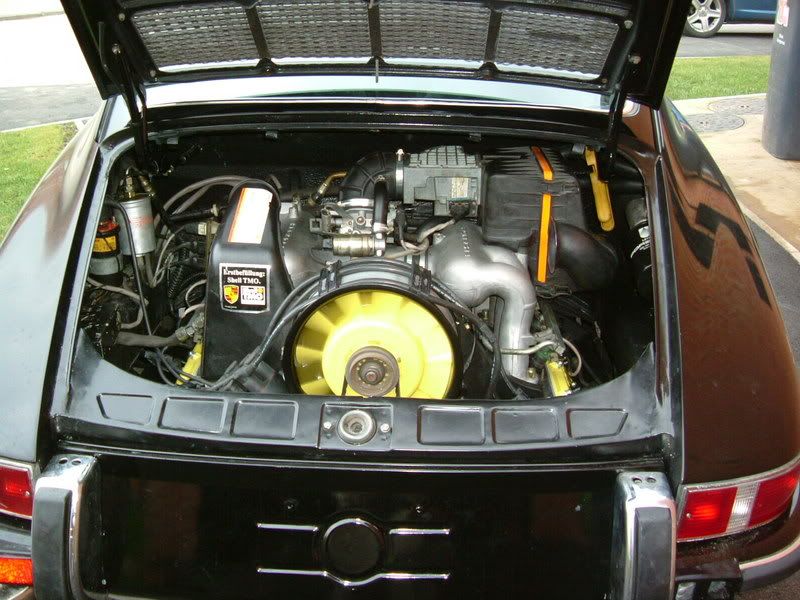
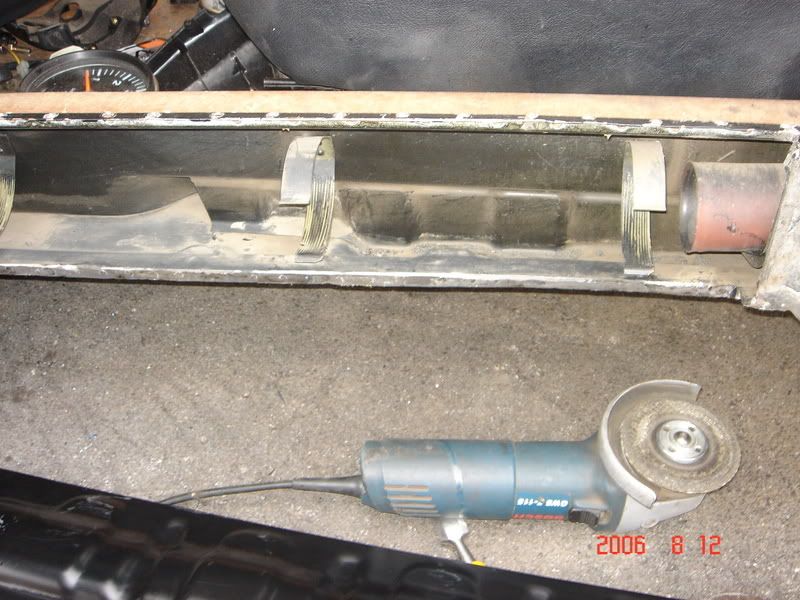
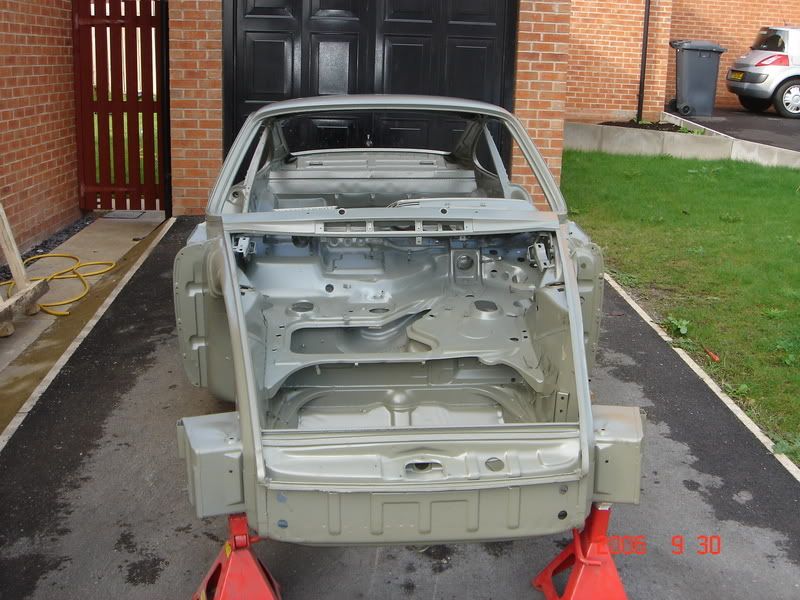
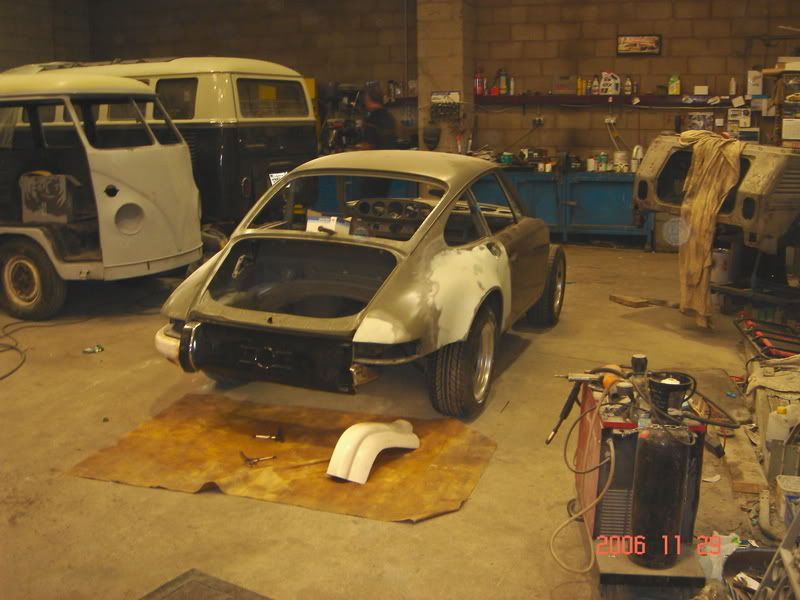
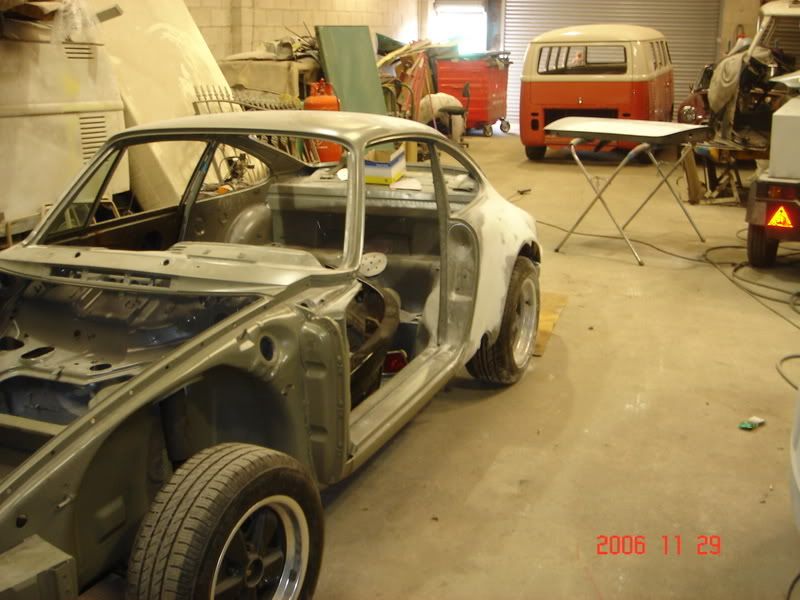
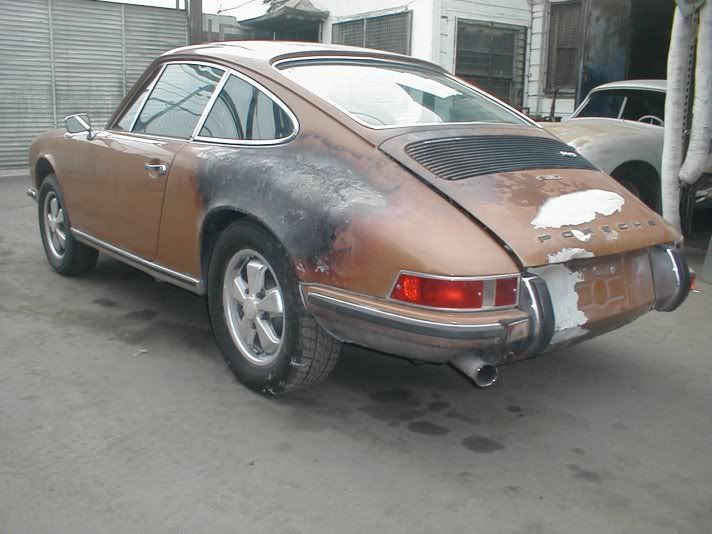
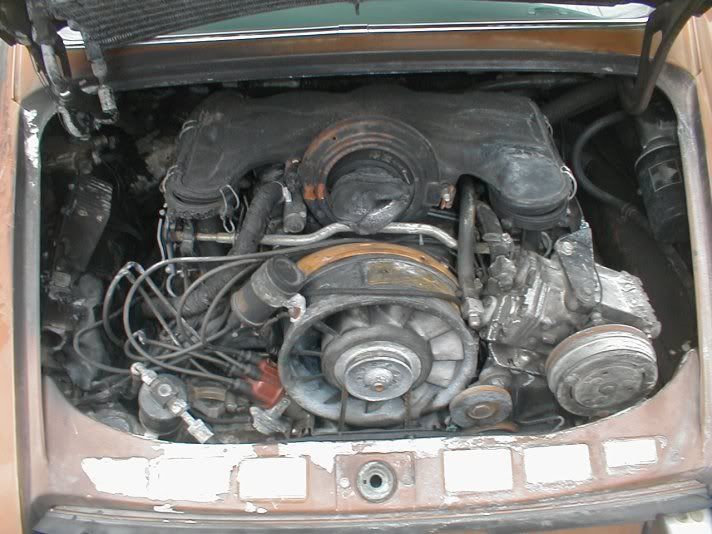
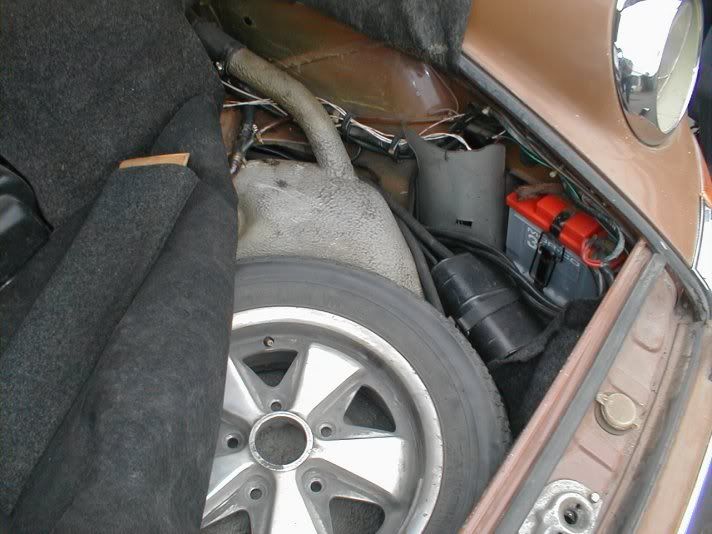
The engine bay was completly burned out and all the old sealer or what was left of it had to be removed. I did this with a wire wheel on a grinder, not a plesent job at all.

Image

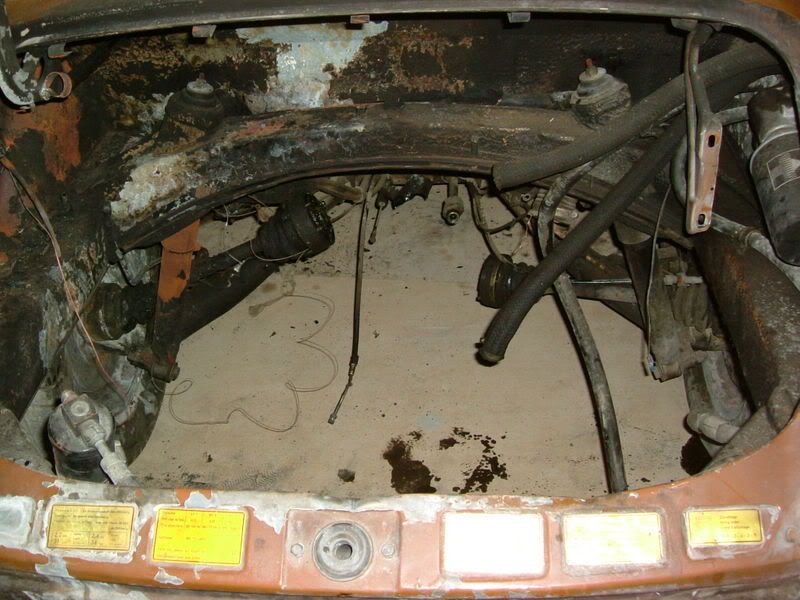
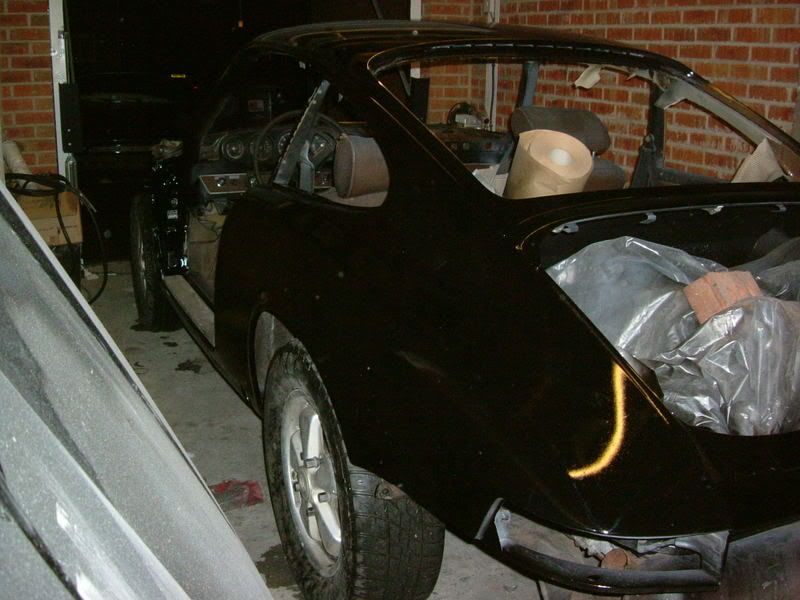
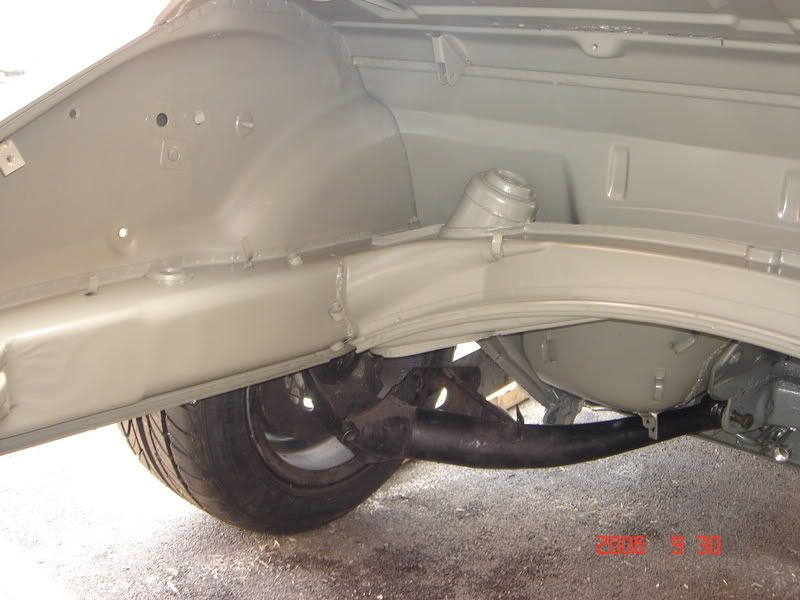
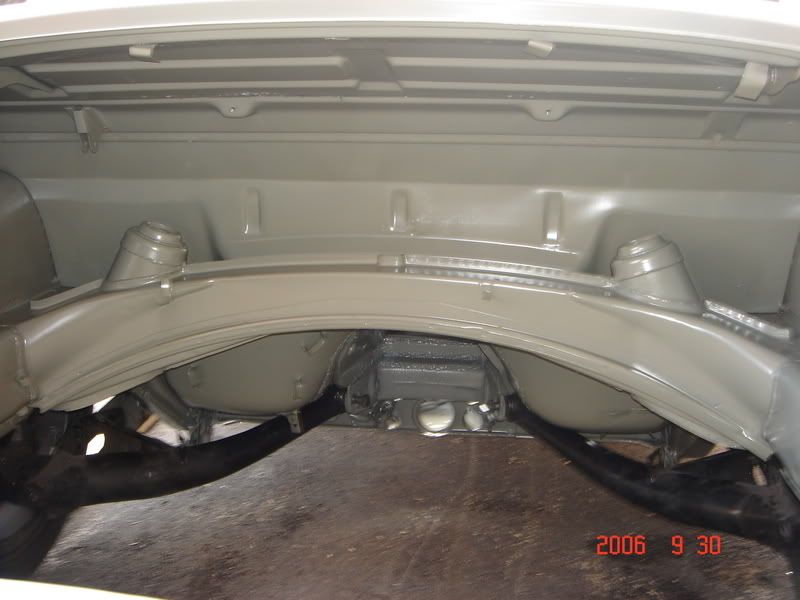
The entire engine bay was then por15'd and covered with harmerite stone chip. A new rear section of wiring also had to be solded in just behind the rear cross member.

Image

Image
Last edited by 1972_911t on Sat Sep 08, 2007 1:32 pm, edited 2 times in total.
1972_911t
DDK forever
Posts: 688
Joined: Tue Aug 16, 2005 8:21 pm
Location: Yorkshire

Post by 1972_911t »

Luckily the engine semed to have escaped pretty much unscathed one intake and the air cleaner needed to be replaced and everything else just given a good cleaning the CDI unit also worked which was a suprise as this seemed to have been the worst a affected area of the fire been next to the fuel filter unit.

Image

Image

Image

Once back in and all connected up it wasnt long before the engine was up and running again (all be it a little rich), now i was time to address some of the body work issues mainly the big burnt path on the rear 1/4.

Now comes my first bad decision of this project, I had decided from early on that I didnt like the sepia and the car was going to have a color change in my chosen color of black. In hindsite I wish I had just left it sepia and got it on the road rather then attempting a full color change respray in a single garage :? . If I had stuck with the sepia it would have been on the road months earlier and much cheaper but it did at least give me the chance to attempt painting a car, (Never Again! not without a paint both anyway or atleast a garage big enough to get round the whole car at once).

Image

All panels with any signs of rust were stripped down to bare metal, this included engine lid, rear 1/4, bonnet, bumpers etc. As I was working in a small area I had to paint the car in two halfs.

Image

Image

And so in a move that may be a contender for DDK's most unproffesional paint job ever the car ended up black, well 98% anyway and also some bits that wernt supposed to be. :)

Image

Image

Image

The car then underwent a fairly haisty no frills rebuild to get it in for its mot.

Image

Image
Last edited by 1972_911t on Sun Sep 23, 2007 10:19 pm, edited 1 time in total.
User avatar
bjmullan
Me and DDK sitting in a tree! KISSING
Posts: 2986
Joined: Fri Apr 30, 2004 2:15 pm

Post by bjmullan »

Fantastic thread, it always amazing me what people can do with these cars and that garage looks so small. So did she pass the MOT and what is to happen next?
Brendan
1969 911T
2007 2.7 Boxster

Pray, hope and don't worry - Padre Pio
1972_911t
DDK forever
Posts: 688
Joined: Tue Aug 16, 2005 8:21 pm
Location: Yorkshire

Post by 1972_911t »

Hi Brendan yes she did pass the MOT, after all that work and nothing else done other than to correct the damage from the fire all they could find wrong was track rod end ball joints, two days later I left mot in hand after the mot tester spent 2 hours pulling what little he had left of his hair out trying to work out how to issue a certificate using the new computer based system on a car with no reg :)

Lots more to come ive only covered about 6 months so far, just took a break from photobucket for a while.

Steve
GP911
Married to the DDK
Posts: 258
Joined: Mon Sep 04, 2006 8:07 pm
Location: North Wales.

Post by GP911 »

Wow Steve, great job, excellent stuff.
3.2 Carrera.
58A - 71E
Put a fork in me, I'm done!
Posts: 1842
Joined: Tue Nov 28, 2006 1:49 pm
Location: Yorkshire

Post by 58A - 71E »

I love these restoration threads, keep it coming Image
James

'58 356A 1600n
'71 911E 2,2


#0335
impmad2000
I need to get out more!
Posts: 3302
Joined: Fri Nov 14, 2003 8:31 am
Location: Leicester, a convenient mid point !
Contact:

Post by impmad2000 »

Wow, great work.
Its official now then, Black is the new silver !!
This one, My Targa and JTP's coupe....
Cool :)
Tim
Tim Bennett
RHD Targa 2.2T EFI, Triumph ITB's, EDIS and Megasquirt.
"Old enough to know what's right and young enough not to choose it"
#1153
1972_911t
DDK forever
Posts: 688
Joined: Tue Aug 16, 2005 8:21 pm
Location: Yorkshire

Post by 1972_911t »

Hi Tim the black paintwork was short lived as you will see later in this thread, I did intend the car to be a blask RS look a like which would have been way cool but after recently owning a black X-trail im glad I changed my mind and decided on Viper green for the finnished artefact. Black looks greate on any car when just washed and polished but thats short lived.
1972_911t
DDK forever
Posts: 688
Joined: Tue Aug 16, 2005 8:21 pm
Location: Yorkshire

Post by 1972_911t »

With the MOT out of the way I then went on to focus on driveability, the car may have passed its MOT but it drove like my friends split screen camper. All the shocks and bushes were changed to improve this and my focus moved to the engine. I never got the original 2.4 running properly and unfortunatly I didnt know about this site at that time. With no local mechanics who could tune an MFI engine I regretfully made the decision to sell it and get a later 3.2. After a bit of searching I found a 3.2 with valve guide wear that I bought to rebuild.


Image

Image

Image

The engine was stripped and fully rebuilt with all new bearings, new piston rings and the usual top end work.

Image

Image

Image

The new 3.2 was everything I wanted at that time, modern fuel injection easy to start and plenty of power and torque. The short time I had the car up anbd running with this engine were lots of fun. :P
Last edited by 1972_911t on Wed Nov 14, 2007 3:42 pm, edited 1 time in total.
1972_911t
DDK forever
Posts: 688
Joined: Tue Aug 16, 2005 8:21 pm
Location: Yorkshire

Post by 1972_911t »

My next focus of attention was the 915 tranny, the tranny very whiney and I presumed a bearing was worn. I took it to a local gearbox centre who stripped it and supposedly replaced a bearing. £220 later the box was back in and guess what no change. By this time I had met Mike Bainbridge after posting on pelican. The tranny was taken back out and upto Mike who stripped it and found the cause of my problems to be wear on one of the gear sets which was replaced and guess what no signs of any bearings been replaced as I supposedly previously paid for by the previous rebuild.

With the tranny back in the shift on this old tired tranny was still clumsy and slow, Mike had also warned me that the 3.2 may be a little over powerd for this old 915. With this in mind the search started for a late style 3.2 915. I found one in germany that was promised to be an excelent condition 915 with lsd and cooler. When it arrived it was anything but, mike ended up buying the box off me for spares for a third of what I payed. The seller agreed to replace the tranny but only had a G50 with LSD. As I had previously drove a G50 equipped car that my 3.2 came out and due to the superior shift of these trannys of I decided that a G50 conversion was the way forward. For the conversion I decided a torsion tube replacement was the best option for me. I wont go into this in this theread but for anyone interested the infor can be found on pelican parts.

Here;

http://forums.pelicanparts.com/showthread.php?t=280341
1972_911t
DDK forever
Posts: 688
Joined: Tue Aug 16, 2005 8:21 pm
Location: Yorkshire

Post by 1972_911t »

The process of converting the car to the G50 setup lead to other changes needing to be made to the car, I had always likes the 911r look of the narrow bodys and had spent quite a bit of time researching having wheels converted to 911R format (as I couldnt afford the originals) to enable me to keep the narrow body and run 7" wheels on the rear as the back end was very lose to say the least with the 6's and the 3.2. This is also my reason for wanting a LSD tranny. However with the G50 torsion tube came the need for for the G50 spring plates and also the larger holes in the bottom of the 1/4's to enable the fitting of this new setup. I tried to look at ways to keep the narrow arches and include the larger holes but in the end I couldnt see solution and G50 arches were bought leading me down the RS look route.

I did lots of research into how to weld in the new rear arches my main worry was cutting the 1/4's and the arches exact enough to get a good seam and get the arches in the right place. On pelican I found a thread where someone had layed the new arch over the old arch then used a dremmel to start cutting round the edge of the new arch through the 1/4 a few inch at a time and welding as you go, I decided this was the way to go.

Image

Image

Image

Image

Image

Image

Definatly not the best job in the world by any standards but not bad for a first attempt at this sort of work, just wish I had a tig welder instead of a mig then maybe there wouldnt be as much shrinkage in the joints.
1972_911t
DDK forever
Posts: 688
Joined: Tue Aug 16, 2005 8:21 pm
Location: Yorkshire

Post by 1972_911t »

One of my major bug bares of the fire was the fact that I couldnt get into all the crevices on the underside of the rear arch with the wire wheel. The wire wheel on the grinder does a excelent job on surface rusted steel and for removing paint and sealer with very little damage or marking of good steel surface however there pretty orkward to get in tight spaces. For this reason and to garantee I bankrupt myself before the year was out I decided to have the shell E-coated once the arches were finnished. One of the downsides of e-coating is that the heater pipes in the sills wont survive the heat stripping process so the sills had to be removed to replace the plastic heater pipes with steel.


Image


Image

Image

Image

Image

As you can see with the sill removed the inner sills were in excelent condition with no rust or nasty supprises inside.
1972_911t
DDK forever
Posts: 688
Joined: Tue Aug 16, 2005 8:21 pm
Location: Yorkshire

Post by 1972_911t »

With the sills replaced and all of the welding complete the next task was to completly stripp the shell of all parts ready to go off for the stripping and e-coating.

Before

Image


After

Image

Image

Image

Image

The e-coating really cleans up the body work, apart from the obvious welded on panles the shell could have past for new once coated. I was luky in that there was no nasty suprises after the coating and most of the panels were in greate shape with only the odd patch needed here and there.


As you can see the previously burned out engine bay was as good as new.

Image

Image

One nasty suprise however was that the pratts at the e-coatin place had decided to use fork truck to push the shell and caused considerable damage to the rear 1/4 and rear panel.

Image

Image
58A - 71E
Put a fork in me, I'm done!
Posts: 1842
Joined: Tue Nov 28, 2006 1:49 pm
Location: Yorkshire

Post by 58A - 71E »

1972_911t wrote:One nasty suprise however was that the pratts at the e-coatin place had decided to use fork truck to push the shell and caused considerable damage to the rear 1/4 and rear panel.
Too true - I had the 356 plastic bead blasted last year and the company I used also decided to lift it with a fork lift and wagon straps - resulting in 2 damaged rear wings :x As if the job wasn't hard enough :roll: hate it when you spend a small fortune and people seemingly just don't give a sh*t
James

'58 356A 1600n
'71 911E 2,2


#0335
1972_911t
DDK forever
Posts: 688
Joined: Tue Aug 16, 2005 8:21 pm
Location: Yorkshire

Post by 1972_911t »

Another nasty suprise I found when I came to fit the doors to the car ready for it to go off to the body shop was that unbeknown to me at the time 911 bodys warp during the paint stripping process due to the heat used and the body not been supported properly. Aparently this is well know both to the e-coaters and to other people who have had this done, Unfortunatly I didnt know about it untill the car came back. Has you can see from the photos the front top corner of the roof has moved back making the door frame hit its surround and this is with two shimms fitted to the top and none on the bottom. With the normal one on each the door would not even close.

Image

Image

Hence a major part of the body work now to do on this car was to straighten up the door apertures by placing the car on a jig and ensuring the rear end of the car was jacked back to its proper position. Thus hopefully moving to roof forward to it original postion and making the door apertures even again.

Unfortunatly the guy doing the body work decided this could be done without the use of a jig and used a hydrolic press to push the front screen forward. He assured me at the time this was ok and when it was all fitted up it would be right. The doors now fit the apertures with the correct shims (one on each hinge) and the taper up the B post isnt as bad but there is still an obvious taper up to the top of the A post. I have told body guy that im not at all happy with this and the car is now finnaly going to get the jig work it needs hopefully in the next week or so. This is just one part of the nightmare I have had with the body/paint work on this car. The car originally went in for the paint work in the first week of november last year with a quote of 8 - 12 weeks the pics below were taken as you can see on the 29th of november. If I took a pic of the shell as of a week ago it would have looked identical to what it does now. The work has been so slow.

Image

Image

The car finally got some primer last week and all was looking good untill I went to refit one of the doors to see what the gaps were like. This is when the decision was made that the car needed to go on a jig before anything else happens. Its another delay but to go any further would be daft to say the least ive already spent too much money on this car to have a bodge job done on the finnishing.

Its quite sad really as since been a teenager it been a long running abition of mine to fully rebuild/restore a car and have it all painted the way I want it and built the way I want and now that dream is comming true the most enjoyable bit seeing the car painted and built up has been nothing short of a ten month nightmare. So much so that a few months back I actually started selling off parts as id had enough of the stres and was just going to part it out as it was.

Luckily I have come to my sences and decided the car is going to be finnished and kept I just hope I can get things back on track and recover from this current nightmare by getting the quality finnish I desire.

Hopefully this will be the only somber post I have to make in this thread and from here on in things will be happier.

Steve
Last edited by 1972_911t on Fri Sep 21, 2007 7:59 pm, edited 1 time in total.
Post Reply