Engine conversion to Fuel Injection Part 1
Right, I have already sung Paul Foreman's praises on the engine build, but now I have it back at home there is some jobs to carry out to get it ready for the car. So these are the list of jobs I have to do on the engine to finish it off ready for when the chassis turns up:
1. Install Oil Thermostat for remote Oil cooler
2. Install Throttle Bodies
3. Set-up Carrera Throttle linkage for throttle Bodies
4. Modify Air filters to fit throttle Bodies & install
5. Fit Breather Pipe
6. Make rear sealing tin for engine
7. Fit Coil Pack on rear of Fan housing
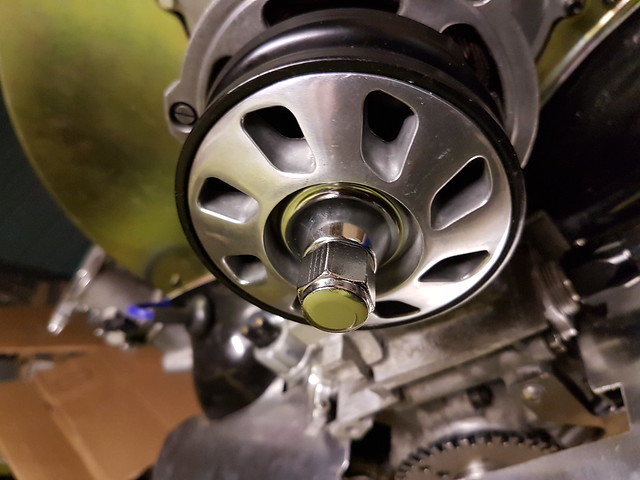
8. Modify Pulley fitting to allow fitting of alloy pulley cover
9. Fit Distributor Blanking plug
10. Make plate to cover hole in fan housing
11. Fit Air temperature sensor
12. Fit fuel lines, & fuel filter to throttle bodies and round back of fan housing
13. Install and secure plug leads
14. Disassemble tinware paint and re-assemble
Progress on Engine conversion list so far:
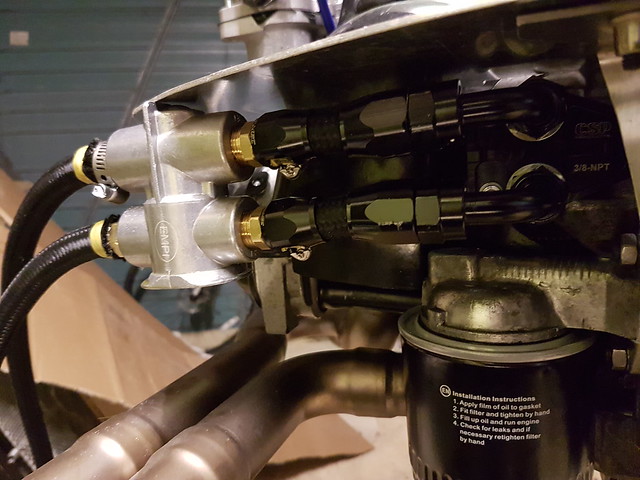
1. As part of the run-up of the engine Paul ran with an external oil cooler, but I want to run with a thermostat in line to ensure the oil is only pushed through the cooler once the oil in the engine is hot. I have installed an EMPI oil thermostat and plumbed it in right next to the oil take off plate so it should be in an ideal place to ensure the oil in the engine heats up nice and quickly.
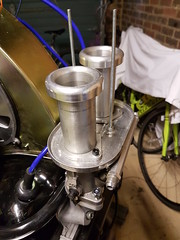
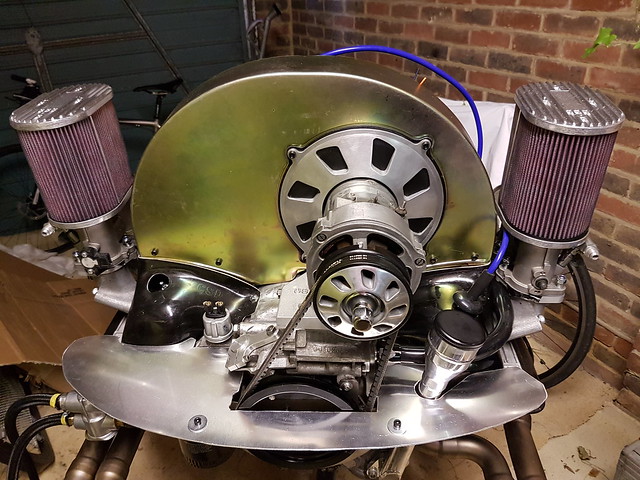
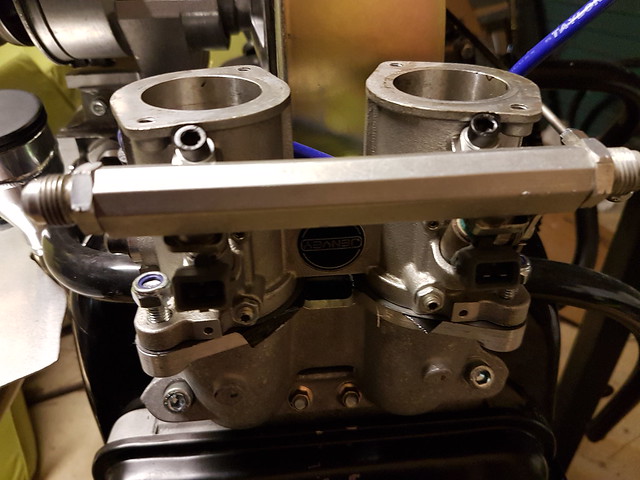
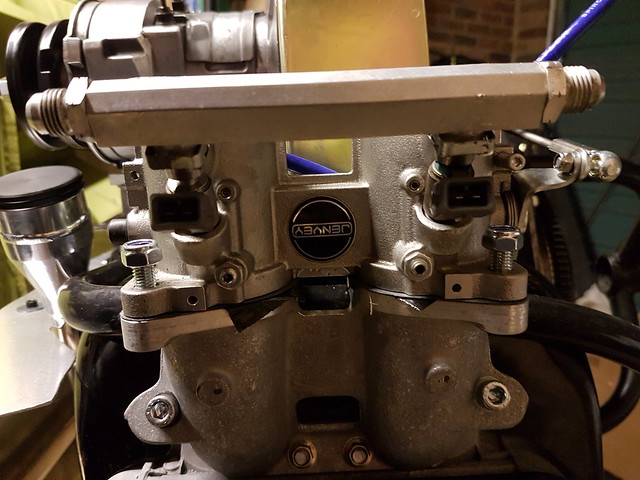
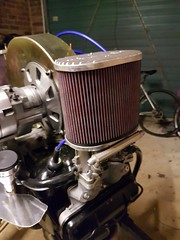
2. The Jenvey throttle bodies are supposed to be a direct IDF replacement, and although they bolt straight on to the inlet manifold, the air filter hole spacing at the top of the throttle body is different to the IDF by about 5mm so I could not go with my original plan of using the Vintage Speed replica 356 air filters as they bolt from the top right through to the base plates and the holes would be in the wrong place and would destroy the look if I were to try to modify them. In the end I saw some nice CB Performance 6" tall IDF filters that look period and I have modified the base plate holes on these to allow them to bolt on to the throttle body top mounts along with the long ram pipes. I also had to use Pico injectors from a Renault Clio Sport to allow for the air filters to bolt directly to the top of the throttle body as standard injectors are too tall.
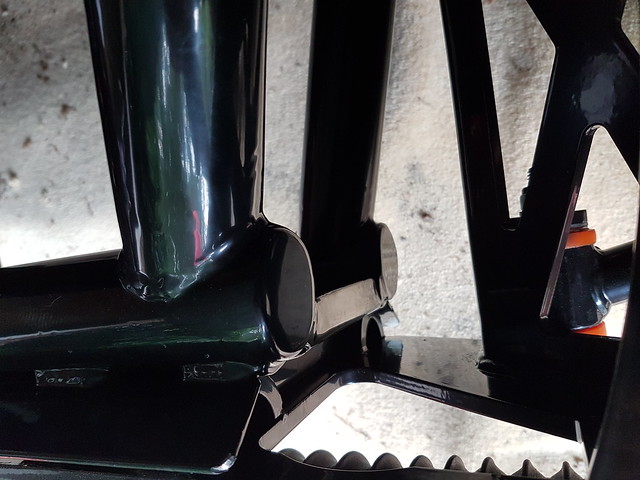
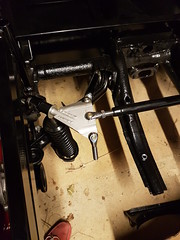
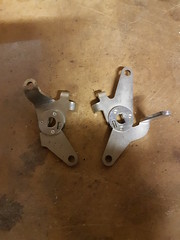
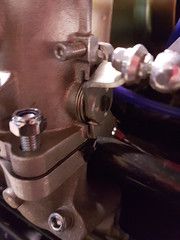
3. Once the throttle bodies were in place I was able to set-up the Vintage Speed Carrera throttle linkage. This was not straight forwards as the actuators that came with the throttle linkage have a different spindle design to the Jenvey's, but luckily I was able to bend the arms of the actuators that came with the throttle bodies to replicate the length of the actuators for the linkage so as to get the right pedal movement - or so I hope. I also had to cut down the actuating rods at both ends to get them to fit.
The one on the right is the unmodified actuator and he one on the left is the bent one that now has the right amount of movement. I couldn't just add another hole as this would have interfered with the throttle stops that are cast into the throttle bodies.
4. The other thing with installing IDF air filters on Jenvey throttle bodies is that IDF's have a centre hole in the air filter base plate to allow you to adjust the carbs, but on throttle bodies this is not there so I needed to fill the holes to stop air entering the air filters from the bottom. I dropped the air filter base plates at a local engineering company who are presently laser cutting some aluminium plates and will then be welding them into the said holes. Pictures to follow on this...
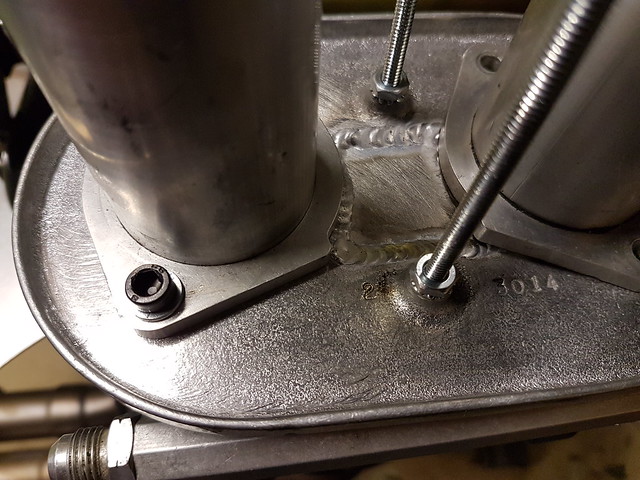
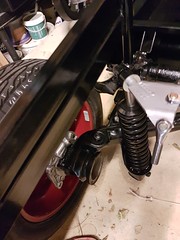
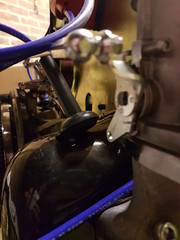
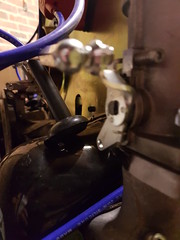
5. I have put a large breather into the side of the engine case just under where the alternator stand is and as you can see from the photos it makes for a very neat installation.

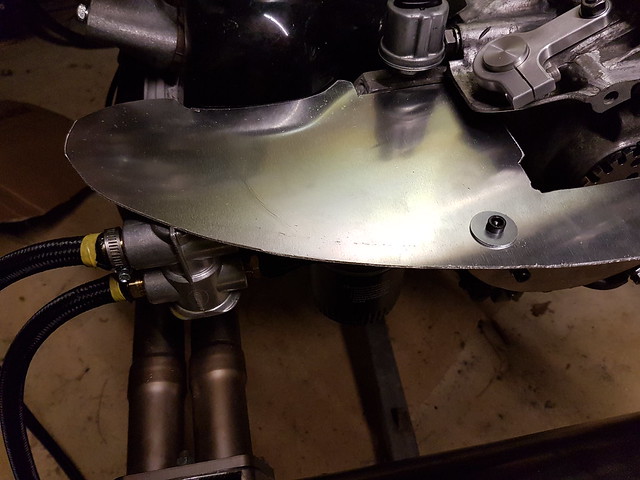
6. When I was picking up the engine from Paul, I took a look at Paul's CSP rear engine tin for fitting a type 4 in a type 1 and worked out that it wouldn't fit my engine properly as the hole for the dipstick tube was out by about 50mm, however I drew round the CSP tin and the mounting bracket and have now made my own. I made the supporting bracket from 2mm Stainless and the tinware plate from 2mm Aluminium modified to fit round my dipstick. This only took about an hour and the materials were only about £20 so saved a few quid on this.
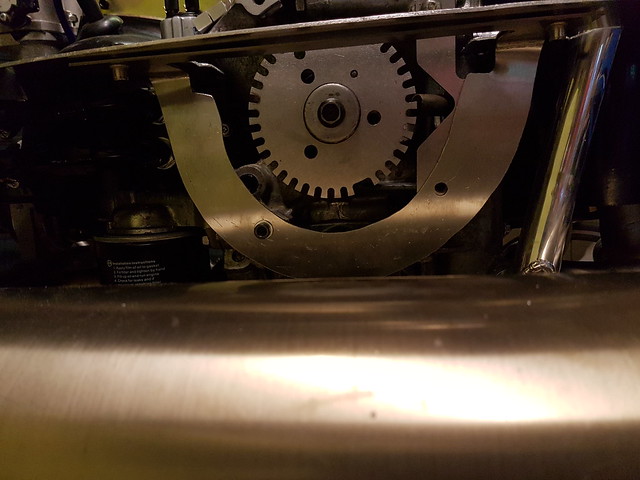
7. To keep the engine bay nice and tidy, I installed the MSD mini coil pack on the rear of the fan housing using Rivnuts. This should keep the spark plug leads out of the way and make for a nice tidy engine bay.

8. With the CSP upright cooling cooling conversion the new alternator top pulley is offset compared to a standard one so the pulley beauty ring that I had to match the fan housing brace would not fit as the sleeved nut was too short to tighten over the pulley and beauty ring. The answer to this was to to get a longer sleeved nut (actually a wheel nut for use with spacers) and then my classic car enthusiast neighbour Saul, slightly bored out the collar and it all fits together nicely now. Just need to polish the fan housing brace to match now.
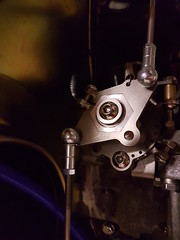
9. Final update on the engine for now is the installation of the Distributor Blanking plug. The plug was again made in my neighbours workshop and installed with an O ring to seal it properly. The rather nice distributor clamp was from the USA which I think you will agree looks pretty good.