Page 4 of 10
Posted: Tue Apr 06, 2010 10:30 pm
by 911hillclimber
Ah! Plumb bobs and lines!
Arthur Mallock had a similar system (I'm told) but they all hung down from the roof above the flat floor of the workshop which had white datum marks painted on...!
That looks good to me Barry and referenced to the C/L of the jig.
I've found I keep only the tools I will actually need out on the car. The rest are all away.
My Lola has UNF in the front and metric/UNF across the rear and mixed spanners/sockets drive me mad....

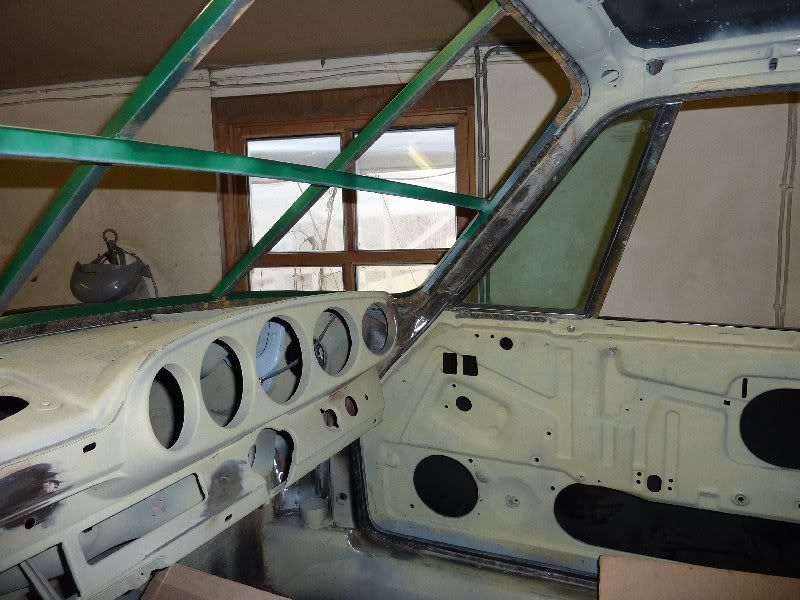
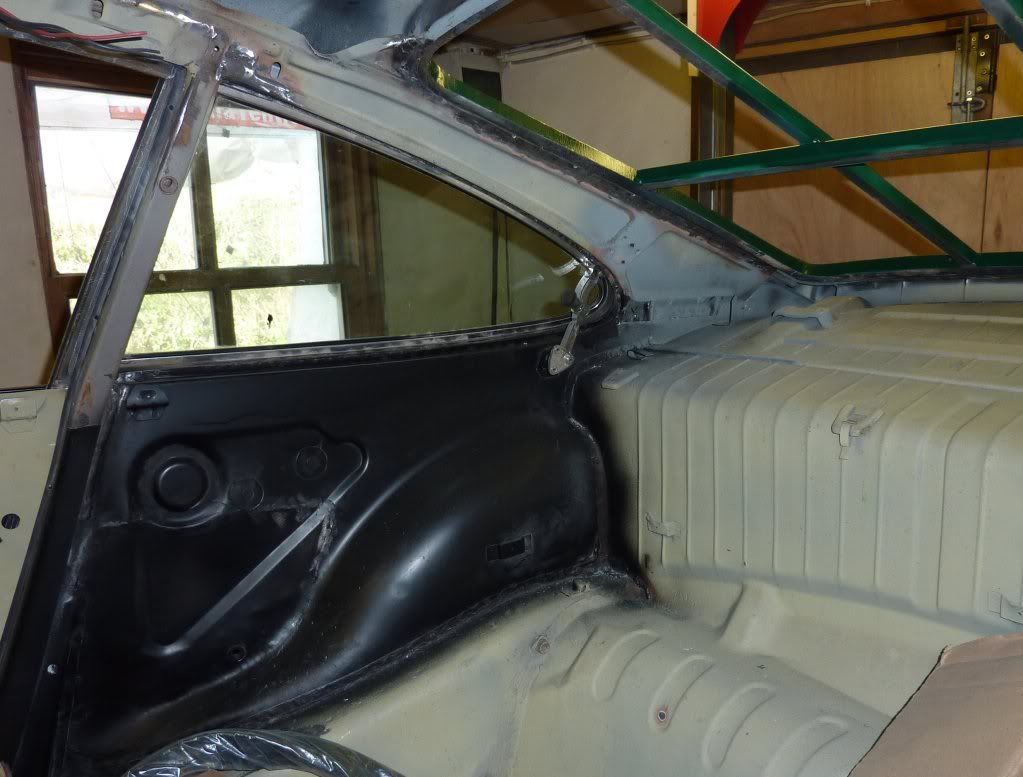
Incredible to see a front wing hanging, the roof resting on and so much repair work progressed. Sure there is much more to stitch up yet!
Great stuff.

Posted: Wed Apr 07, 2010 8:39 am
by Barry
That wasn't a good shot of the system: the plumb is just a temporary addition, although I might well make up a proper holder for it for the horizontal slider. Like I say, I'll detail it properly elsewhere as it gets round most of the drawbacks of a bracket jig system.
As for the tidying, I'm the same generally, and only have the tools out for that particular job. Trouble is you often need three or four panels, one grinder, two drills, oodles of clamps, MIG and spot welding gear etc etc. So, despite best intentions, all of a sudden you can be surrounded with a pincer movement by an army of tools

.
Posted: Thu Apr 08, 2010 5:10 am
by John S
Barry wrote:...Like I say, I'll detail it properly elsewhere...
Please post the link here, Barry. I don't want to miss this.
Thanks
Posted: Thu Apr 08, 2010 8:36 pm
by Alan @ CanfordClassics
Hi,
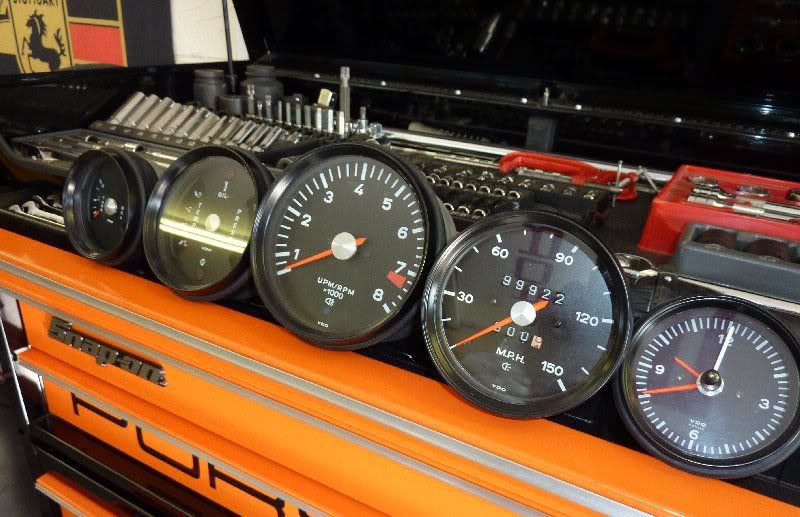
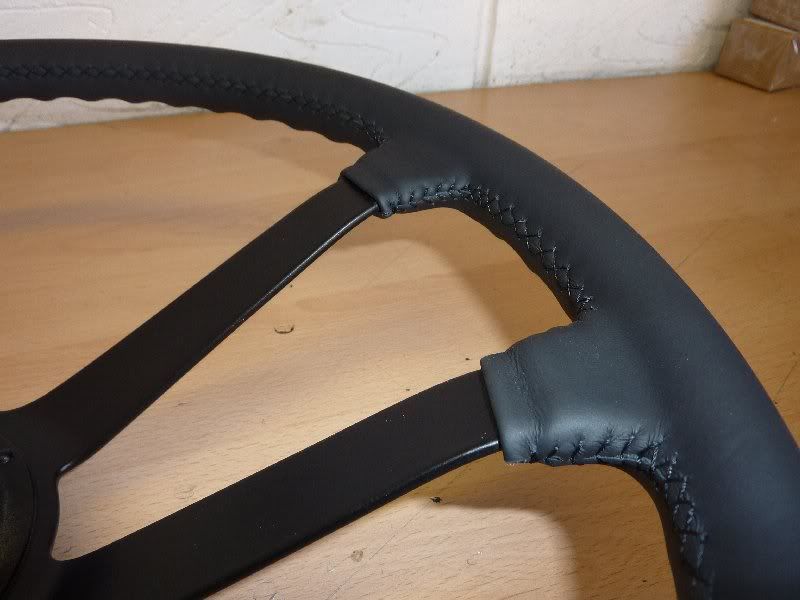
We have now finished painting and re-trimming the steering wheel and also the freshly rebuilt guages arrived back today.
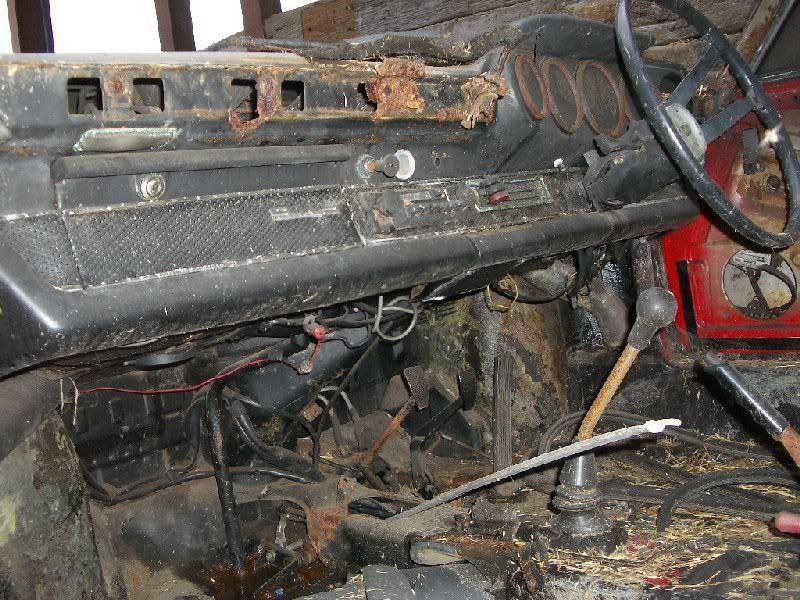
Remember this
Progress is being made
Thanks
Alan
Posted: Thu Jul 01, 2010 12:16 am
by Alan @ CanfordClassics
Hi,
It has been a while since I updated this thread, but things have moved on some.
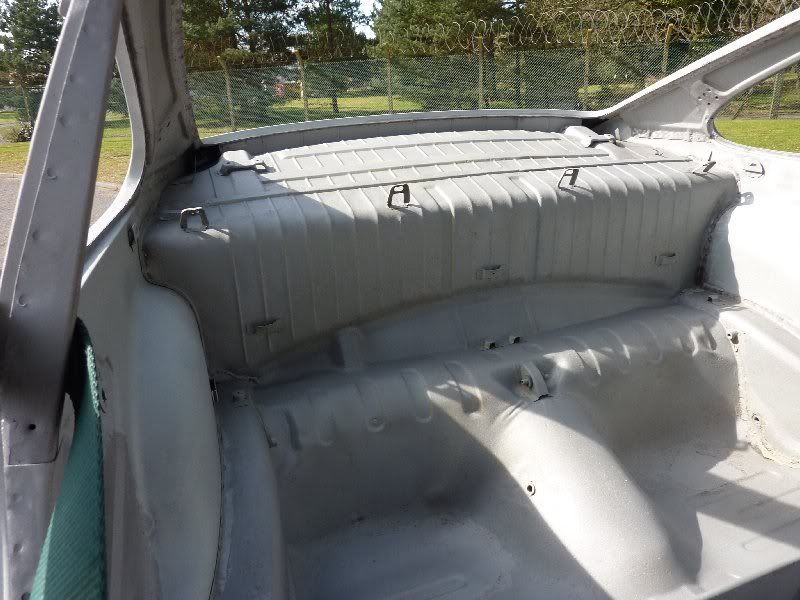
Roof, inner wings, inner and outer sills etc are all done.
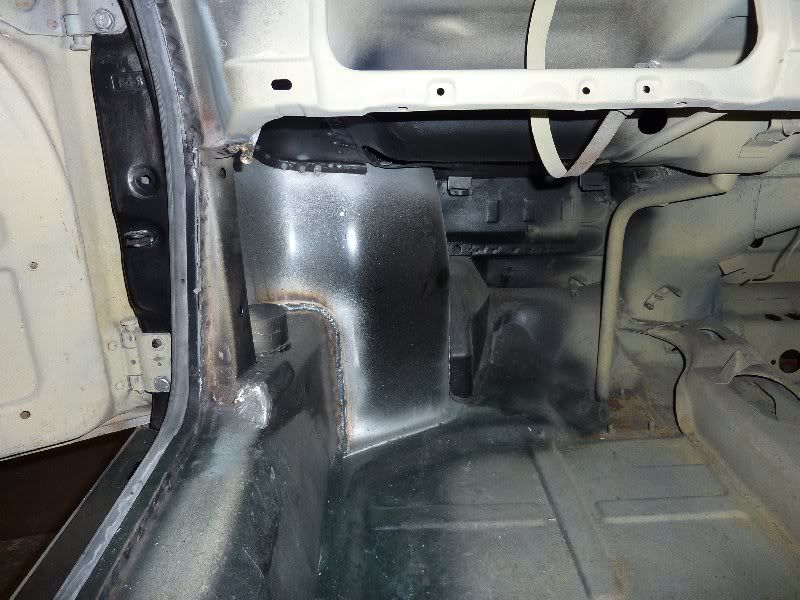
The rear inner wings also needed backdating as new inner wings from Porsche have the incorrect pressing for the seat belt mount.
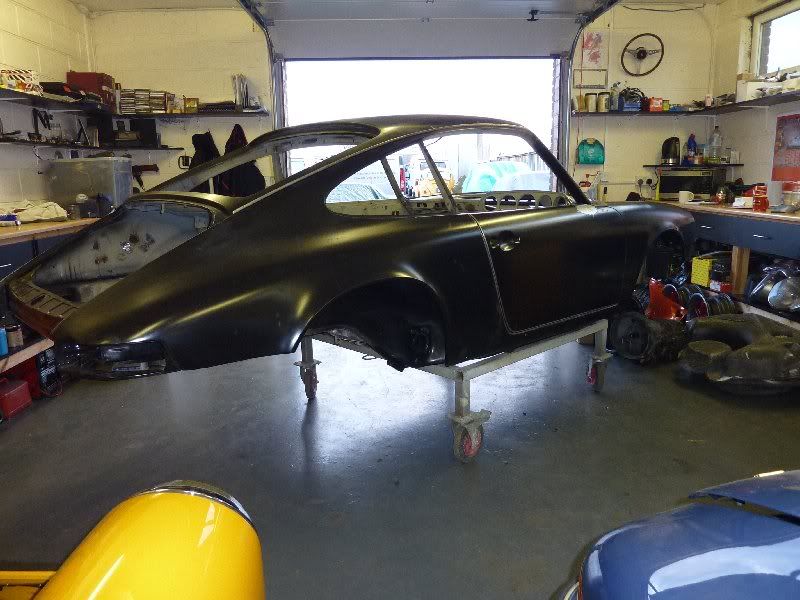
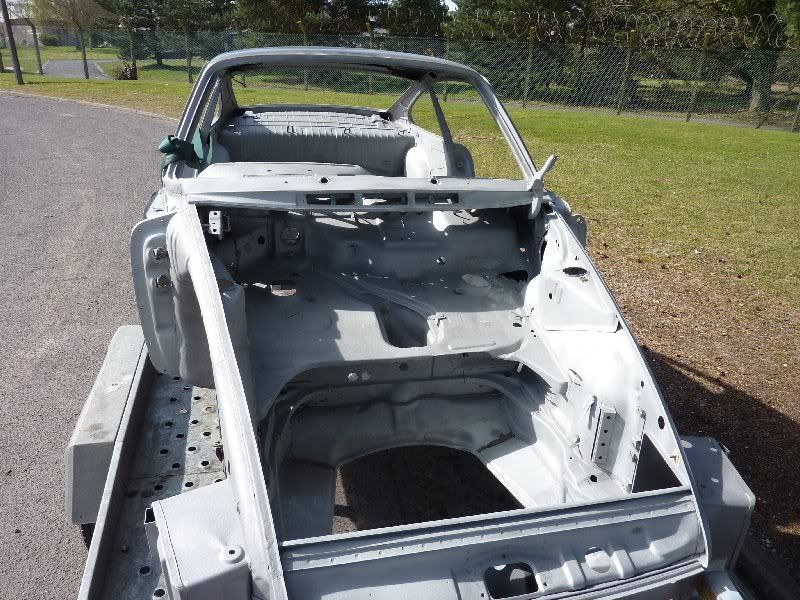
The shell is now back to one solid item. Looks much better
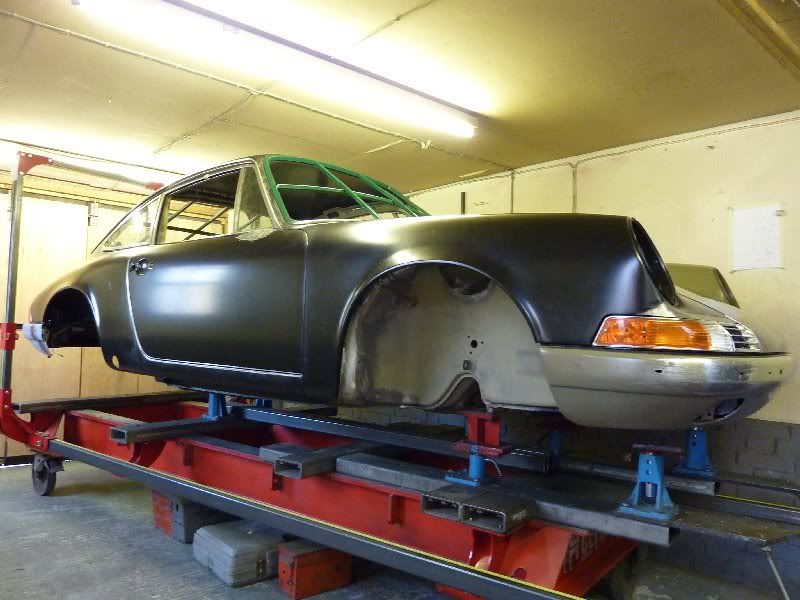
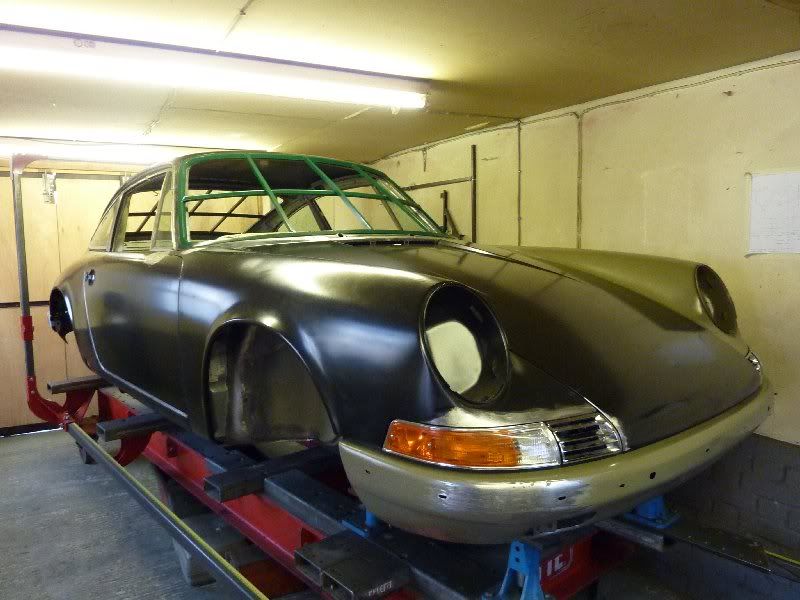
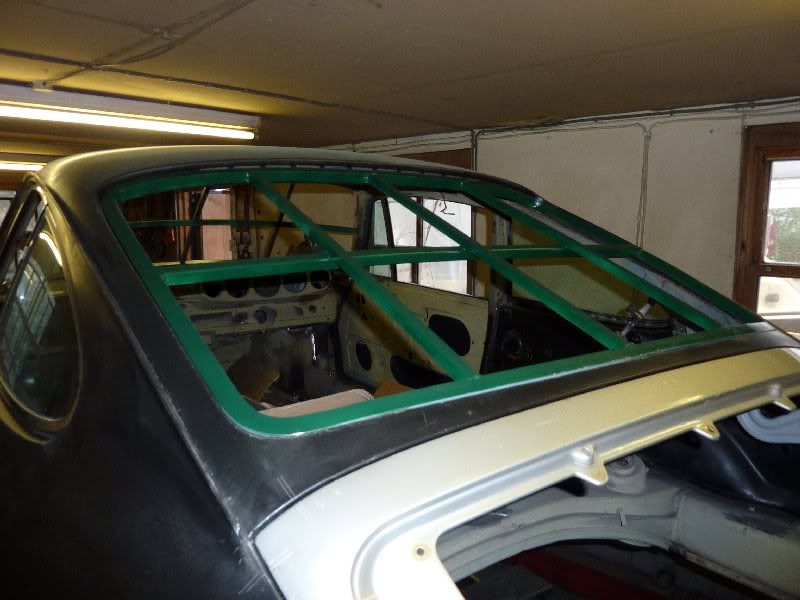
It has been paneled up and correctly gapped including all window apertures- now ready for the next stage of the restoration.
Thanks
Alan
Posted: Thu Jul 01, 2010 12:33 am
by sramdeen

Great stuff! What a nice surprise to see this post updated after a while.
Looking forward to the next instalment :D
Posted: Thu Jul 01, 2010 1:32 pm
by Barry
I was thinking the same thing: the next one is about two days from being finished as well
.
Posted: Thu Jul 01, 2010 8:06 pm
by 911hillclimber
Gob smackin'!
Who would have thought it...
We all did of course. Fab work in speedy ways.
What a result!
Posted: Thu Jul 01, 2010 8:43 pm
by Gary71
Looks great

Do you dip and ecoat prior to paint to try and preserve all that hard work?
Posted: Thu Jul 01, 2010 8:51 pm
by Alan @ CanfordClassics
Hi Gary et al,
Very little was dipped and ecoated in this project. What you see that is black is new Porsche panels. The front bumper and LH front wing were dipped and ecoated a while back before starting this resto and were in stock.
Thanks
Alan
PS. Thanks for all the kind words
Posted: Thu Jul 01, 2010 8:56 pm
by Alan @ CanfordClassics
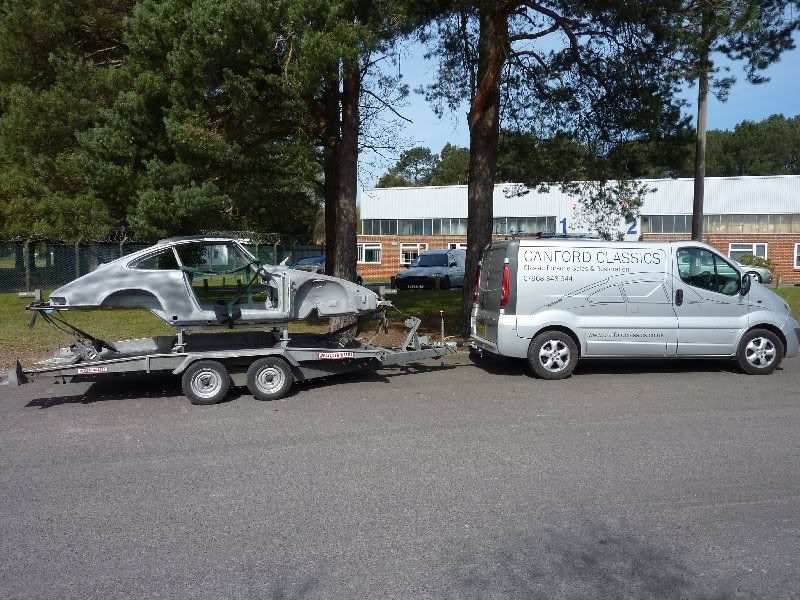
Shell completed and ready to be stripped for the second time:
back on the trailer:
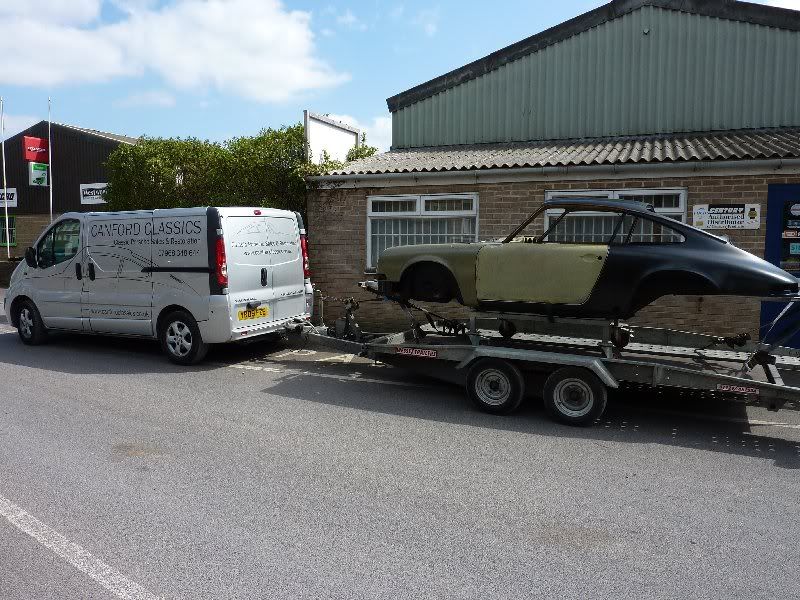
and back to bare metal, just before going into the oven for an etch prime.
Thanks
Alan
Posted: Thu Jul 01, 2010 10:43 pm
by jtparr
fantastic work mr carter
alan, looks like a gorgeous car in the making, look forward to updates on the reassembly
regards
jonathan
Posted: Fri Jul 02, 2010 7:09 am
by oliveR
Impressive Alan !!!!
Posted: Sun Jul 04, 2010 7:55 am
by Barry
Alan.UK wrote:Shell completed and ready to be stripped for the second time:
Just out of interest, it ended up leaving here with all gaps at 3.75mm +- a fracton. I've got a little door gap gauge which is a taper with 4mm at one end (factory spec), and 3.5mm at the other. Just as long as the tool is running near the centre, I know I'm just about right. The bonnet lines I like to leave a fraction tight, knowing that they will open a smidge when they are sealed to the inner wings. If you say that you work to a tolerance of .25mm it sounds tiny (not to mention fat-headed

), but to the eye on cars with tight gaps as standard, .25mm is a country mile, and really stands out.
We have found that many front wings need slitting around the indicator areas and re-working in order for the indicators and horn grills to flow into the bonnet line properly. Also, just about all front wings have work done to the frames in order for the wing to marry up to the curve at the top of the door correctly. Rear wings all have to be modified at the base in order to run into the sill with a good gap, and need a serious tweak or two in order to stop the wing base from protruding out from the rear bottom corner of the door.
As for the actual shape, I was always taught that a car should look as though it was carved from one solid lump of steel, and then at the last minute, someone comes along and lets in some door gaps. Also that many cars are basically fish-shaped when viewed down the side: one long continuous curve all the way through. Sometimes to achieve this you end up pulling in or pushing out big chunks of car, and having a way of measuring just what the car is doing down the sides (and comparing each side by measurement and not just eye) certainly helps. I guess what you are trying to avoid is a car that looks as though the side is made from three separate panels, all following slightly different lines.
I've not taken any further shots of the measuring rig, but will try to before the current car (the SWB sans torsion tube) is collected by Alan on tuesday, and will post a link on this thread (if Alan doesn't mind) to a differend thread.
Thanks for all of the comments on the bodywork through the process: they are very much appreciated

.
I can't wait to see the next stages as the car continues it's journey back to the road after all of these years

.
Posted: Sun Jul 04, 2010 9:17 am
by silver911
Wow..
Looks great.. as ever..