Page 21 of 24
Re: Pre-A Outlaw replica.
Posted: Fri Jul 01, 2016 4:40 pm
by Raikku
Amazing project and a perfect way to spend long finnish winter nights!
Re: Pre-A Outlaw replica.
Posted: Fri Jul 08, 2016 7:17 am
by oliver365
Re: Pre-A Outlaw replica.
Posted: Tue Jul 12, 2016 3:29 pm
by Hebster52
Yesterday the innerframe and skin finally joined. Still need fiberglass work before it is done.


Re: Pre-A Outlaw replica.
Posted: Tue Jul 12, 2016 4:53 pm
by mdmax72
Nice work on the lid. If your going the extra to look more authentic, I've got these tabs in each corner of the grill for the deck lid rack mounting.
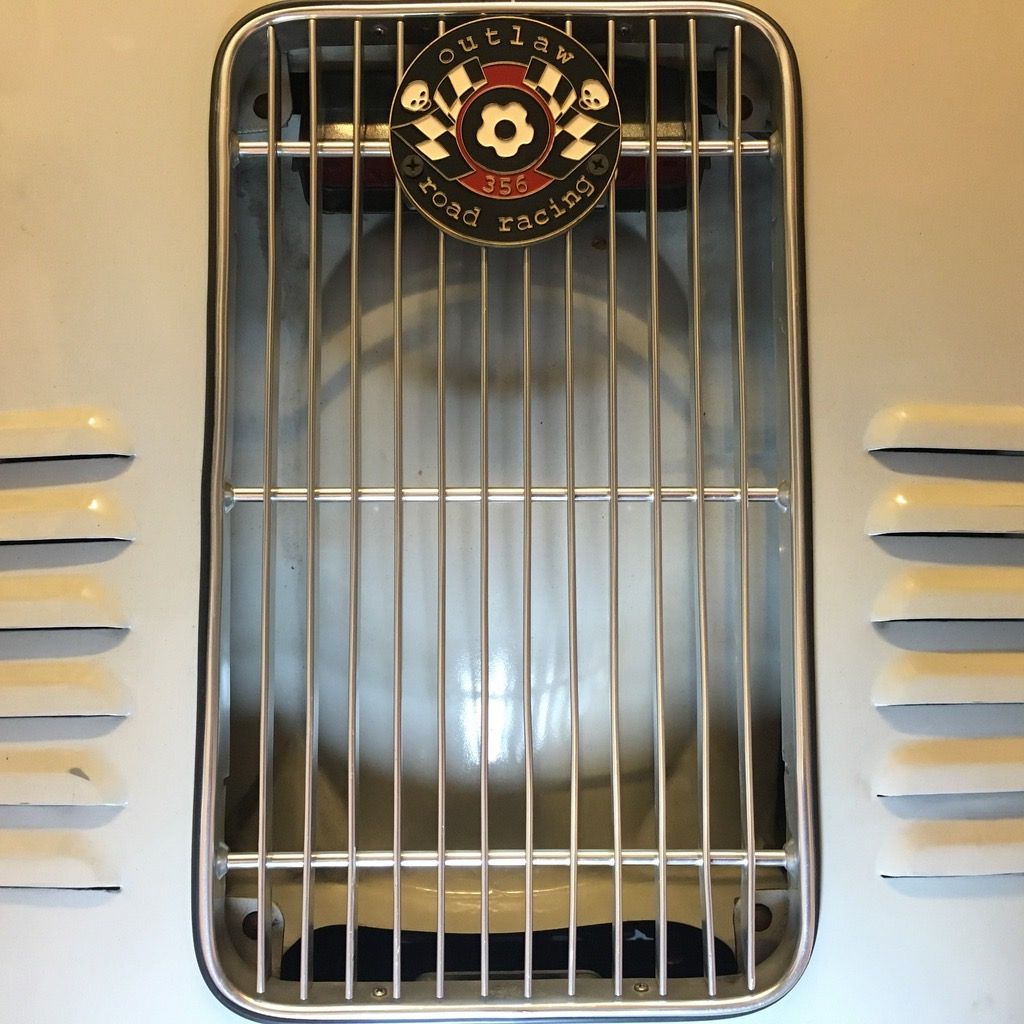
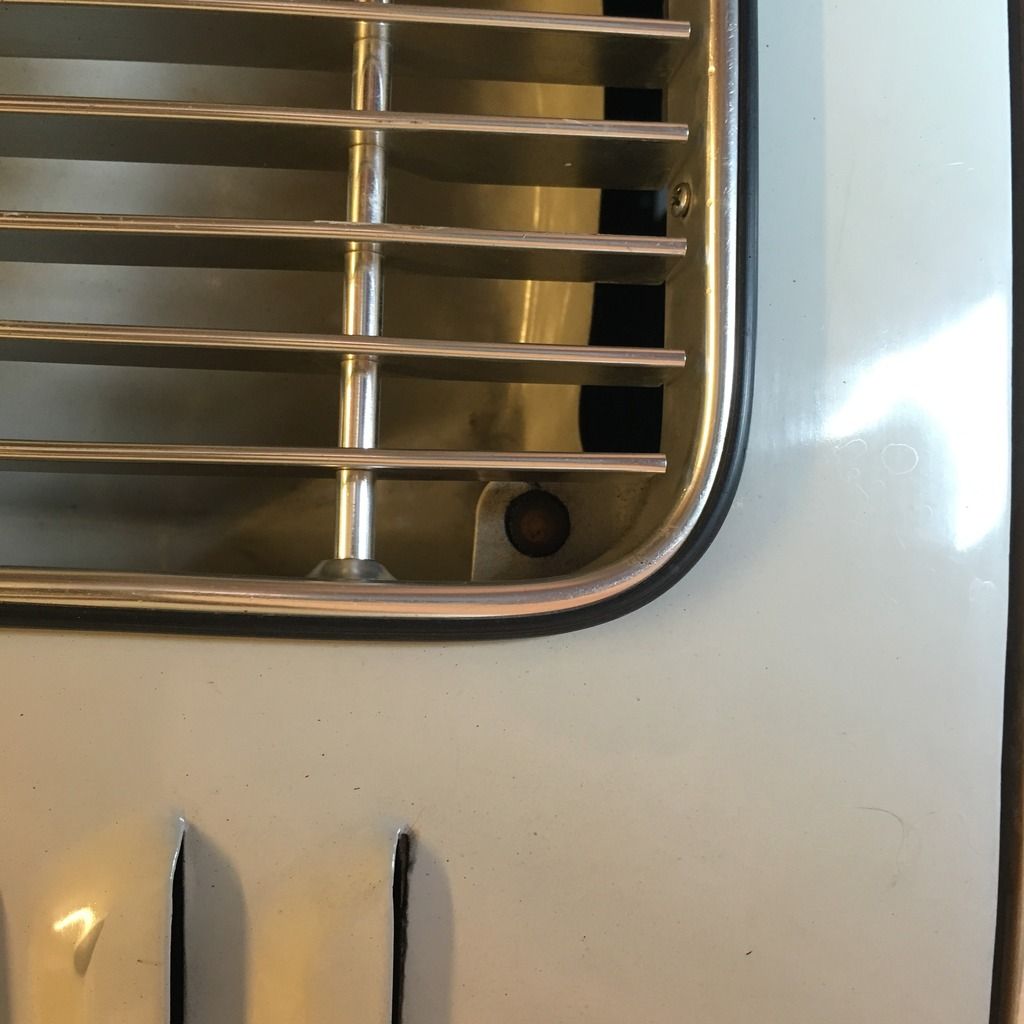
There's also a slot at the bottom as pictured
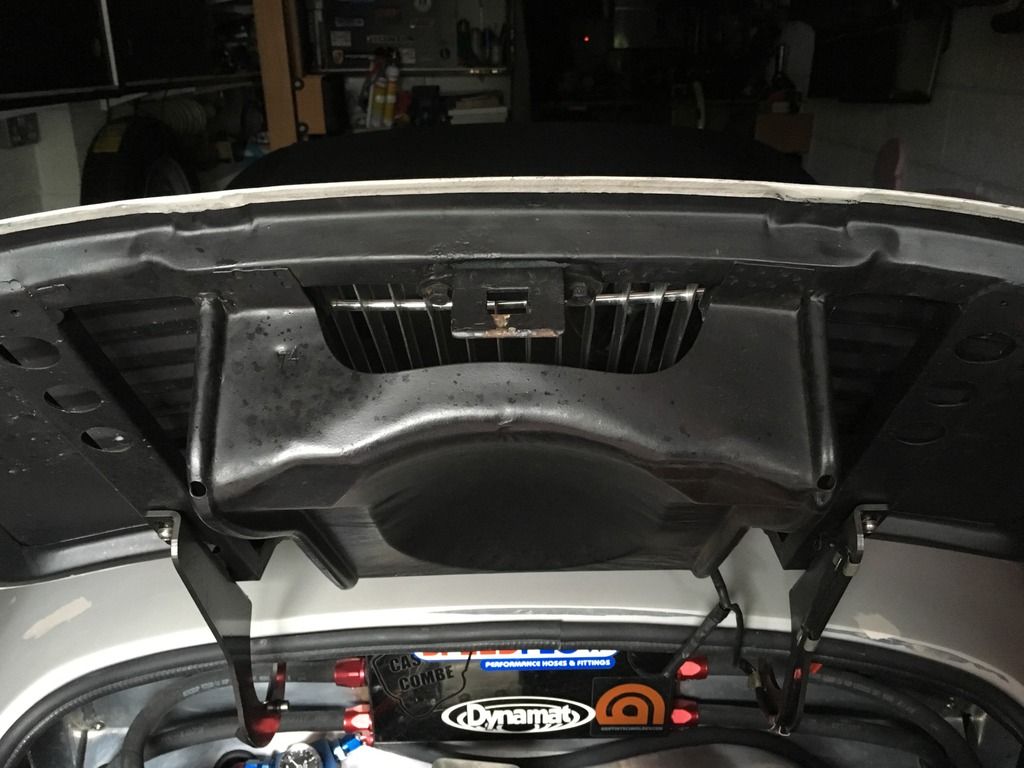
And two slots at the top
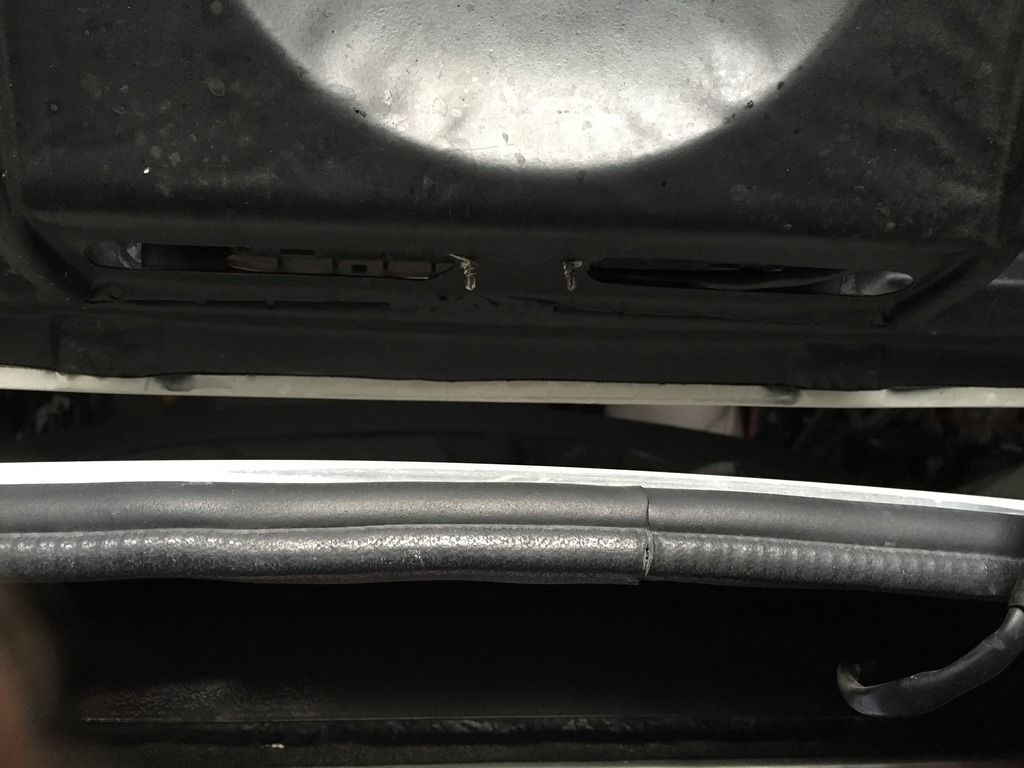
Re: Pre-A Outlaw replica.
Posted: Tue Jul 12, 2016 5:40 pm
by Hebster52
Yes. Been thinking about the tabs too... :D
There are traces of the slots from the mold so they will come soon..

The mold was made from an original.
Re: Pre-A Outlaw replica.
Posted: Fri Jul 22, 2016 12:22 pm
by Hebster52
Finally got the parts together.
Here still just glued together with resin.

Had to testfit on body just to confirm it still is in shape...
I use classic Mini hinges.
https://youtu.be/ALE4VkMKkFM Vidclip.
After testfitment I could fiberglass the partsfully.

Re: Pre-A Outlaw replica.
Posted: Fri Jul 22, 2016 1:30 pm
by Hebster52
Re: Pre-A Outlaw replica.
Posted: Fri Jul 22, 2016 10:17 pm
by Hebster52
And done!

Re: Pre-A Outlaw replica.
Posted: Wed Aug 10, 2016 7:56 am
by Hebster52
Enginelid fitted perfectly now so I started finally to build the rearbumper too...


Re: Pre-A Outlaw replica.
Posted: Wed Aug 31, 2016 9:55 am
by Hebster52
Not much but I got the rear bumpermounts made. Just need to weld them to the frame...

Re: Pre-A Outlaw replica.
Posted: Thu Dec 01, 2016 10:46 am
by Hebster52
Re: Pre-A Outlaw replica.
Posted: Fri Dec 30, 2016 10:56 am
by louis356
You can't leave it there!!
I've just read this over Christmas and loved every minute of it. Hats off to you. A great job.
Hope that you have been neglecting your family and been working on the car over the holiday season!
Thank you for the updates it's been a great and inspiring read
Good luck and keep the faith!
Re: Pre-A Outlaw replica.
Posted: Mon Jan 23, 2017 8:40 am
by Hebster52
Re: Pre-A Outlaw replica.
Posted: Mon Jan 23, 2017 9:38 pm
by cubist
Lovely work!
Re: Pre-A Outlaw replica.
Posted: Mon Feb 27, 2017 11:13 am
by Hebster52


