Page 18 of 35
Re: 75 S to R Homage
Posted: Sun Jul 29, 2012 8:49 am
by 911hillclimber
The pin 'C' clips are such a pain in the ar$e and even more fun when putting the last ones in on the engine. They fly faster than superman when mis-placed. Listen for where they hit the garage door is my motto..
Hate fitting the barrels/pistons etc.
I put the first side of the C rings in the pistons before assy but on the right side for final access, but I think you are now all buttoned - up?
I'll be interested to see how you torque the heads down.

Itching to get going on my 3.2 but still waiting for parts.
Remember I need a good detailed DIY guide to cam timing when you are ready please!
Re: 75 S to R Homage
Posted: Sun Jul 29, 2012 11:18 am
by haasad
Checked right and left bank deck heights this morning...only 0.7 mm after all the work . I need at least 1 mm to be safe so will have to source some thicker base shims, or stack 3 standard ones prefer to minimise these though.
Good idea to fit one of each of the circlips prior to fitting pistons in bores ...why didn't I do that

Not anticipating any issues with torquing the heads...

I promise a set of snaps of timing but I have to get those ruddy circlips in place succesfully first.
Re: 75 S to R Homage
Posted: Sun Jul 29, 2012 11:36 am
by 911hillclimber
Head nuts:
I think there is a two-stage technique to pulling them down with a delay between torques. I see you have Time-Sert'd the block, so this may change things. It is about getting the right load at the end evenly that will not creep loose a touch.
You can buy the copper cylinder base gaskets in two thicknesses if that helps even things up to keep the carrier free of twist.
The Wayne Dempsey Rebuild Book gives all the height grades for everything, a fab book and one I will be following to the letter. Fed-up doing top end rebuilds!
I think this was the outcome of C ring coming out of it's groove.

Graham.
Re: 75 S to R Homage
Posted: Mon Jul 30, 2012 7:41 pm
by haasad
Sorted some 0.5 mm base joints today so thats the deck height addressed. Those circlips where really bugging me it seemed so inelegant to pry them in with pin nosed pliers not to mention the risk of losing them somewhere awkward. I did some googling and found tools from harley davidson and tomski racing . The tomski ones are available from pelican and seemed effective. However I wanted a cheaper option.
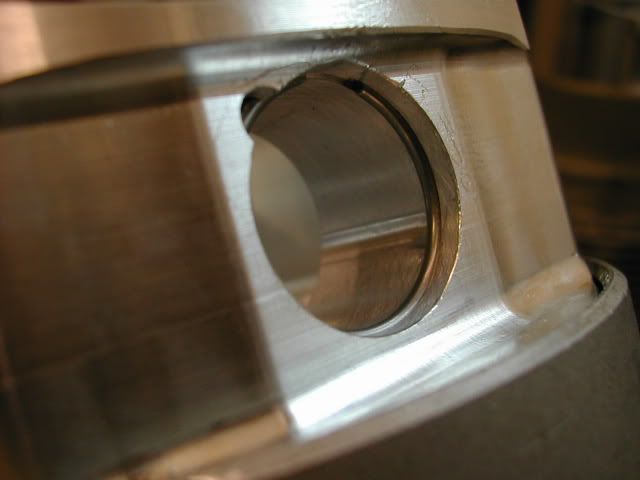
So an old gugeon pin and some off cuts of mild steel were pressed into service to make my interpretation. I made a guide to fit the bore of the old pin tightly and slide into the bore of the new ones smoothly, then I bored a piece of steel to the size of the gudgeon pin hole in the piston and cut away its end to clear the features on the sides of the JE pistons.
Now all I have to do is load the circlip into the steel ring by hand square it up in the bore with the insertion tool made from an old pin and some steel rod.
The clip is now captive and cannot spring out into the garage or engine.
Now simply locate the assembly over the piston hold the steel ring and sharply push the insertion tool through the ring, the circlip is carried forward perfectly into position with no cursing or blood.
Note the trials on an old piston
Chuffed with that result....
snaps of the deck height checks and the new tool.

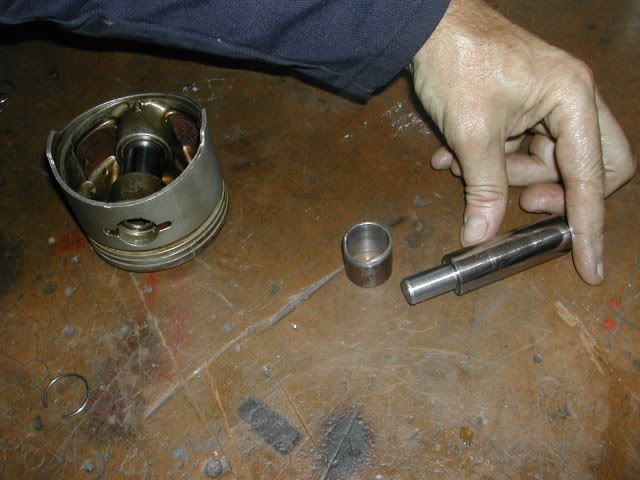
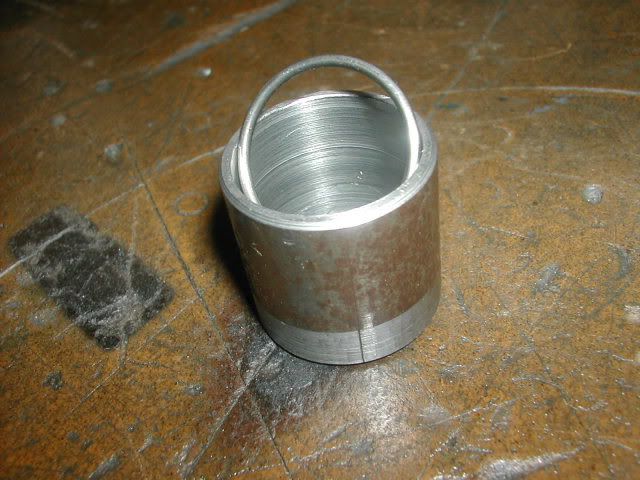

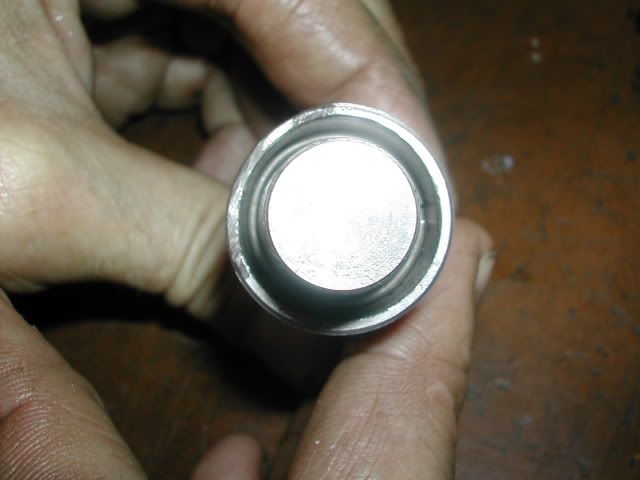
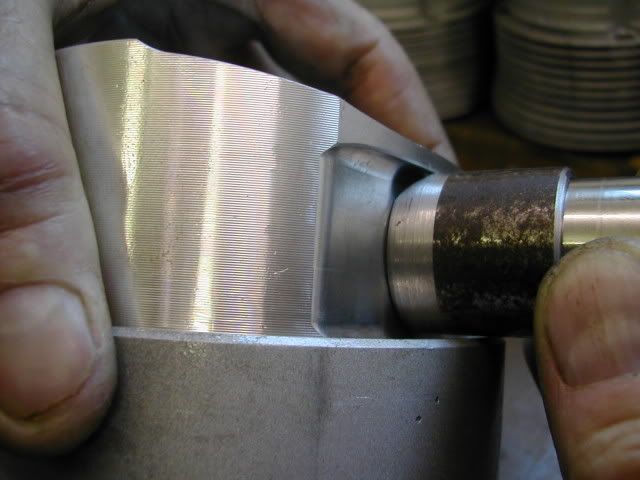
andy
Re: 75 S to R Homage
Posted: Mon Jul 30, 2012 10:17 pm
by 911hillclimber
I love that fix!
Excellent tool.

Re: 75 S to R Homage
Posted: Tue Jul 31, 2012 9:21 pm
by nickT
Cool, thats one to remember.

Re: 75 S to R Homage
Posted: Sun Aug 05, 2012 8:58 pm
by haasad
Re: 75 S to R Homage
Posted: Sun Aug 05, 2012 10:52 pm
by 911hillclimber
Nice job.
Measure twice, torque-down once, comes to mind.
I'm getting my bits next weekend so will be on the same treadmill...
Must make one of those piston clip insertion tools unless you can be tempted to make me a set?
(please, and for a few others too I think)

Re: 75 S to R Homage
Posted: Mon Aug 06, 2012 7:26 pm
by haasad

usually I would be happy to knock up one of those for you ( and anyone else) but I'm really focused on getting this motor built after waiting so long so sorry but not this time

Happy to draw it up at work and pdf a sketch but bear in mind the slip ring will have to be filed or cut to match whater piston is being fitted .
Bit more progress tonite but I'll save the snaps till later in the week, suffice to say that sealing a motor isn't always about what gunge one uses to put it together. Having said that this one will probably leak like a sieve......

andy
Re: 75 S to R Homage
Posted: Tue Aug 07, 2012 12:56 pm
by 911hillclimber
no probs on the clip-into-the-piston tool, can make one at work. I thought you went to sleep with a lathe so could do one in your sleep!
I've just ordered a HUGE box of gaskets, brgs etc for my 3.2, but you will be done before i start.....

Re: 75 S to R Homage
Posted: Sat Aug 11, 2012 9:11 pm
by haasad
Re: 75 S to R Homage
Posted: Sat Aug 11, 2012 10:21 pm
by 911hillclimber
Looking good!
I was discussing head torque sequence today with a specialist.
He torques 17 lbft from centre out then to 28 from centre out then 28 again.
I've just started on the crank!
Did you use red loctite on your con rod bolt nuts?
Re: 75 S to R Homage
Posted: Sun Aug 12, 2012 8:58 am
by haasad
Hi, very much the same sequence and load then

Yes loctite 270 .
Re: 75 S to R Homage
Posted: Sun Aug 12, 2012 10:53 am
by Mike911scrs
HI Andy
you may just need to change the bottom LEFT, head barrel nut on each head for a 15mmXm10 so you can fit the lower spark plugs??
regards mike
Re: 75 S to R Homage
Posted: Sun Aug 12, 2012 1:50 pm
by haasad


