Page 14 of 25
Re: Meet Ralph - 1970 ST project
Posted: Sun Feb 20, 2022 3:35 pm
by rich73
Steady progress, managed to stick to the plan and get the body welding pretty much finished, lots of finishing off fiddly bits I'd missed or put off have now been done as well as some hole filling. Things like the fuel filler hole I considered buying a bung but it ended up only taking 10mins to weld up.
 2022-02-20_09-32-31
 by
richard cannings, on Flickr
Still need to do the rear ARB mounts but looks like I'll need to buy the ARB to do this I'm leaving it for now. I'd still like to do the jacking point strengthening plates as I really like the look of them but holding off for now as I'd ideally like to keep standard oil lines. I do want to look more into a rear mounted cooler solution as I like the idea of the clean look without oil lines.
Also need to do the battery tray, think I'm going to got for a full size battery the same as in the 3.2.The car will have electric air conditioning, heated screen and possibly even seats this seems the most sensible option.
Was going to get straight on with the grinding but decided to do the fuel filler as it was job I was really looking forward to doing. Seems like there loads of ways to do this so on Early 911S Registry so decided that the best way forward was to come up with another.
 2022-02-18_02-39-12
 by
richard cannings, on Flickr
 2022-02-18_02-39-35
 by
richard cannings, on Flickr
ACME alignment tool developed.
 2022-02-18_02-39-49
 by
richard cannings, on Flickr
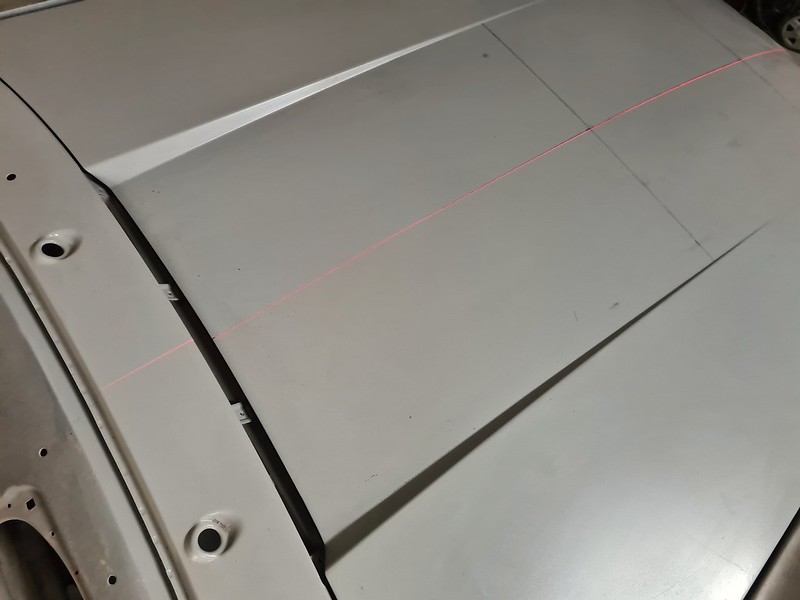
Measured the bonnet angle with resect to the filler tube from under the bonnet.
 2022-02-18_02-40-18
 by
richard cannings, on Flickr
3.5 hours in and looking promising.
 2022-02-18_03-00-26
 by
richard cannings, on Flickr
Re: Meet Ralph - 1970 ST project
Posted: Sun Feb 20, 2022 7:09 pm
by Gary71
That looks like a scary cutting job approaching if ever there was one!
Measure 20 times
Cut once
Good luck!
Re: Meet Ralph - 1970 ST project
Posted: Mon Feb 21, 2022 4:13 pm
by rich73
I think you were pretty much spot on with measure 20 times Gary.
Started with a small hole just to check all lined up from below.
 2022-02-21_03-57-37
 by
richard cannings, on Flickr
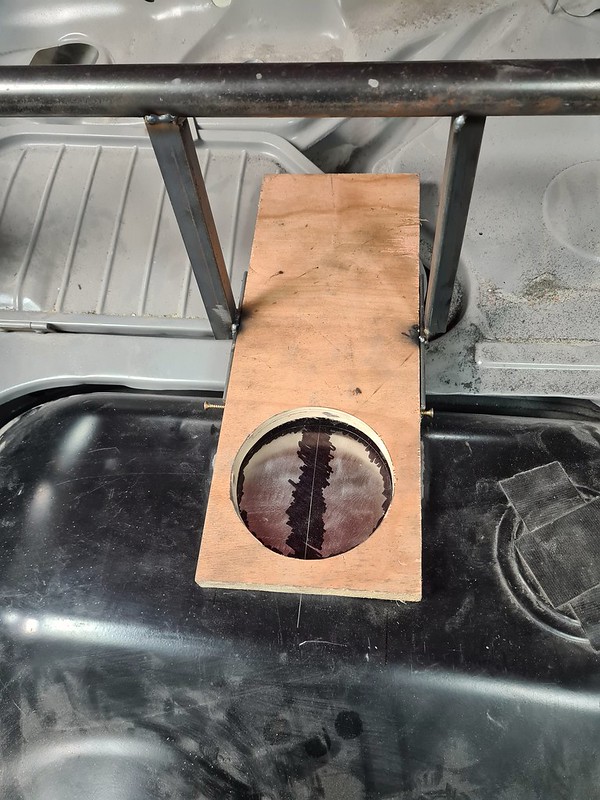
Then a bit of woodwork to start the morning.
 2022-02-21_03-58-25
 by
richard cannings, on Flickr
Then did a test piece before destroying the bonnet forever, went much better than expected.
 2022-02-21_03-58-46
 by
richard cannings, on Flickr
MDF former screwed to the bonnet.
 2022-02-21_03-59-06
 by
richard cannings, on Flickr
Started hammering steadily working my way round, doesn't really need much force at all the stretch the panel.
 2022-02-21_03-59-22
 by
richard cannings, on Flickr
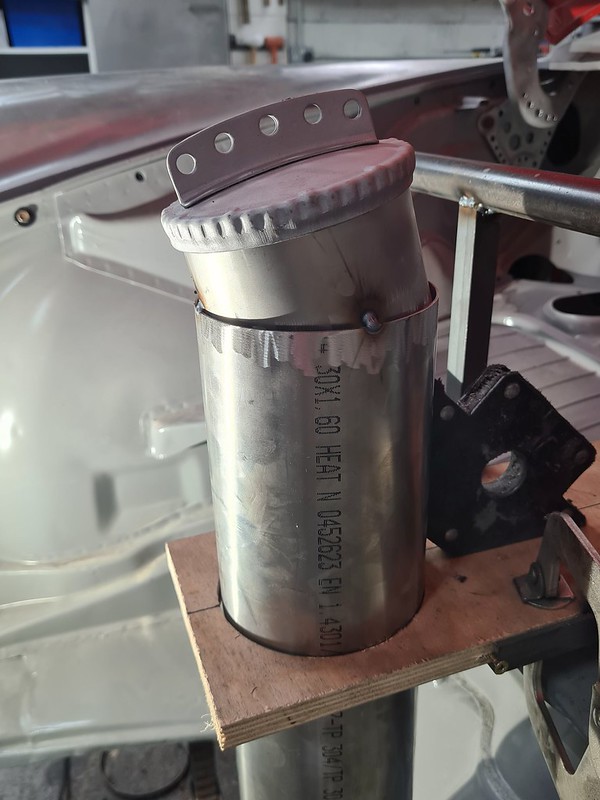
Trial fit of the filler and all looks good.
 2022-02-21_03-59-39
 by
richard cannings, on Flickr
Then had a tidy up, really happy with the result. Hoping to get the filler attached to the tank tomorrow
 2022-02-21_04-00-11
 by
richard cannings, on Flickr
Re: Meet Ralph - 1970 ST project
Posted: Mon Feb 21, 2022 4:17 pm
by matteo68
Awesome job Rich!

Sent from my iPhone using Tapatalk
Re: Meet Ralph - 1970 ST project
Posted: Mon Feb 21, 2022 4:19 pm
by hashman
That looks very nice .
Karl
Re: Meet Ralph - 1970 ST project
Posted: Mon Feb 21, 2022 4:39 pm
by RobFrost
You did that by hitting with a hammer? Wowsers!
Re: Meet Ralph - 1970 ST project
Posted: Mon Feb 21, 2022 5:09 pm
by Gary71
That’s really neat, good work

Meet Ralph - 1970 ST project
Posted: Tue Feb 22, 2022 7:54 am
by sladey
Nice work - was that with a round wooden mallet?
Edit ah I can see it’s one of those plastic headed ones
Re: Meet Ralph - 1970 ST project
Posted: Tue Feb 22, 2022 8:55 am
by deano
Excellent work !

Re: Meet Ralph - 1970 ST project
Posted: Tue Feb 22, 2022 9:53 am
by yoda
Great work. Seeing the details take shape always amazes and impressed me!
Re: Meet Ralph - 1970 ST project
Posted: Tue Feb 22, 2022 11:36 am
by Bootsy
Very impressive.
Re: Meet Ralph - 1970 ST project
Posted: Tue Feb 22, 2022 3:57 pm
by rhd racer
Love the way you make this stuff look easy - fantastic
Re: Meet Ralph - 1970 ST project
Posted: Tue Feb 22, 2022 5:53 pm
by rich73
Thanks so much for the comments everyone, really nice to be sharing a job that went better than expected.
Managed to remove and weld up the original fuller tube as well as weld the new one in this morning.
 2022-02-22_05-34-55
 by
richard cannings, on Flickr
If ever you wondered what the inside of a Dansk 110l tank looked like inside;
 2022-02-22_05-35-20
 by
richard cannings, on Flickr
Wasn't sure if would have baffles. Seems really good quality, steel must be about the same thickness as the original tank.
Really feel like its changed the look of the car.
 2022-02-22_05-35-47
 by
richard cannings, on Flickr
Stanley getting a little concerned about the new bowl he got for Christmas as I decide on a rain catchment solution.
 2022-02-22_05-51-07
 by
richard cannings, on Flickr
Re: Meet Ralph - 1970 ST project
Posted: Thu Feb 24, 2022 3:49 pm
by BILLY BEAN
Rich,
Looks like you kept the filler tube as far back as possible in the tank. If you don't then there are clearance issues with the spare wheel/ tire. It does not look like you have clamped the tank in position ( could be wrong) which I would suggest you do and fit up the fuel outlet under the tank. There may be clearance issue with this which means you have to adjust the tank position. The knock on effect is that the filler cap is then not central to the hole you cut in the front lid. Of course all may be OK already but worth checking. Nice metal forming as usual.
Re: Meet Ralph - 1970 ST project
Posted: Tue Mar 01, 2022 10:03 am
by rich73
Hi Kirk,
Yes I remember your advice about getting it back as far as possible, thanks for that. Your right I've seated the but haven't clamped it in, I'll make sure I clamp it down to be sure.
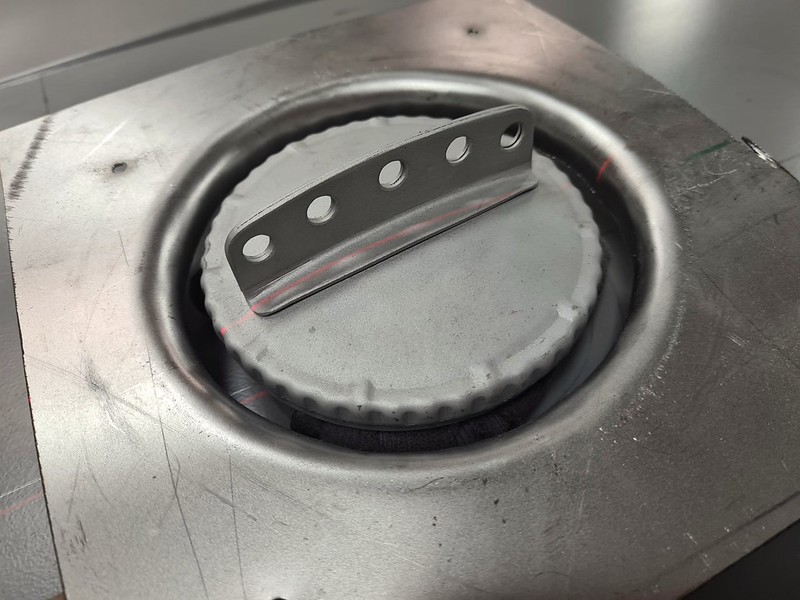
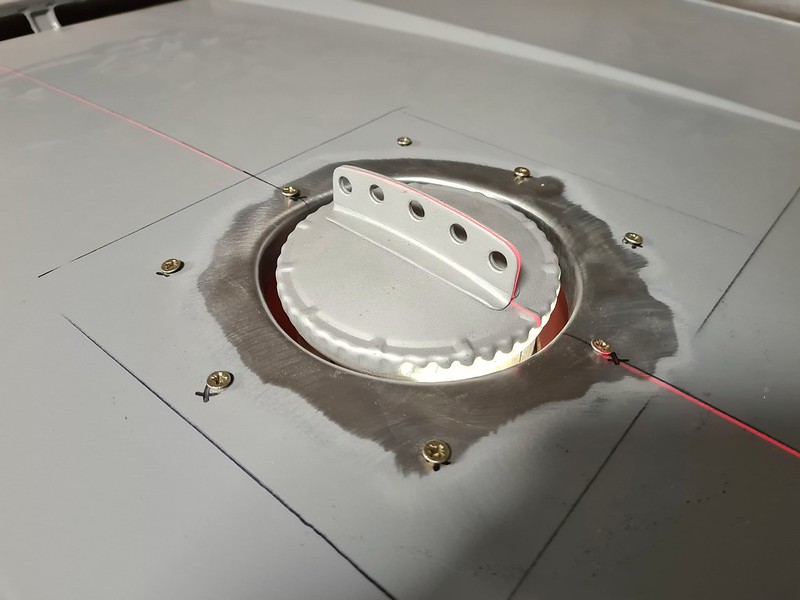
Thought I'd have a go at making the rain catchment bowl from an offcut of flue pipe I had, looks neat from the side and is compact but don't think I like the fact the filler cap isn't centred due to the angle of the filler tube. I think a bowl like yours would look much better. Its only tacked together so not a problem to change.
 2022-03-01_09-36-04
 by
richard cannings, on Flickr
Working my way round the car getting any last paint off, grinding and epoxy priming as I go.
 2022-03-01_09-33-35
 by
richard cannings, on Flickr
 2022-03-01_09-33-18
 by
richard cannings, on Flickr
I'm thinking I might leave this plate in place and just carefully work round it. The others plates just had pop rivets that I can easily replicate but not sure about these.
 2022-03-01_10-01-04
 by
richard cannings, on Flickr