Page 2 of 3
Posted: Tue Mar 31, 2009 5:19 pm
by Highfield
Scott
Not got around to ordering the parts yet, as the list of items is growing.
When I do, I will let you know.
Ian
Rear Inner Arch Preparation
Posted: Sat Apr 04, 2009 9:28 am
by Highfield
The rear inner arches are pressure cleaned and all loose and flaky original underseal is removed - at last.
The whole area is remarkably strong and free from any nasty rust. I have treated any surface areas and coated with Smoothrite for immediate protection, before I get to the Stone Chip part.
I removed quite a bit of sealer from right up in the top where the inner wing rolls over and joins the area by the rear screen and roof - this area is solid.
Question - should I fill the area with some kind of sealer / silicon, or leave it as is put apply plenty of stone chip ?
Next job - stone chip.


Ian
Oil Tank Removal
Posted: Sat Apr 04, 2009 9:42 am
by Highfield
The final part to be removed from the car before it starts to go back together is the oil tank - famous last words, but I do not intend removing anything more

The oil is only 500 miles old, so I drained just the oil tank.
The two oil hoses that fit to the tank come off easily (you need a big spanner or stilsons in my case to undo one), and the two retaining bolts are accessed from inside the engine bay.
Remove and discard the ol filter, disconnect the breather hoses, and wrestle it all out.
Ready for sending for refurb.


Ian
Oil Tank Stripped
Posted: Thu Apr 16, 2009 6:49 pm
by Highfield
Alan.UK can do oil tank restoration, but I have a small final load to go to Redditch Powder Coating, so opted for ease to have them do it.
I removed the large rubber 'gasket / seal', the level sender unit and the alloy filter housing so the tank can be thoroughly cleaned and powder coated in 'gloss' black. Cap and nuts form part of the final yellow zinc load along with the 28 row oil cooler that is currently surplus but waiting for a more powerful engine


Ian
Rear Indicator Housings
Posted: Thu Apr 16, 2009 6:57 pm
by Highfield
You have seen this on the front indicators, but here are the rears.
Transformed from a very dirty but also very solid unit via washing, wet-n-dry, wire brush on the drill and some metal polish - really
I need to spray the internals with chrome paint as I did the fronts, but that is a job for tomorrow.
Tomorrow off to Tuthills to collect another box of goodies.


Ian
Posted: Fri Apr 17, 2009 12:11 pm
by ross.mcw
Great stuff Ian - very inspiring!
Posted: Fri Apr 17, 2009 10:41 pm
by Highfield
I finished off the rear indicator refurb this evening.
Used a wire brush on the drill to remove the flaky paint and chrome to leave nice clean alloy.


Primed with grey (plugged the bulb holders with newspaper) and then top coat with 'Chrome' paint.


All ready for the new gaskets that I collected today from Tuthills. Also included are the fuel funnel and foam gasket plus other small seals.
Ian
Posted: Fri Apr 24, 2009 4:31 pm
by Highfield
The end is in sight for the wheel arches.
The rear inner fender area has been done in black stone chip :-

I then fitted the new indicator housing rubbers (not as simple to get them to stay put as at first thought - used a little glue in the end) and then popped them back in, front and rear.


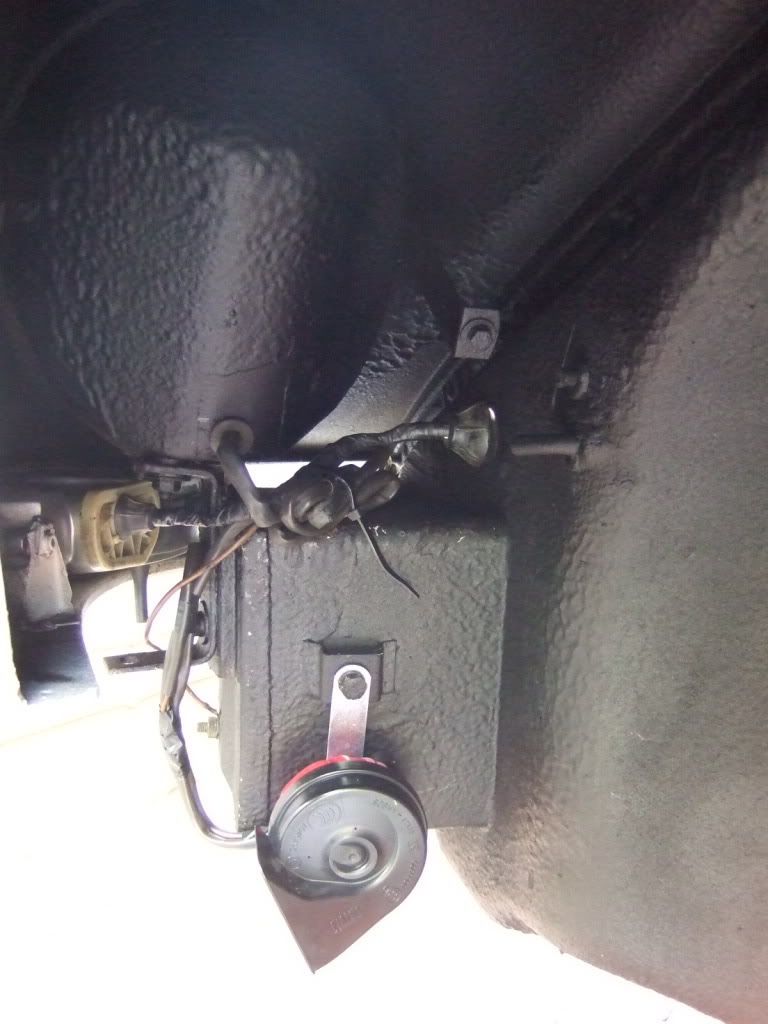
Next it was the horn grills :-

And then the horn - does anyone have a correct Porsche one for sale ?
Ian
Oil Tank Refit
Posted: Mon May 11, 2009 9:25 am
by Highfield
The last things to be refitted to complete the inner wheel arch refurb were the refurbished oil tank and bumper brackets.
The oil tank had gone from this :-
to this :-


courtesy of a chemical clean and powder coat at Redditch Shotblasting.
I replaced the 'O' ring on the filter housing and the 'cork' gasket under the sender unit, with the nuts and cap being yellow zinc coated.
I also kept the original 'yellow plasticky washers' as these are NLA.
The bumpers will be refitted in due course and will be subject to a separate article.
Ian
Posted: Mon May 11, 2009 11:19 pm
by james912
What type of scissor lift have you used? I was thinking of getting one. Do you find it sturdy enough?
The car looks great btw and a great job on the arches. Something I need to complete on mine, hence the question about the lift.
Cheers
James
Posted: Tue May 12, 2009 7:02 am
by hot66
nice tank ... you realise that's the rare '73 only tank too

Posted: Tue May 12, 2009 7:22 am
by Classic
I think you'll have to get a chalking gun and do the same for the cover on the rear lights, as the seals are not sold separately.
Posted: Tue May 12, 2009 10:11 pm
by Highfield
The Scissor lift is a Clarke Strong Arm from Ebay.
James - wasn't aware it was a one year only but it is original and strong and looks great now.
Sorry but I don't get the chalking quote - which seals are NLA?
Ian
Posted: Tue May 12, 2009 11:07 pm
by Classic
On the rear light housing, where the wires protrude there was/ is a gasket i think you'll find that you can't purchase it by itself, or at least i did.t
Posted: Tue May 12, 2009 11:51 pm
by Dakota
Hi
did you make very sure there was no debris at all in the oil tank as they are buggers to get clean, its very important to make certain its clean, don't assume the guys that refinished it did , keep up the good work, Bill