Targa Backdate and Restoration - Completed !

Ongoing and archived Porsche (and other marques) restoration threads from DDK members

Moderator: Bootsy

Post Reply
impmad2000
I need to get out more!
Posts: 3359
Joined: Fri Nov 14, 2003 8:31 am
Location: Leicester, a convenient mid point !
Contact:

Targa Backdate and Restoration - Completed !

Post by impmad2000 »

After a nearly a year not going anywhere, my Targa project has taken a massive step forward. At the hands of DDK's very own Barry, I now have a very solid Backdated Targa shell :)
Here's an overview of the work that has been needed on a what appeared to be a good condition early galvanised RHD Targa shell. Which to my relief, turned out to be at least straight !
With this sort rust around the rear cross member, both rear wings were removed
Image
Only to find that this was the right decision !! The boot release cable had been a platform for the mud to collect with the inevitable consequences...
Image
Generally though the rusty bits were quite limited and cutting back didn't need to go too far. Typically like this.
Image
All still good an clean inside the box sections :)
Image
Image
Image
The base of the targa bar had just started to weaken, and was cut out and replaced with hand made panels. Where there was rust , the metal was cut out and new fitted.
Image
Some typical IB rust trap areas!
Image

Image
But going backdate, the bumper mounts were removed and flattened off and a new (recovered) slam panel was fitted.
Image
and the wing top areas were given the cut out and let in procedure. The Offside needing significantly more work !!
Image
Pleasing result eh ! 8)
Image
The offside opened up for all to see
Image
Not too bad as it turned out. I'd been prepared for new inner and outer silll, and a whole new jacking point and reinforcing plate.... Only the reinforcing plate was used in the end, along with a genuine 993 sill and a replacement kidney bowl
Image
The 993 sill did require the depressions taking out first though !
Image
The bottom of the inner wheel arch
Image
given the treatment
Image
As was the B post lock area
Image
Image
and where it joins top the sill.
Image
Image
and the near side boot release...
Image
Image
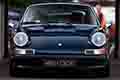
Like the door fit too :P
Image
And on christmas eve, this is how it left to go to the paintshop.
Image
Many thanks to Barry. I cannot speak too highly of the work and skill devoted to getting another 911 back on the road.
Last edited by impmad2000 on Wed Jul 07, 2010 2:04 pm, edited 18 times in total.
Tim Bennett
RHD Targa 2.2T EFI, Triumph ITB's, EDIS and Megasquirt.
"Old enough to know what's right and young enough not to choose it"
#1153
Gary71
Nurse, I think I need some assistance
Posts: 10703
Joined: Wed Mar 31, 2004 1:27 pm
Location: Cheshire
Contact:

Post by Gary71 »

Nice one Tim :)

Excellent work as usual Barry 8)

Be good to see it back on the road soon :) What colour are you going for?
impmad2000
I need to get out more!
Posts: 3359
Joined: Fri Nov 14, 2003 8:31 am
Location: Leicester, a convenient mid point !
Contact:

Post by impmad2000 »

It's going to be black... with lots of chrome 8)
Tim
Tim Bennett
RHD Targa 2.2T EFI, Triumph ITB's, EDIS and Megasquirt.
"Old enough to know what's right and young enough not to choose it"
#1153
GP911
Married to the DDK
Posts: 258
Joined: Mon Sep 04, 2006 8:07 pm
Location: North Wales.

Post by GP911 »

Great stuff. Great job.
3.2 Carrera.
User avatar
hot66
Moderator
Posts: 19195
Joined: Tue Nov 11, 2003 4:17 pm
Location: North Yorkshire

Post by hot66 »

looking good Tim 8) Last time I saw you in a Porsche was the old Targa @ Cadwell :)

Barry, your work is outstanding as usual 8)
James

1973 911 2.4S
1993 964 C2
2010 987 Spyder

1963 Honda C100 Supercub

Its not how fast you go, but how you go fast ;)
Barry
Nurse, I think I need some assistance
Posts: 4322
Joined: Tue Aug 24, 2004 8:50 pm
Location: East Sussex

Post by Barry »

Thank you Tim: it was great working on the car :) .

Hope you don't mind, but dug some pics that 'resolve' two of the problem areas you illustrated above.

Thanks for the comments (as always) chaps!

N/S rear inner wing area after completion, you can just see the very end of crossmember with a new section let in. The haze over the metal is POR Metal Ready. This etches into the metal, and protects it until the etch primer proper is applied. The English Wheel was putting some crown in the rear-most repair, basically the area that sits behind the CDI box, some 5x14 inches.

Image

N/SF Inner wing:

Image

Finally, the N/S/R inner wing repair in:

Image
DDK Member1243 07741 273865. Home of the RY Austin 7 Trophy's and Austin Single Seat Racers
Gilbert '71 T
I luv DDK!
Posts: 894
Joined: Sun Oct 03, 2004 9:12 am
Location: N London

Post by Gilbert '71 T »

Now that looks great Tim, and of course super work as always from Captain Resto, Barry :salute: .

Nice colour choice too 8) Ready for the Highlands run?
Darren
71 911T with C3 motor
Ian Gunney
DDK 1st, 2nd and 3rd for me!
Posts: 2327
Joined: Thu Nov 13, 2003 7:42 am
Location: Cardiff

Post by Ian Gunney »

A nice way to end the year - good to see progress Tim. 8)

Barry if you get bored at all, you can always pop down to Wales to help finish the '14 - since the arrival of my 4 month old little boy, not a lot has happened to it!

Ian
1966 912 Karmann Coupe - polo red.
1972 914/6 GT replica - 2.7 - signal orange.
1961 Standard 217 Tractor.
2003 Boxster S.
1967 Alfa Giulia Sprint GT Veloce.

http://www.redcastleclassics.com
jtparr
DDK 1st, 2nd and 3rd for me!
Posts: 2356
Joined: Mon May 24, 2004 10:54 pm
Location: london/surrey

Post by jtparr »

nice one barry, another car see's the light of day

:cheers: :cheers: :cheers: :cheers:

tim
enjoy the re-building...... :lol: :lol:
impmad2000
I need to get out more!
Posts: 3359
Joined: Fri Nov 14, 2003 8:31 am
Location: Leicester, a convenient mid point !
Contact:

Post by impmad2000 »

I found these, they show the repair to the ends of the rear crossmember better.
Image
Image
Image
Cheers
Tim
Tim Bennett
RHD Targa 2.2T EFI, Triumph ITB's, EDIS and Megasquirt.
"Old enough to know what's right and young enough not to choose it"
#1153
User avatar
Nige
Nurse, I think I need some assistance
Posts: 6681
Joined: Wed Nov 26, 2003 9:11 pm
Location: Denby, Derbyshire

Post by Nige »

Excellent news Tim, good work Barry

Keep the momentum going
Ian Donkin
DDK rules my life!
Posts: 1306
Joined: Wed Sep 29, 2004 9:07 pm
Location: A Southern Northerner

Post by Ian Donkin »

Excellent as always and I'm sure the pictures don't even begin to do the job justice :).

It will be great to see Tim back on the road in a 911 in 2007 8).
2006 RHD 997 Carrera (but DDK remains in my heart - also now no longer)
1972 LHD 2.4T with '73 2.4T CIS motor - gone to a new DDK home
1994 RHD 993 Carrera - gone!
1968 LHD 911L - was the Wife's but now in new hands :-(

#1252
impmad2000
I need to get out more!
Posts: 3359
Joined: Fri Nov 14, 2003 8:31 am
Location: Leicester, a convenient mid point !
Contact:

Post by impmad2000 »

This is an interesting series of photos on the fine art of panel beating...
Image
Image
Image
Image
Image
Image
:cheers: well done Barry ! :cheers:
Tim Bennett
RHD Targa 2.2T EFI, Triumph ITB's, EDIS and Megasquirt.
"Old enough to know what's right and young enough not to choose it"
#1153
fourteener
DDK rules my life!
Posts: 1318
Joined: Mon Aug 15, 2005 6:46 pm
Location: staffs

Post by fourteener »

Barry do you use shrinking/stretching jaws for the flanged piece?
I love seeing these kind of 'black-arts' repairs
Barry
Nurse, I think I need some assistance
Posts: 4322
Joined: Tue Aug 24, 2004 8:50 pm
Location: East Sussex

Post by Barry »

Actually I've not got either a shrinker or stretcher (although I've just ordered a small shrinker to save time in the future), so everything's formed by hand.

I go on the basis that they didn't use shrinkers or stretchers years ago, and I've got similar hand tools to those that would have been available 50-70 years ago. Therefore the only missing bit is the skill :roll: . The basic principle for all of this sort of thing (heavily shaped, small repairs). Paper or card pattern, rough out in steel (1st picture), tidy up by beating upon something with correct shape held in vise (2nd / 3rd pictures), weld in, linish up and home for tea and toast :) .

I have to say though, I did put this bit off for most of the job, until I had thought about how I would do it. There were lots of tricky issues to overcome; getting the panel to end up at the right size, after it had had a lot of shape put into it, the overall shape was compound-curved, and getting the flange to align with the original, and then blend in. The whole thing took a big chunk out of one day: so not a quick thing.
DDK Member1243 07741 273865. Home of the RY Austin 7 Trophy's and Austin Single Seat Racers
Post Reply