

Project Blue Book
Moderators: drummerboytom, MdR
Re: Project Blue Book
Thanks for the encouragement folks. I'm back to plan A, making a rotisserie now, as I realised I could re-purpose some of the parts I've already made as a modular body shell forklift stillage, so massively reduce the work involved, and it should only cost me about another £150 in steel and parts. I've also set up a sub domain to host photos with ftp access for uploading in some existing web space I have. I just need to decide how to reduce the res and upload them now - probably an update to my ancient web design software and a very simple one page site with a photo gallery. Once that's done I'll have run out of excuses for not starting a build thread!
Regards,
RichardJ
1975 California spec 914 1.8 restoration project
RichardJ
1975 California spec 914 1.8 restoration project
Re: Project Blue Book
Latest sightings of Project Blue Book are as follows......dot.....dur......dot.dot...
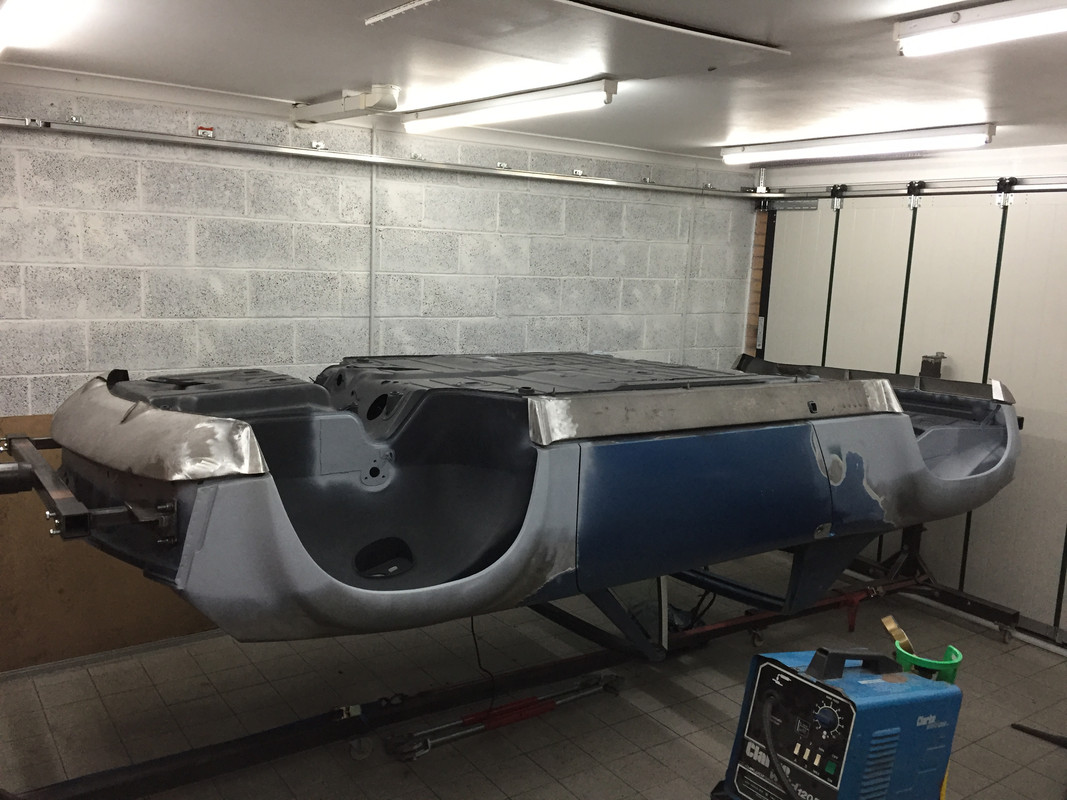
A rumour has surfaced that suggests that Chief is actually putting some paint on the damn thing :o
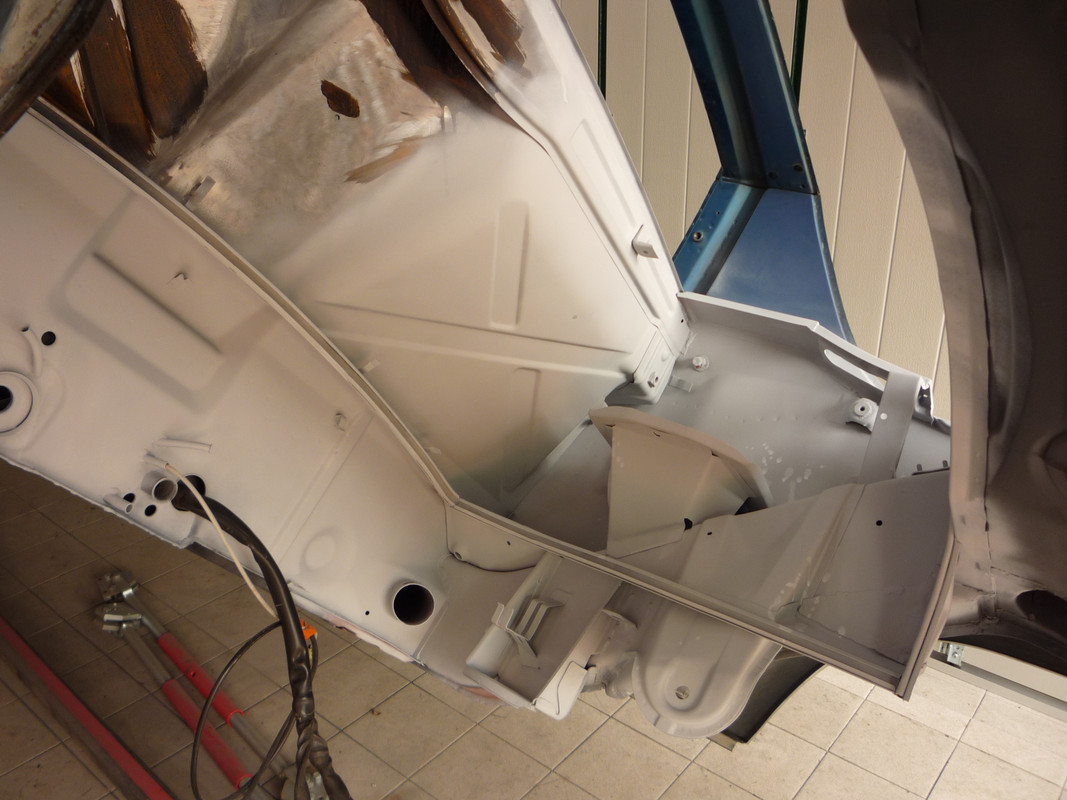
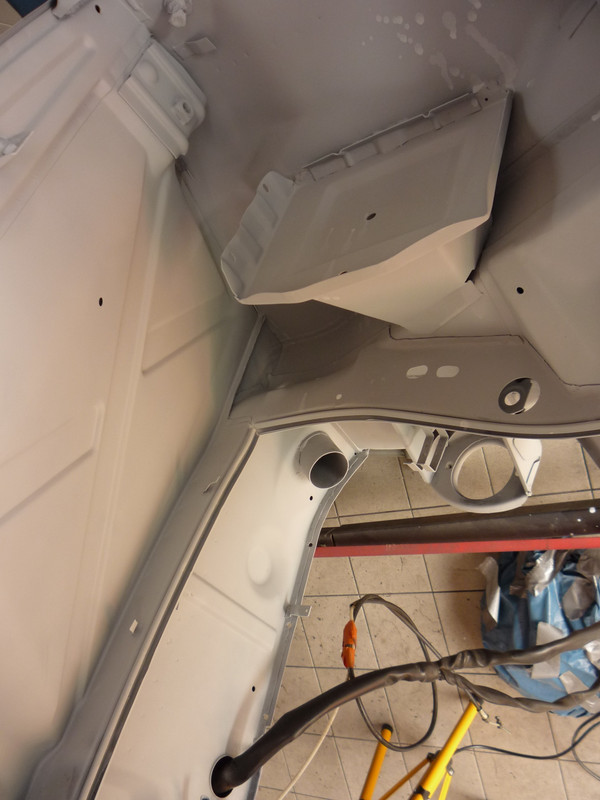
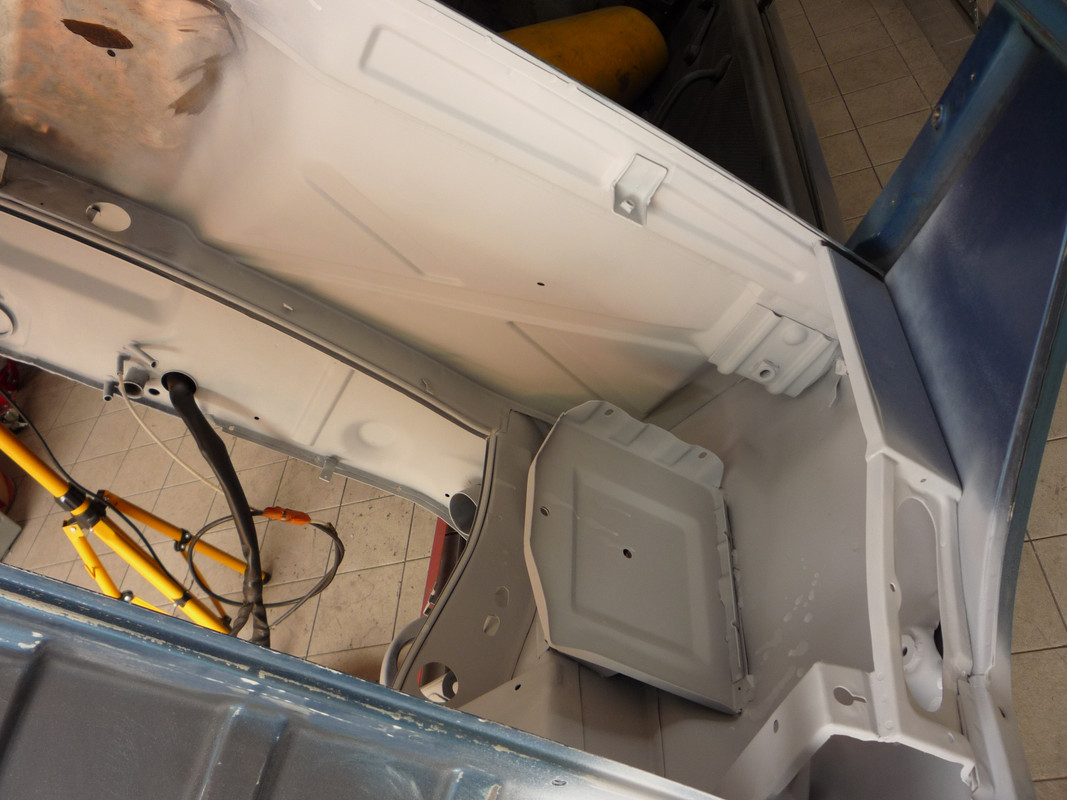

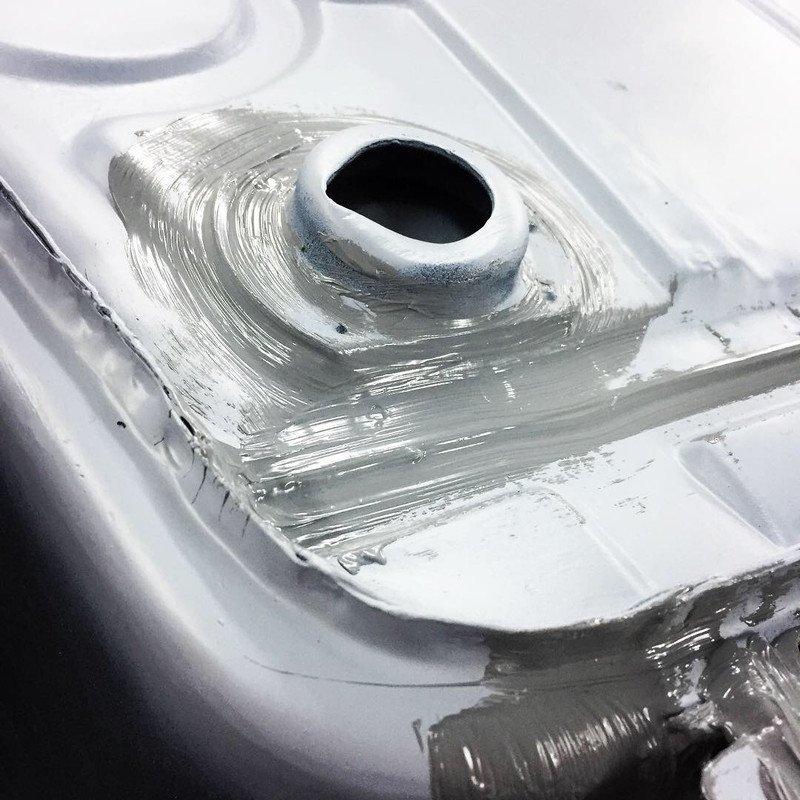
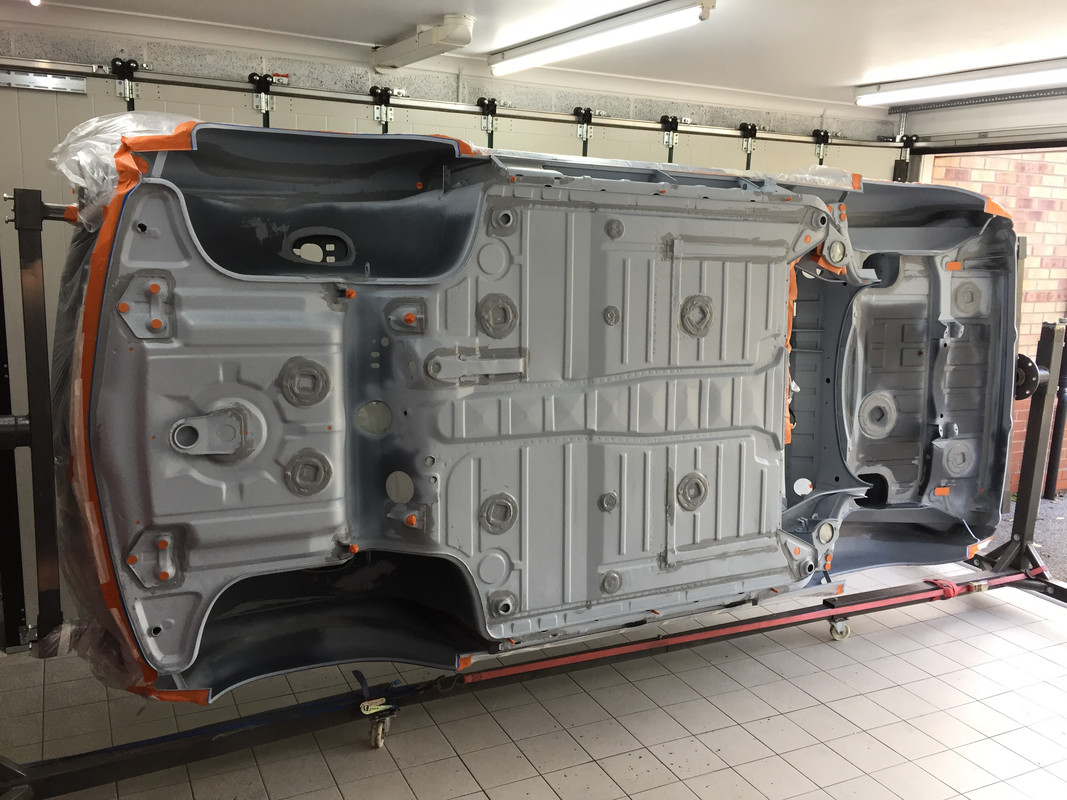
He is apparently breaking the engine bay into two halves to make sure the finish is right. Using Epoxy (not poxy) primer! This is a safer product to use if you need to use filler anywhere. And as the engine bay has had a lot of brackets removed and an awful lot of new tin welded in it's a safe bet it would be needed. He is trying to get the engine bay as nice as the outer body.

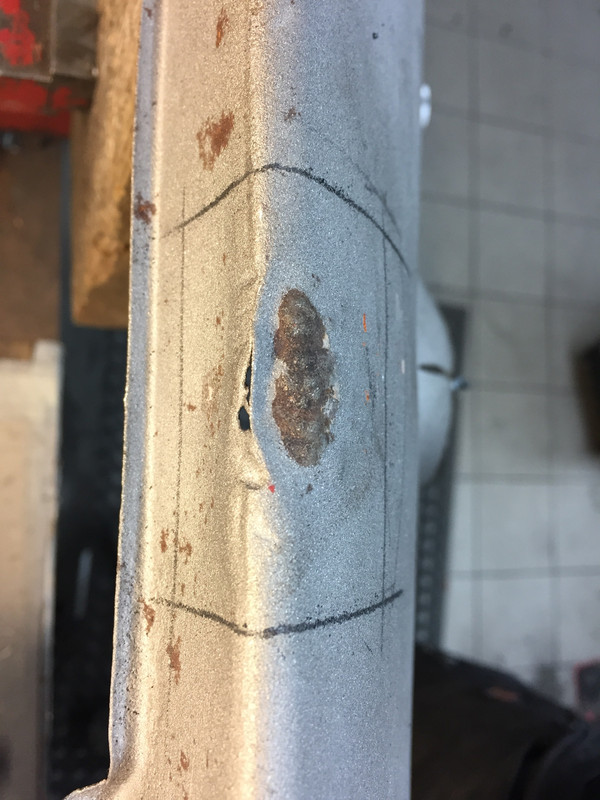
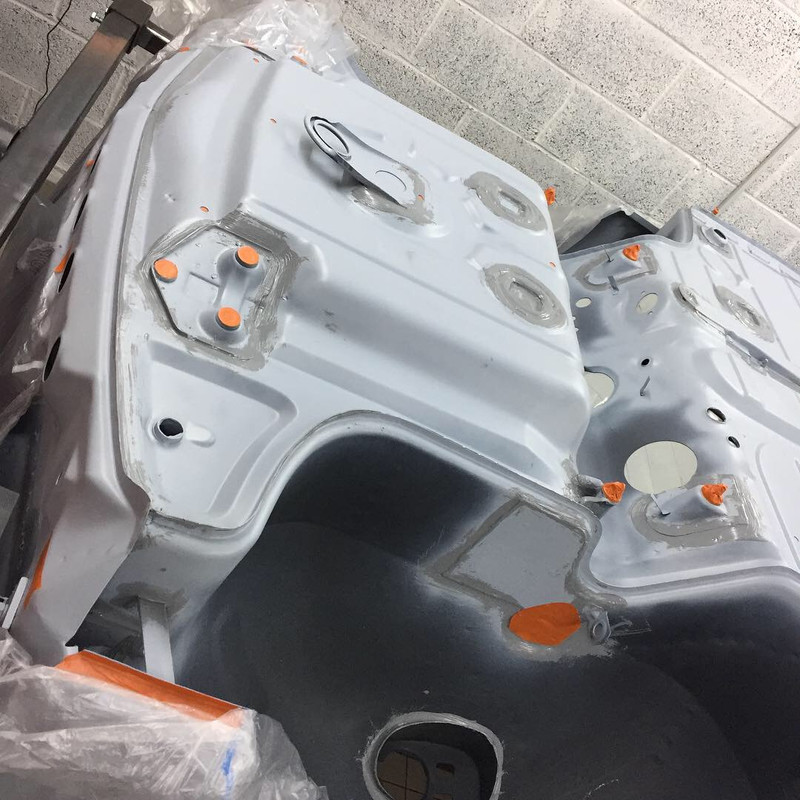
The following spy shots sent in my an anonymous follower seem to show the de-construction then re-construction of some sort of outer body component.
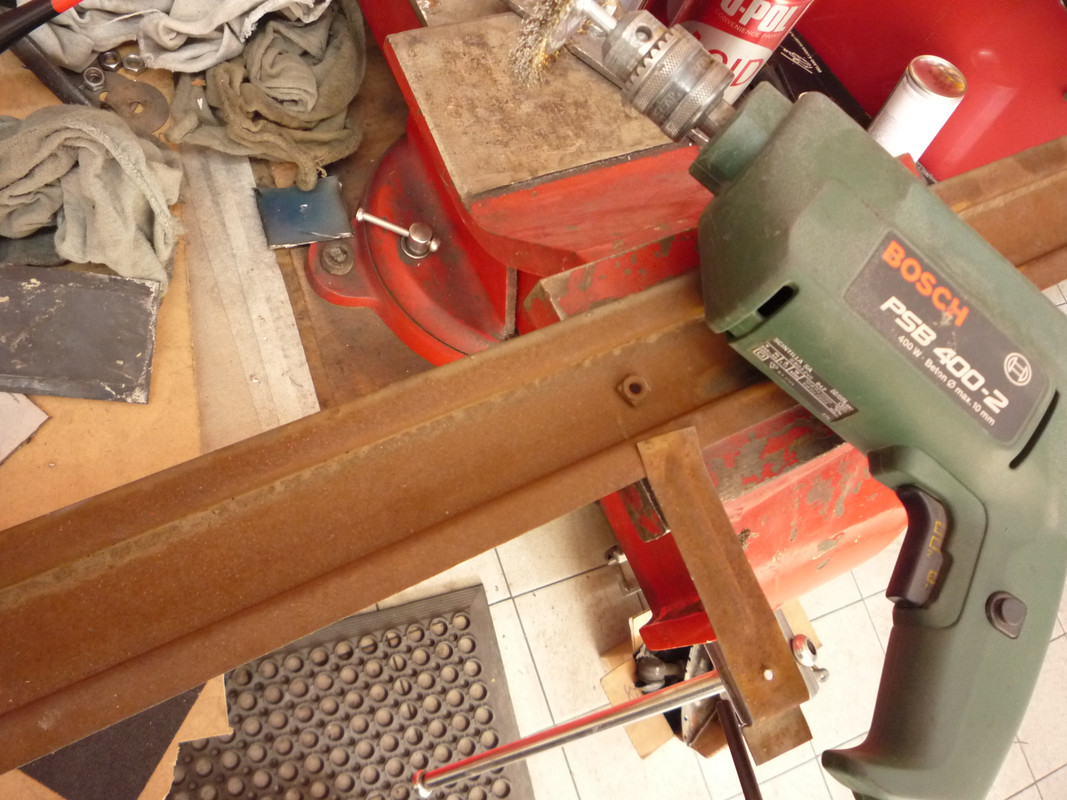
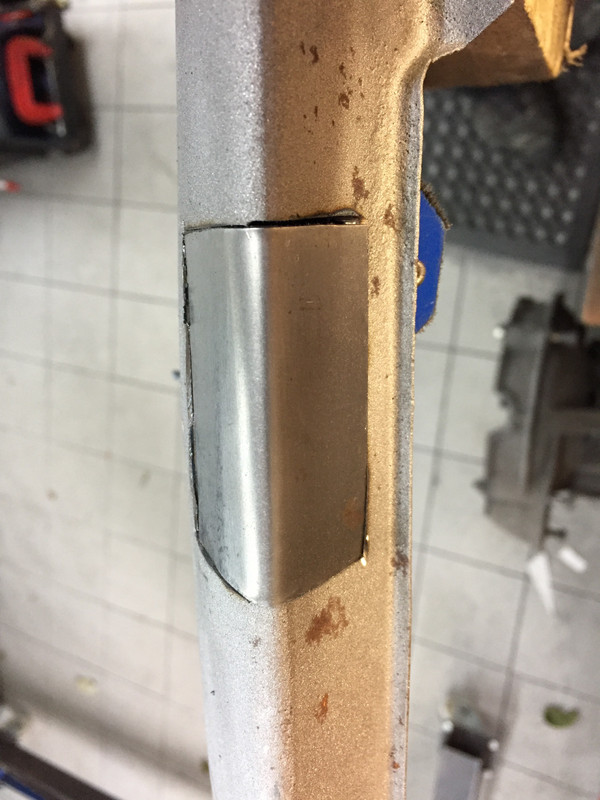
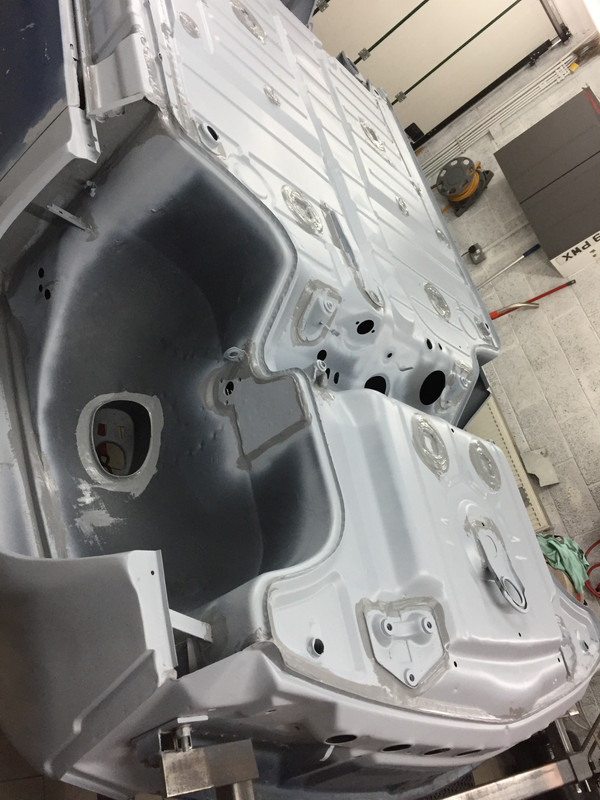
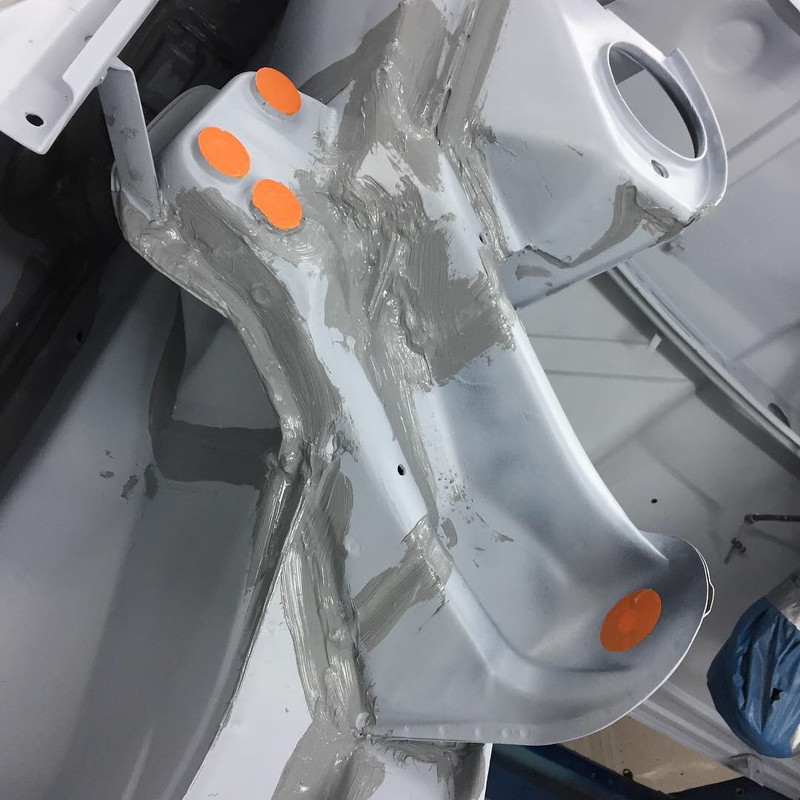
This apparent bracing bar has been cunningly cut off then invisibaly welded back into place by some futuristic process that cannot be determined.....
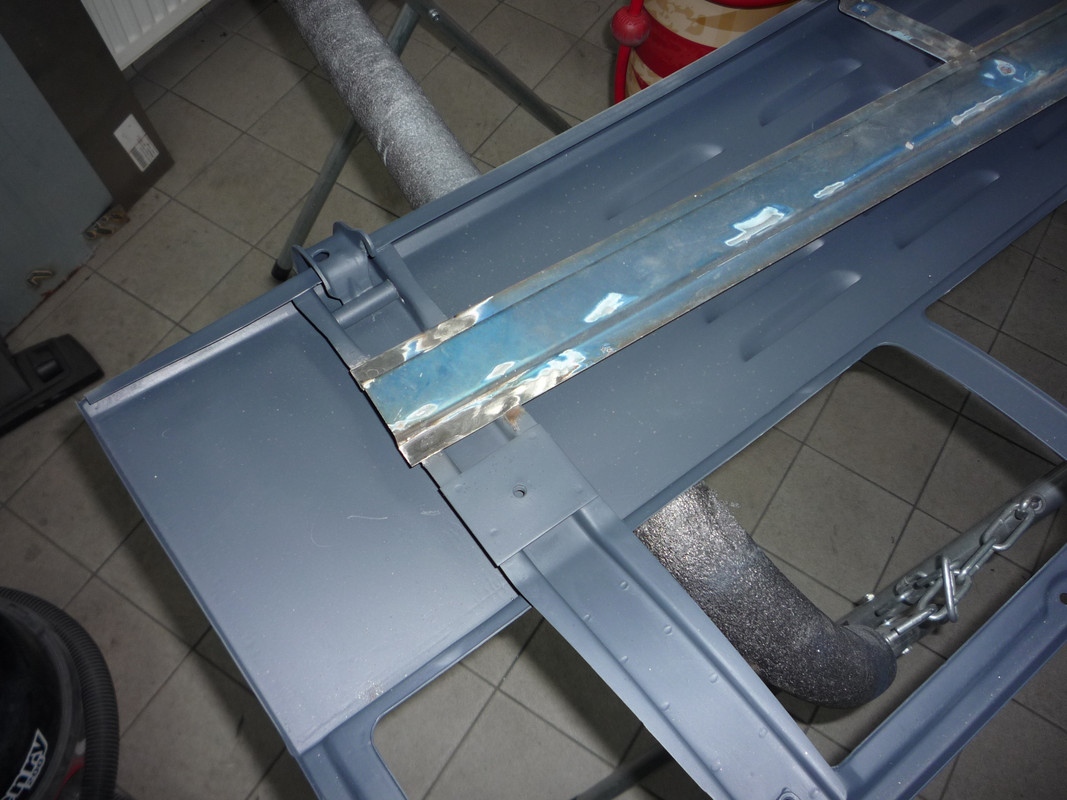
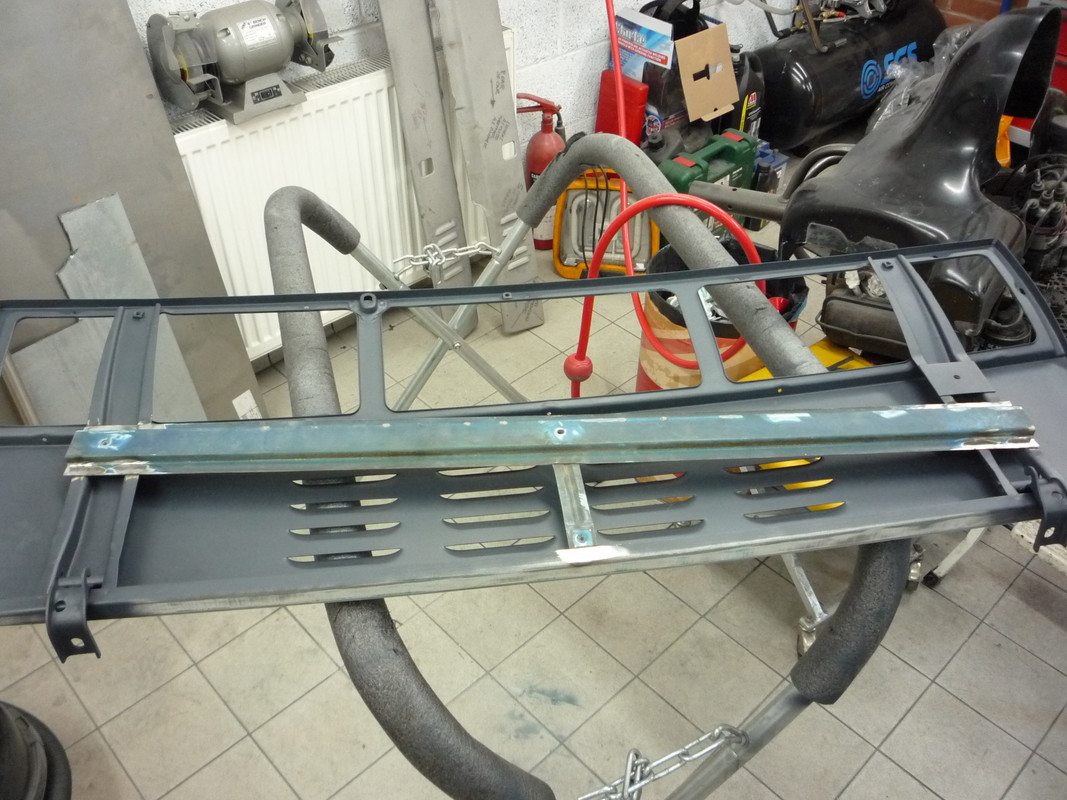

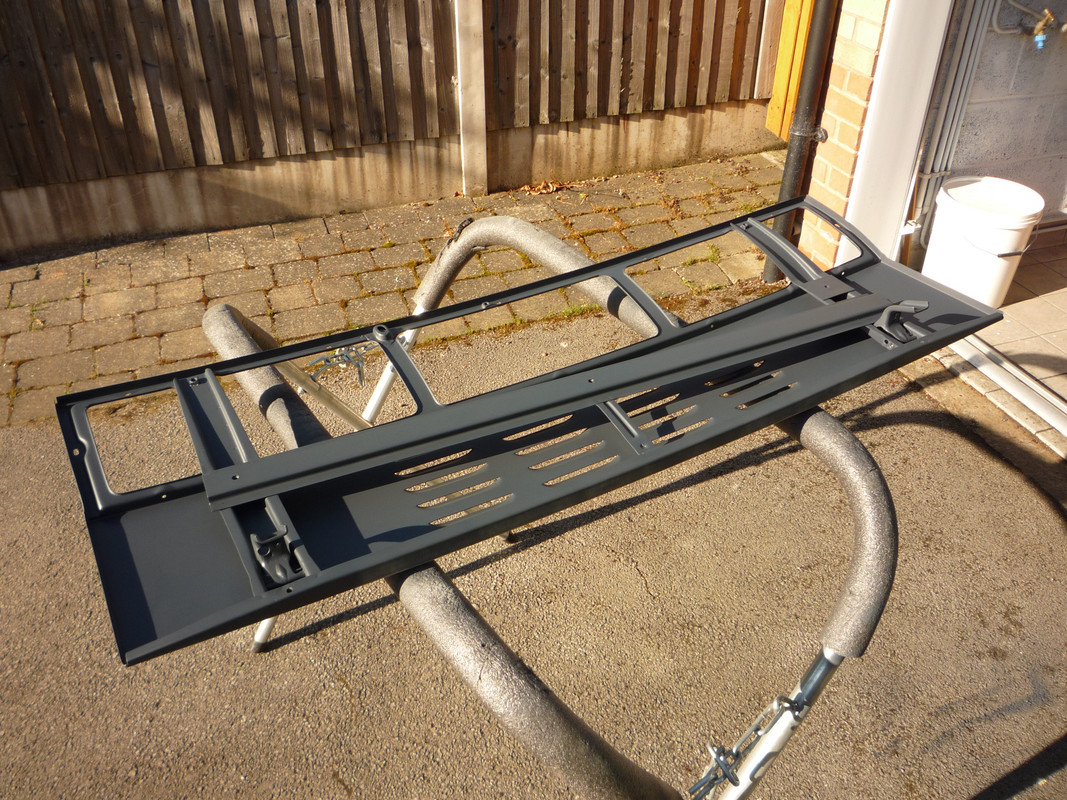
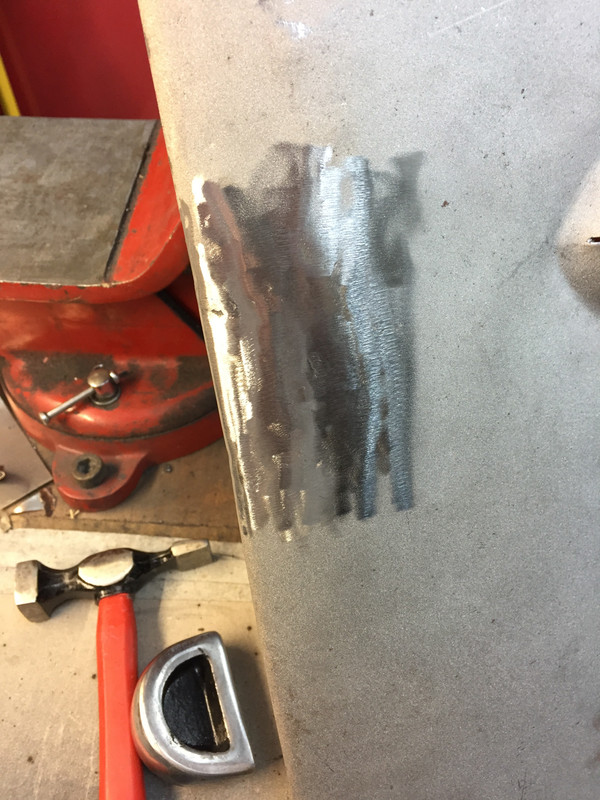
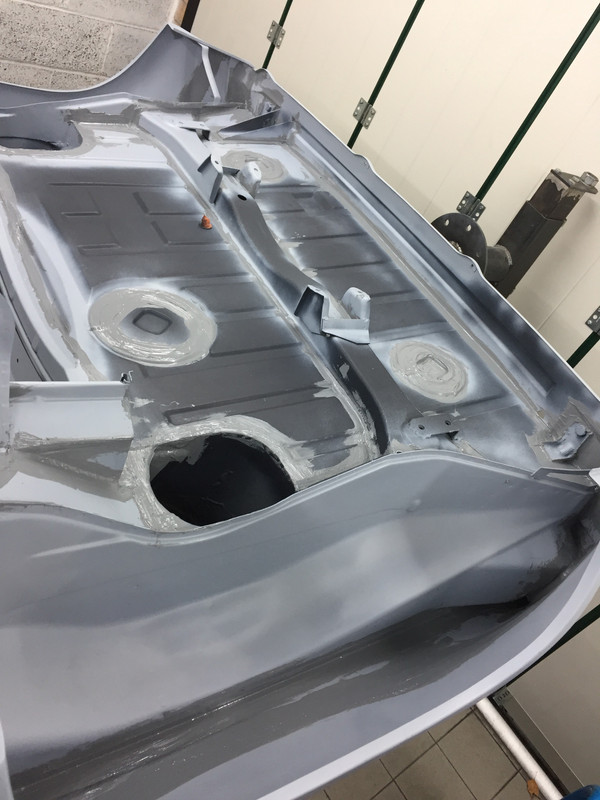
This panel appears to be painted with acid etch primer (darker colour) this works better on bare metal....
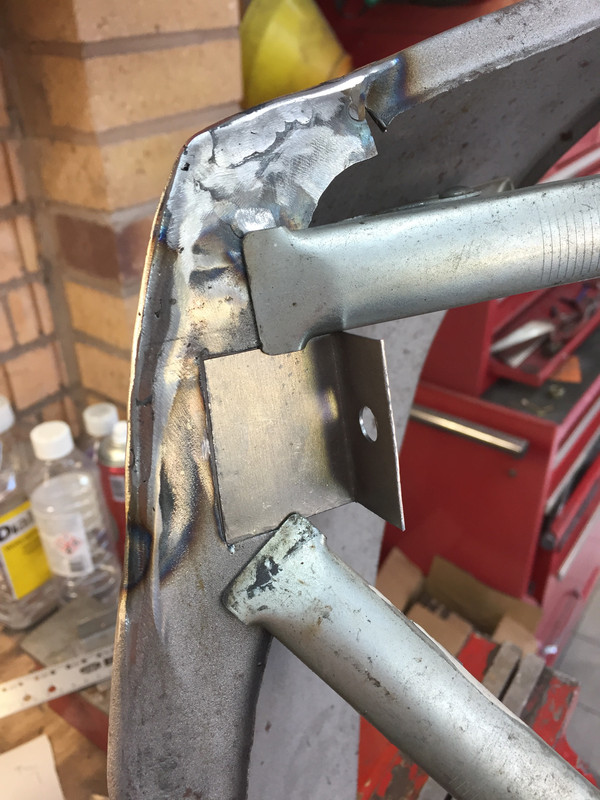
Where all these parts fit is anyone's guess. We're just reporting the facts here folks. Our advise is stay in your homes and draw the curtains!
h'Project Blue Book' - 'The Red Baron' - Amber Alert!
-
Mr Pharmacist
- Me and DDK sitting in a tree! KISSING
- Posts: 2698
- Joined: Wed Oct 17, 2007 6:56 pm
- Location: Leeds
Re: Project Blue Book
I like the lovres in the engine lid!
Very impressive work
Very impressive work
Stuart
1970 914 2056cc
1979 924 n/a - RIP
1986 924S
1969 912 Targa - sold
1970 914 2056cc
1979 924 n/a - RIP
1986 924S
1969 912 Targa - sold
Re: Project Blue Book
Okay gang. Time for the promised update....
Last we left the many and varied hairbrained schemes of our Chief, we had got caught up in a 'War Of The Worlds' theme posting....
Well this time we are just going with the facts.
After putting paint on many of it's underneath body parts it was time to get back to welding and grinding again. The next phase was one I was not looking forward too. This being the side sills and front and rear aprons. There was going to be a lot of measuring, fabrication and head scratching.
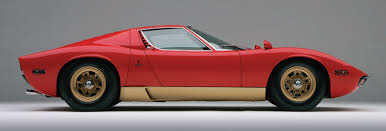
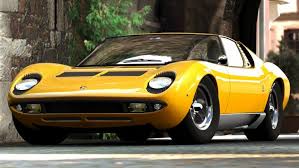
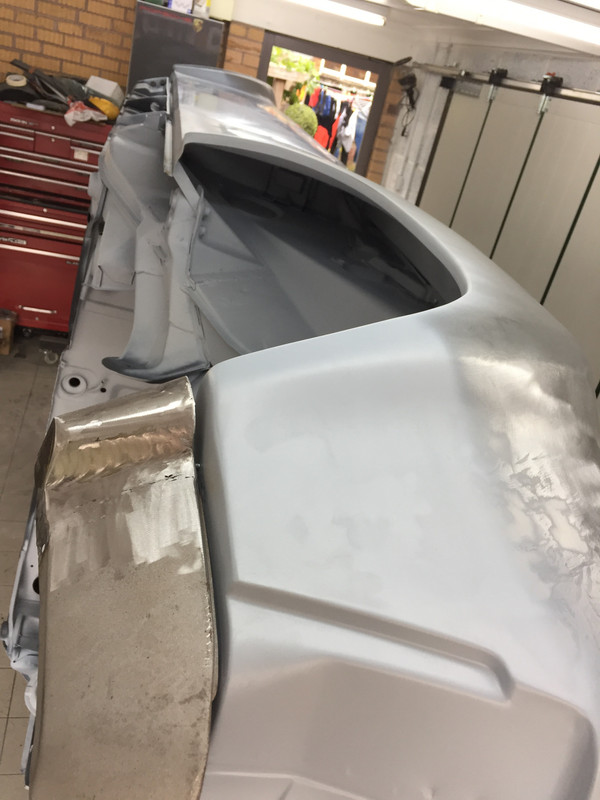
Sooo the 914 has had whopping steel arches fitted, now that is not delicate by any means, however the car is slim waisted much like the famous Lamborghini Muria....
Right, so the key here is not to extend those massive arches into the lower metalwork and make them look bulky.
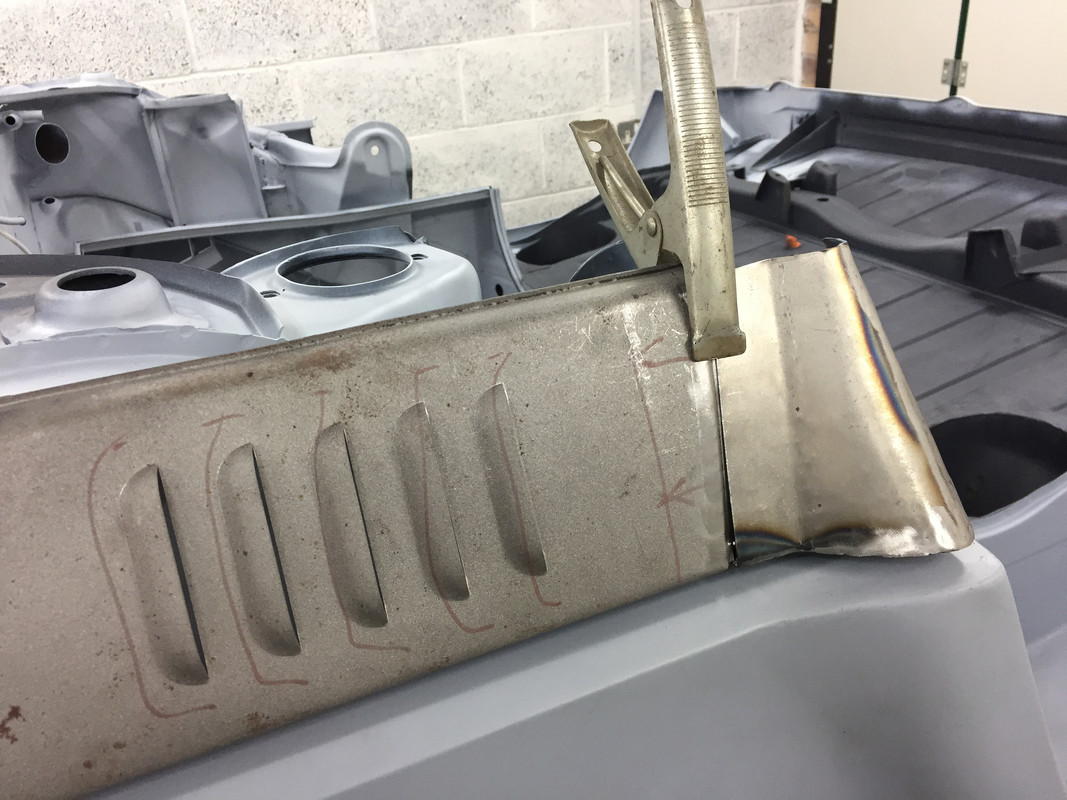
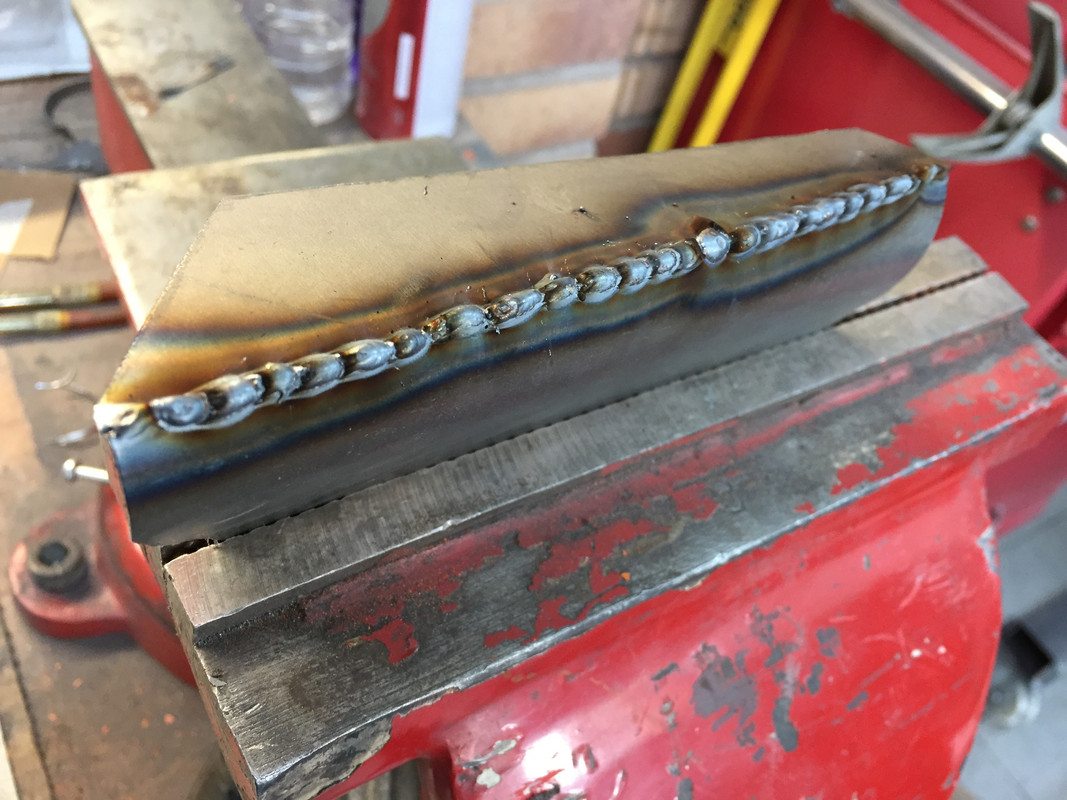
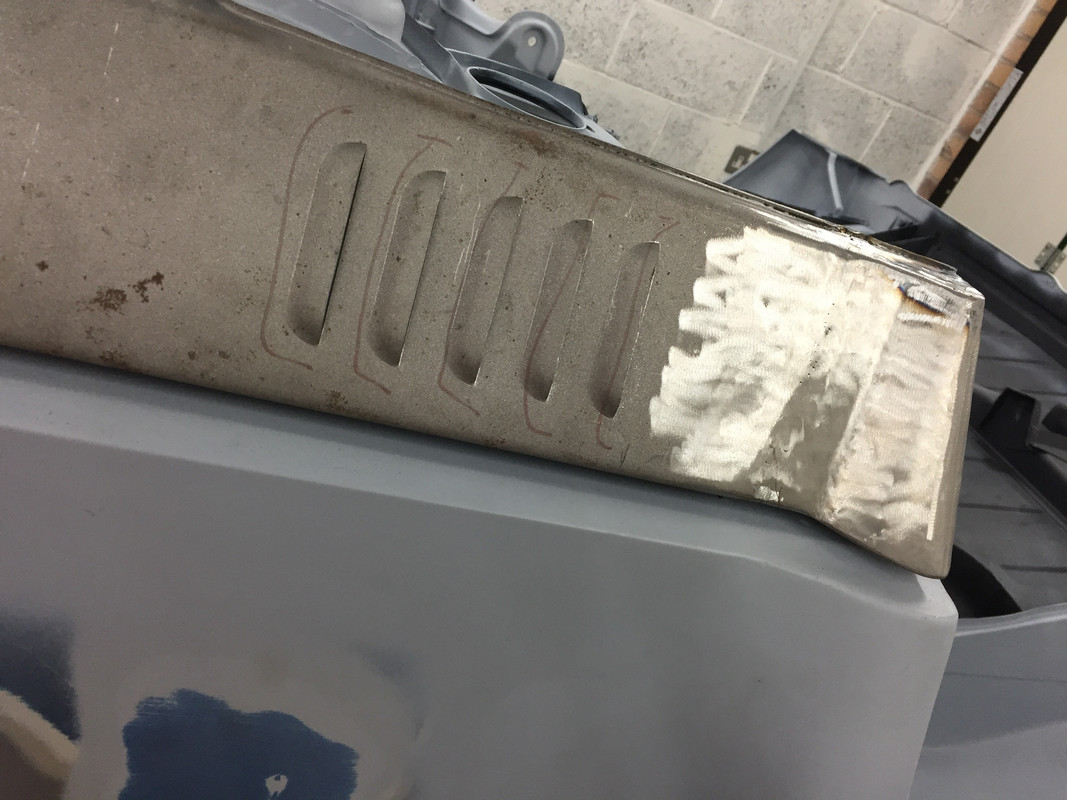
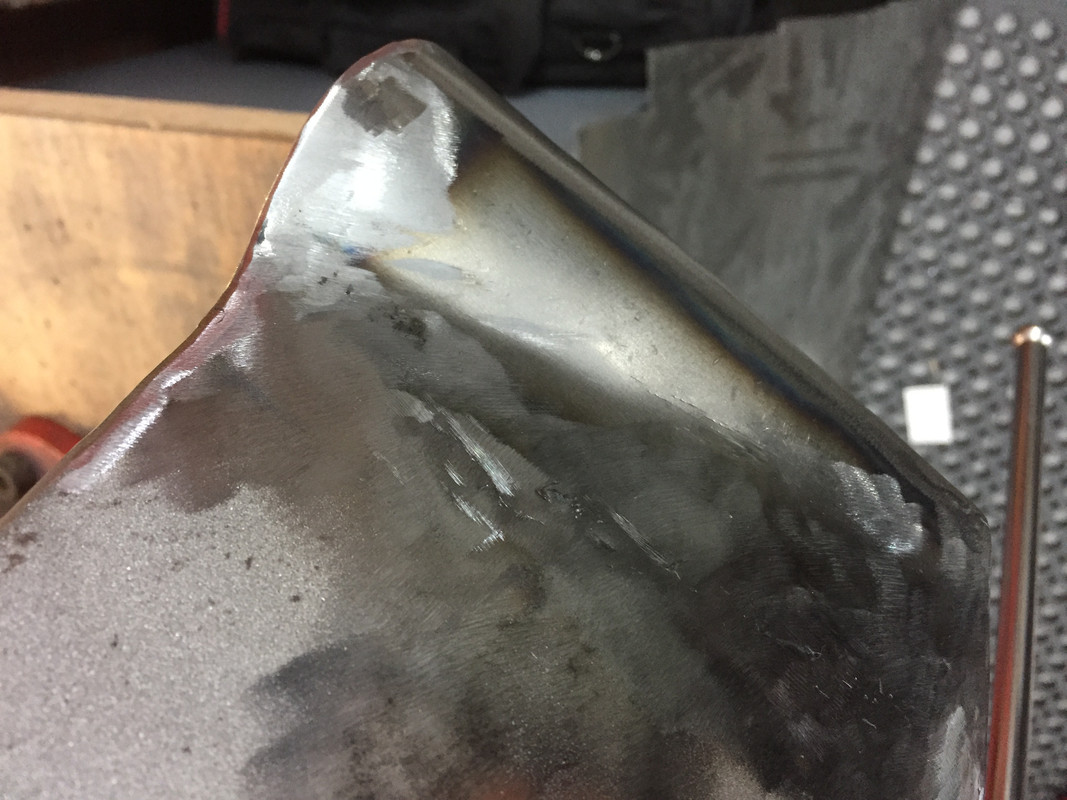
Now the metal sill panel fits against the body at about a 15 degree angle. The arch the extension needs to be at a different angle otherwise the gap from the arch to extension would be huge. This means making up the panel at a jornty angle! I first cut the sill down and pressed a step into the panel to allow me to puddle weld the new piece in place.
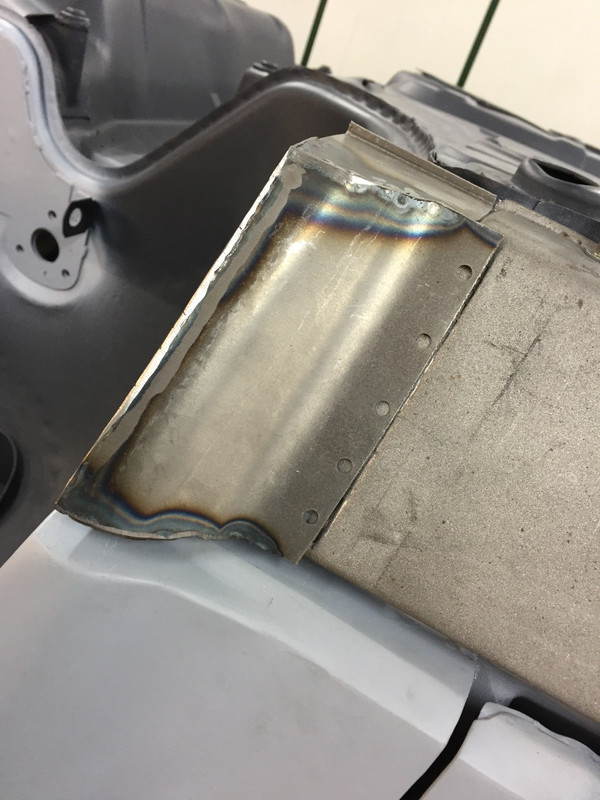
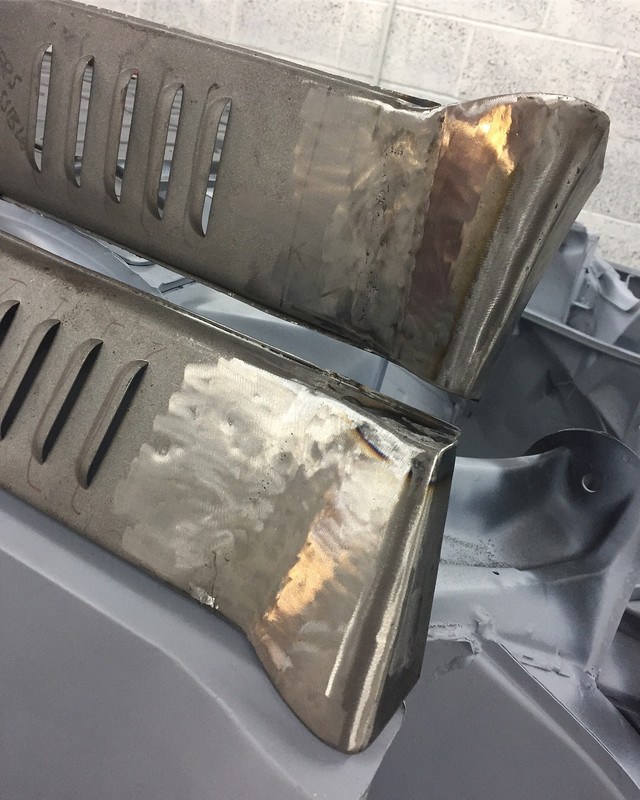
After some more welding and grinding we start to see where I was heading.
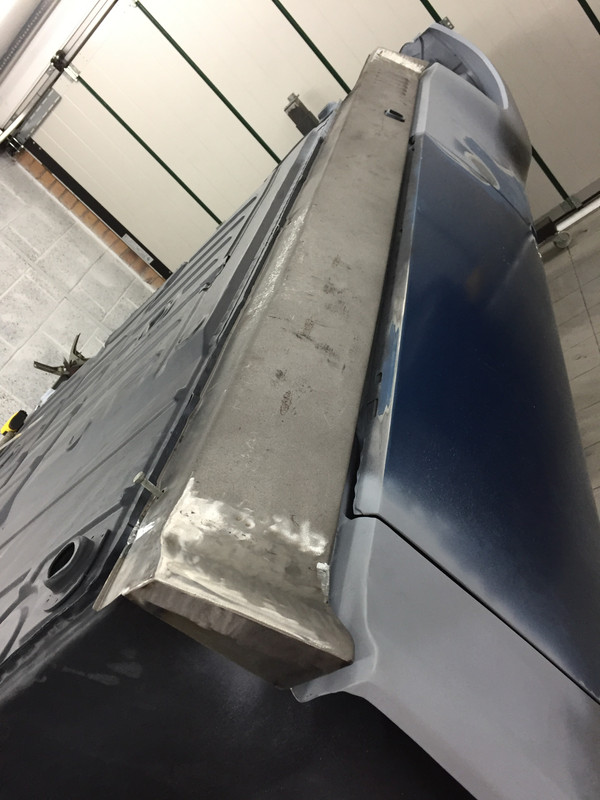
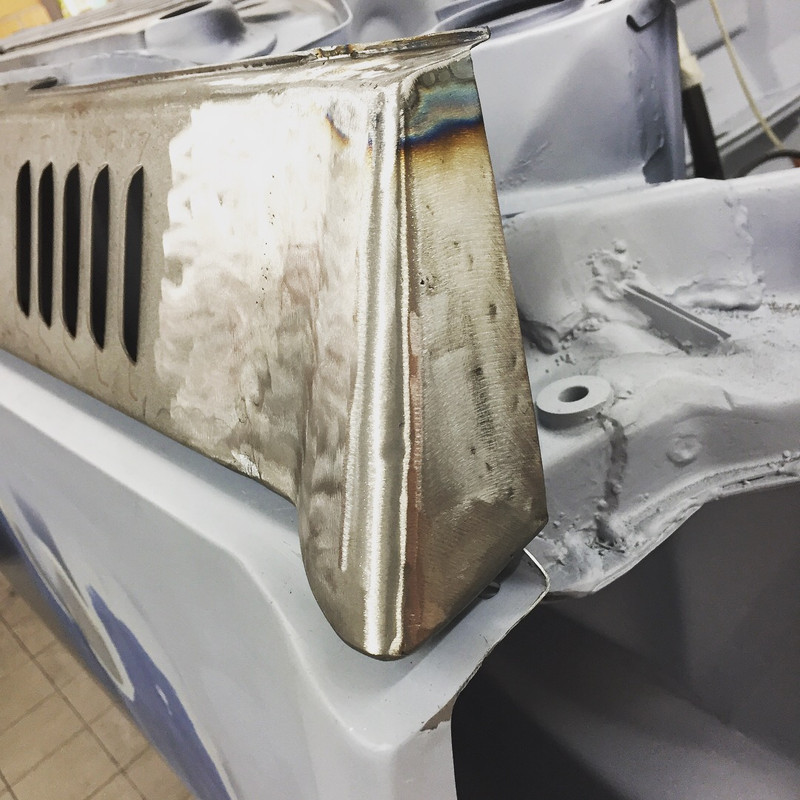
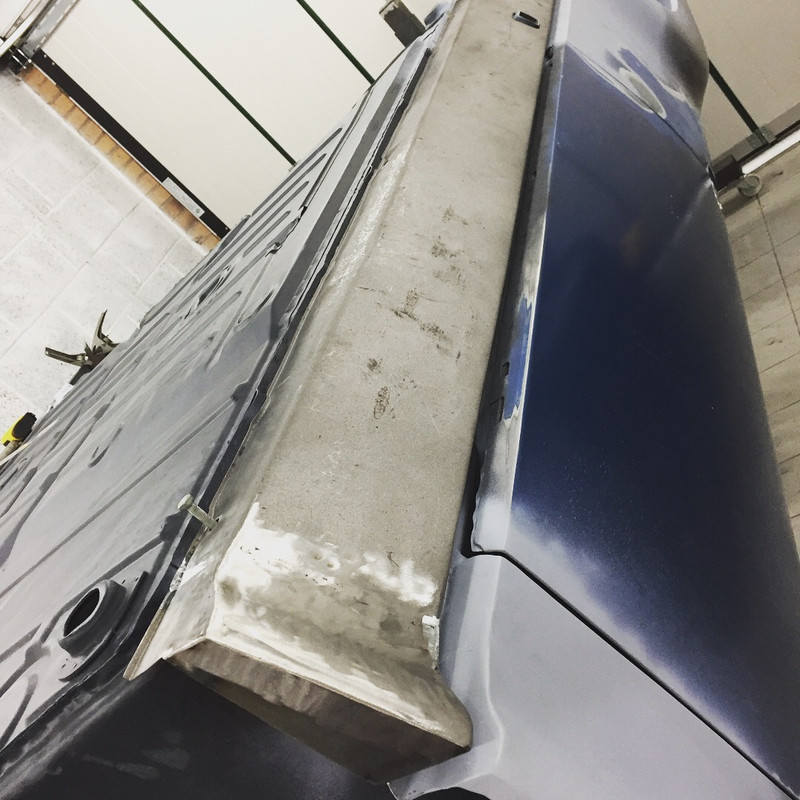
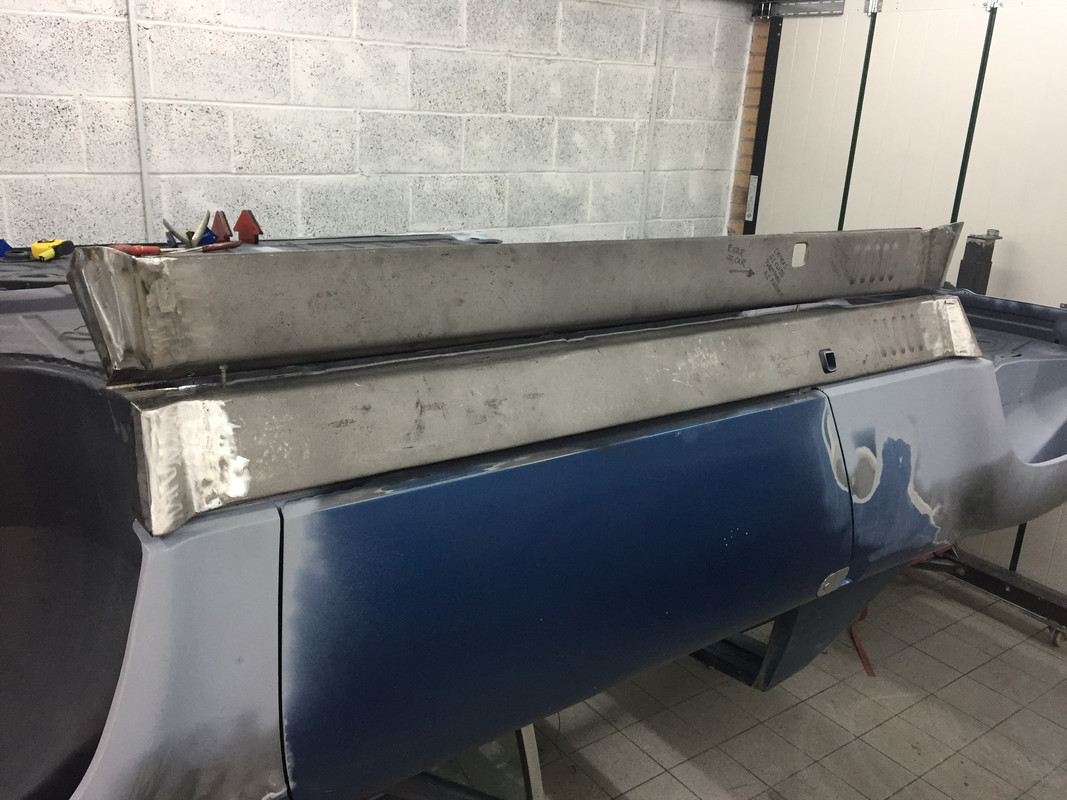
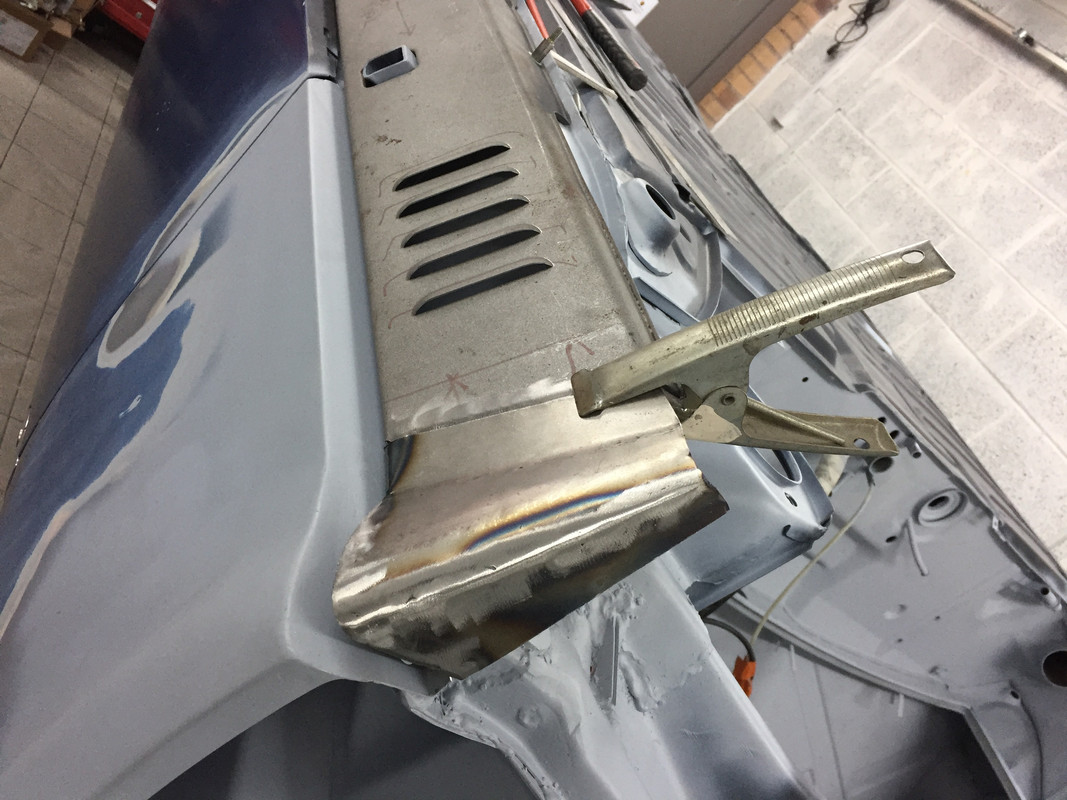
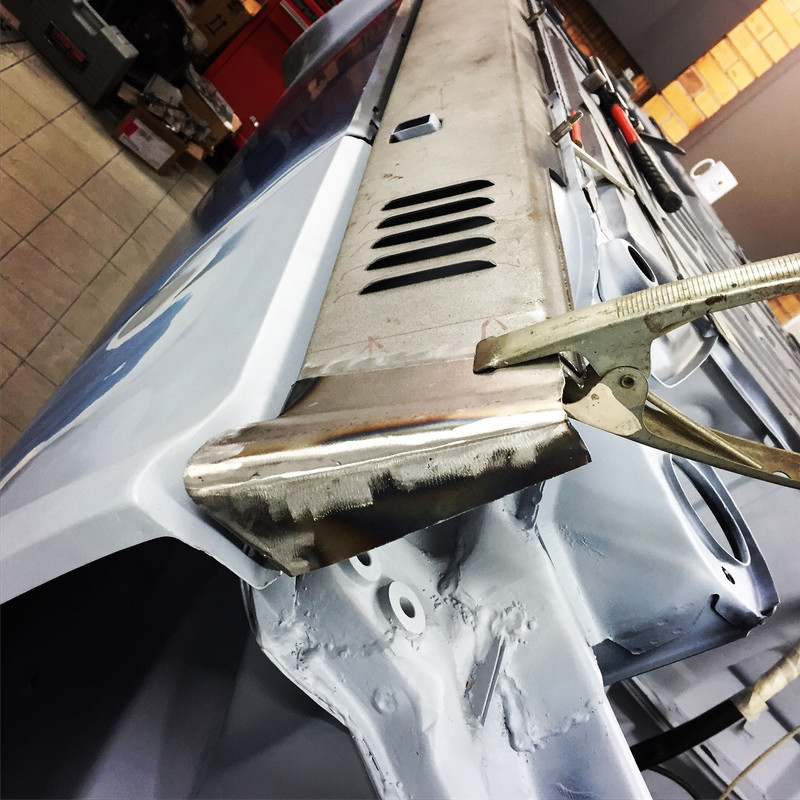
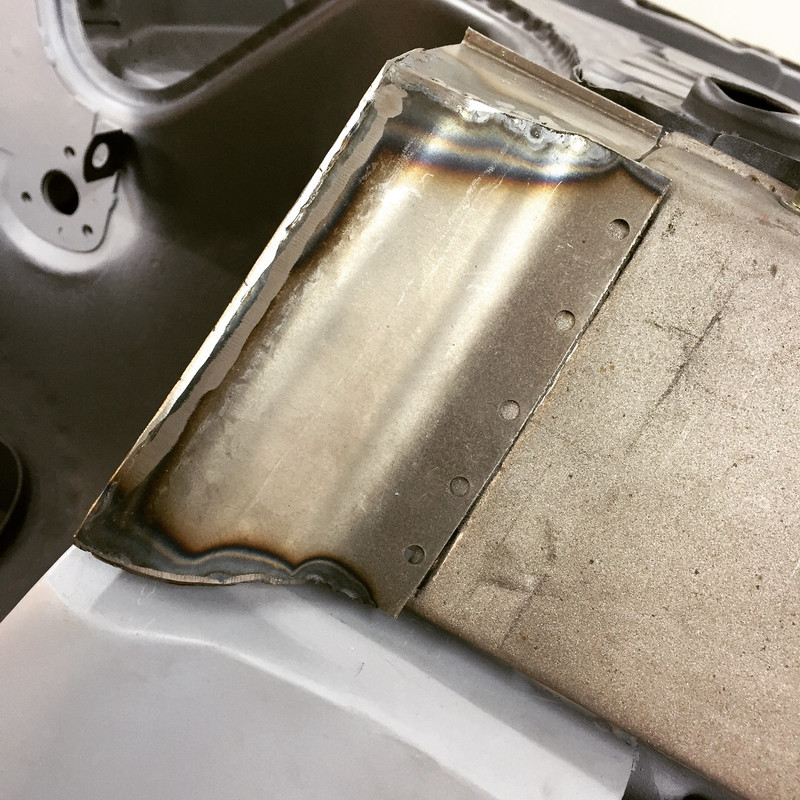
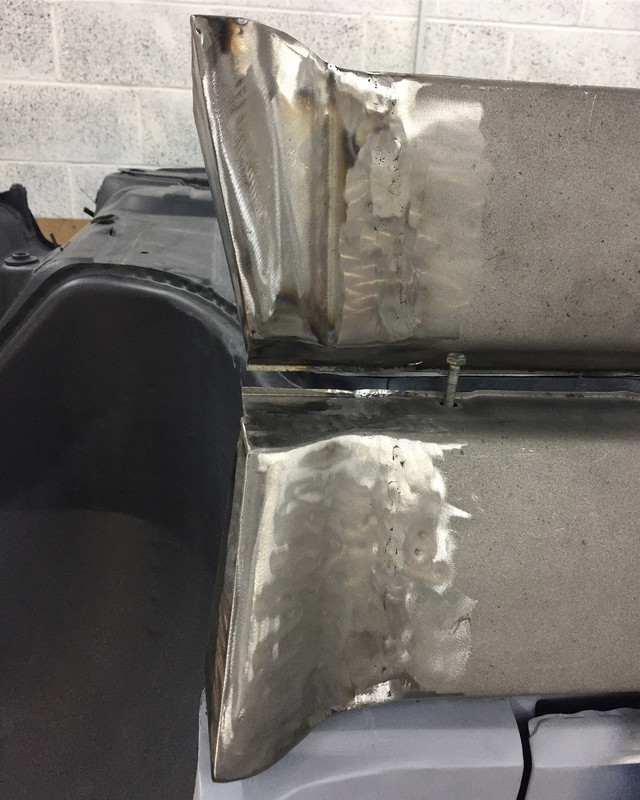
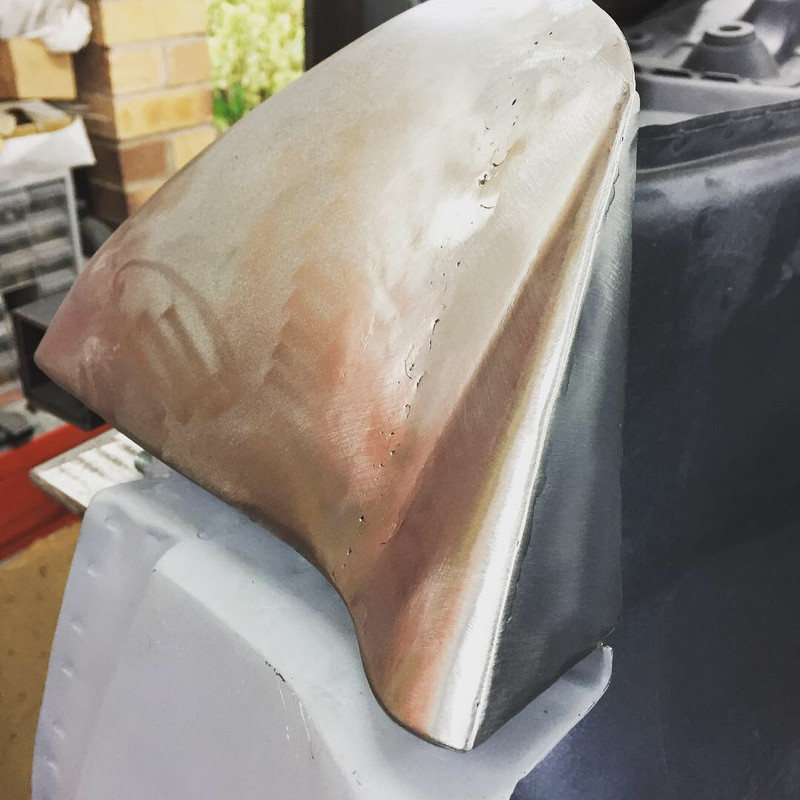
finished one, then had to replicate it for the other side which is seen above.
A few pictures of how I constructed the 'Shoes' as I have taken to calling them.
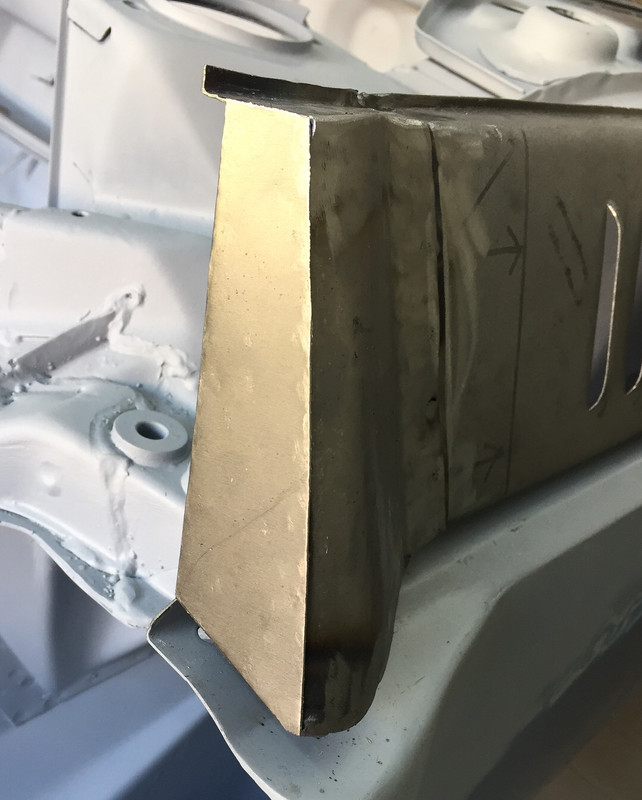
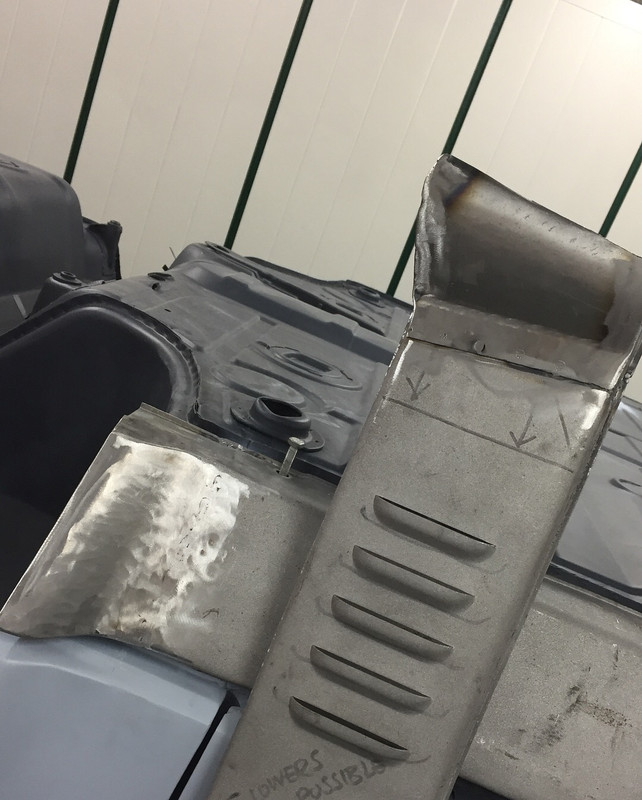
Here you can see the odd angles that have to be created.
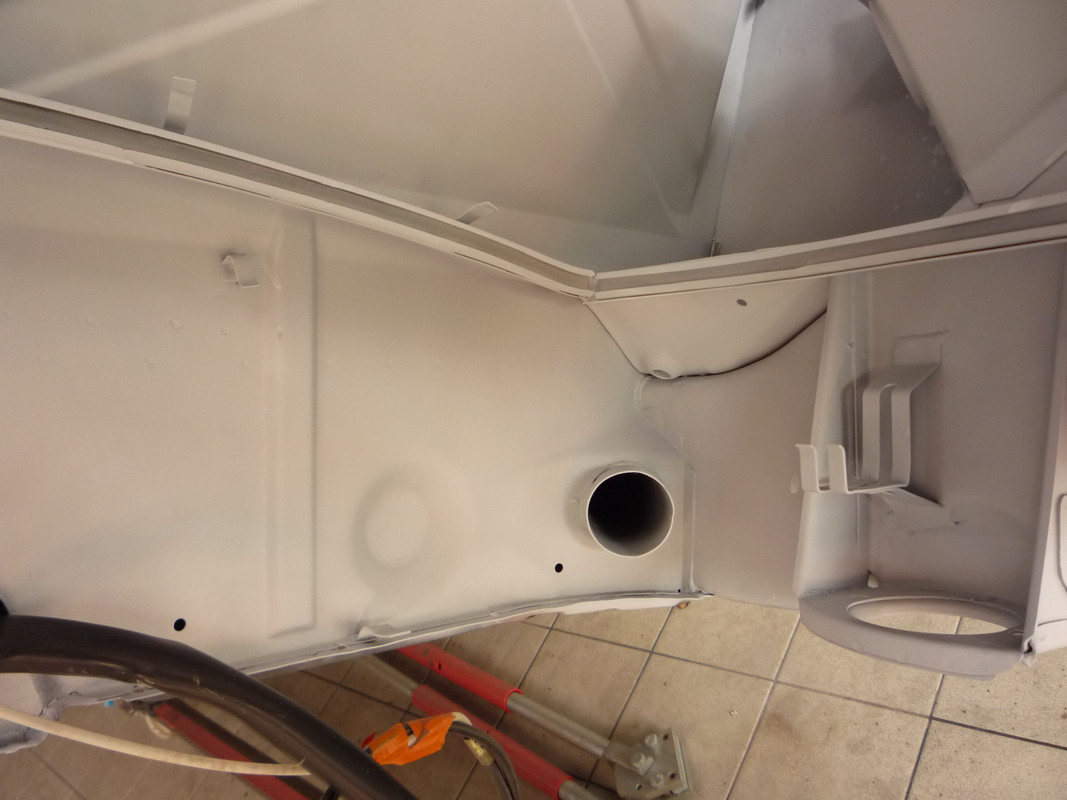
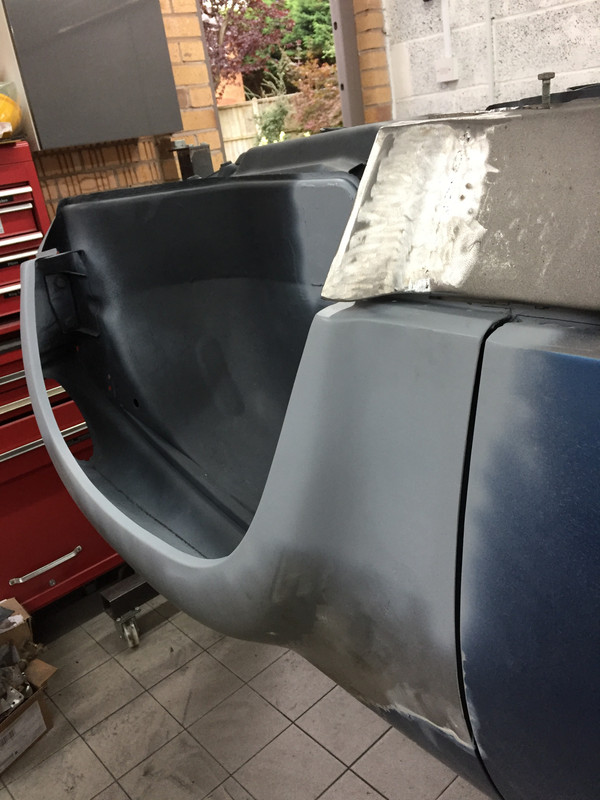
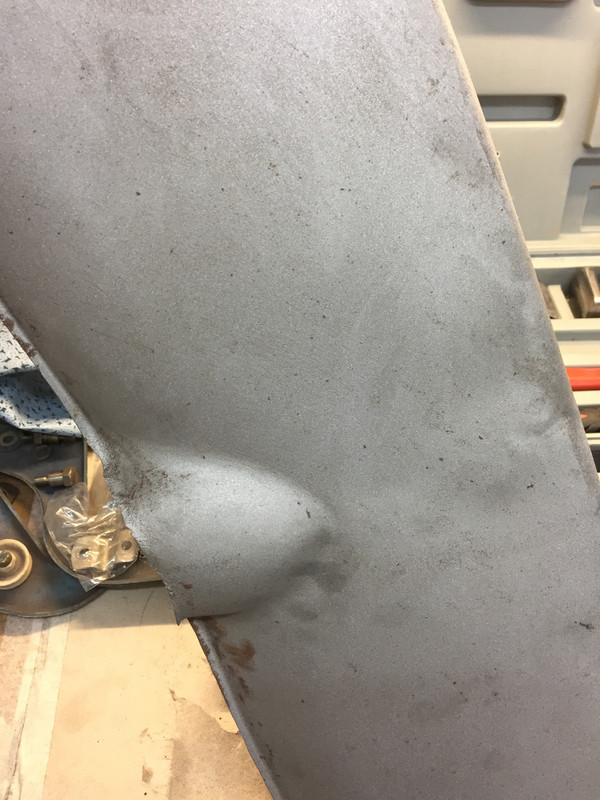
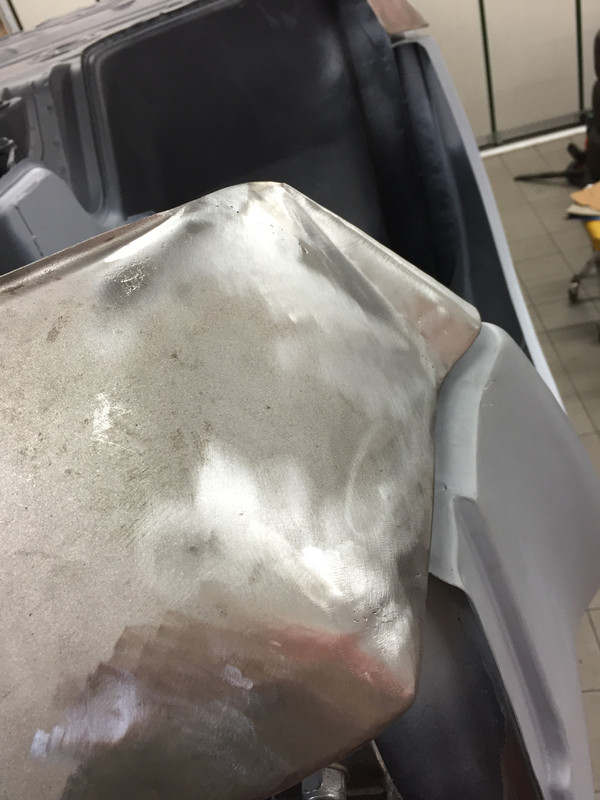
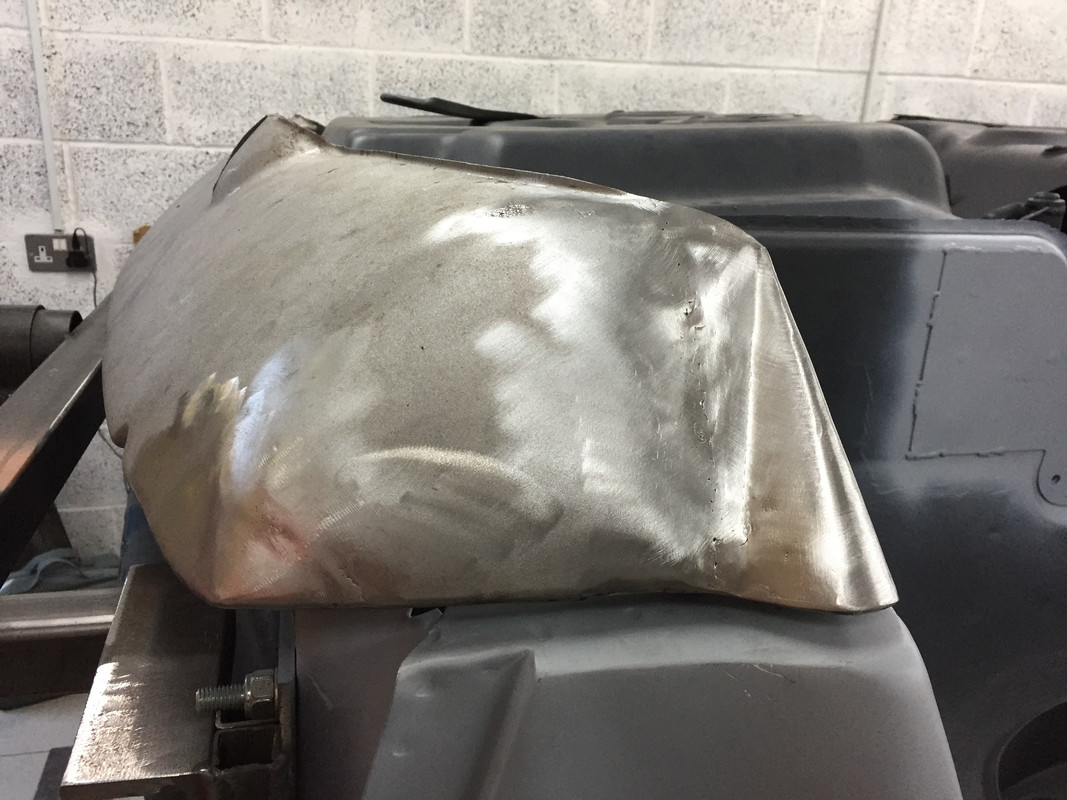
Now onto the rear valance. This was tricky as it fits the body very differently to the side sills.

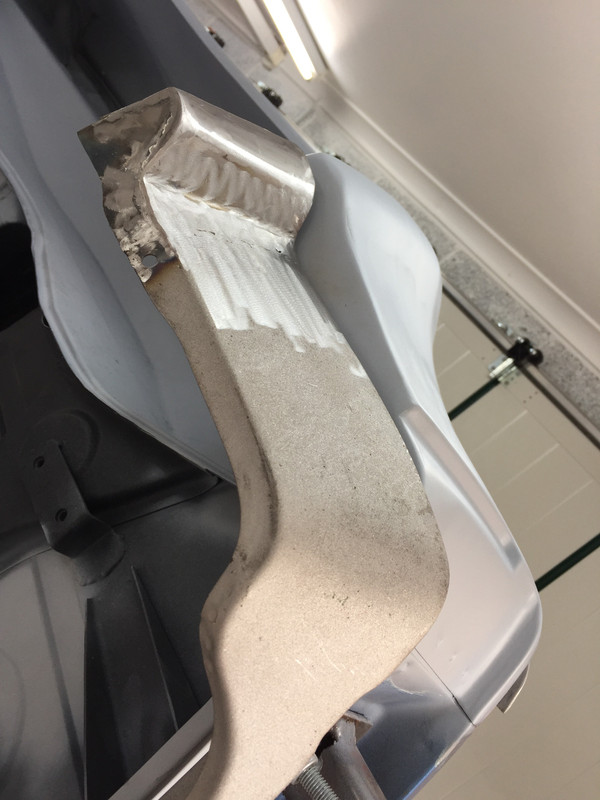
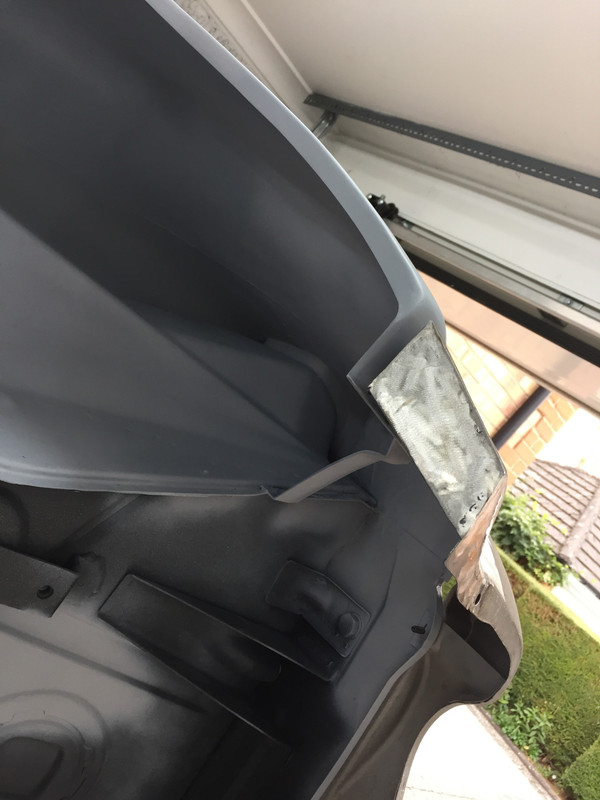
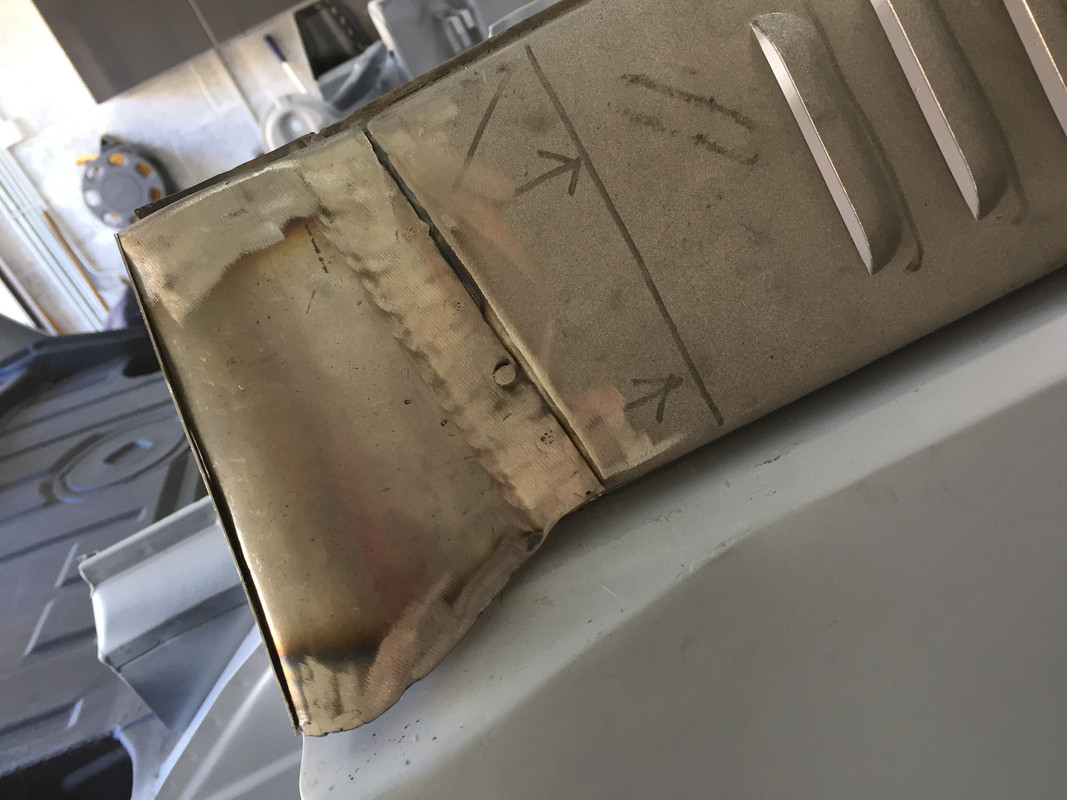
You can see here the shape I have managed to achieve. Keeping that slim waist into the ground.

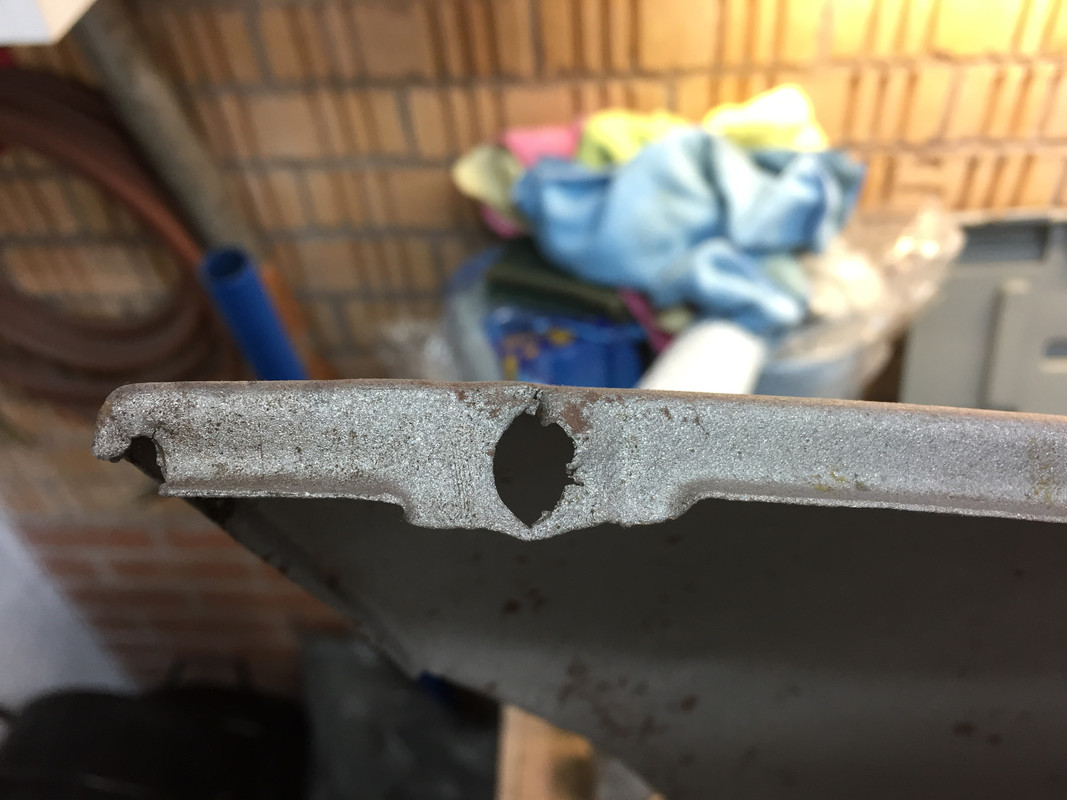
I de-constructed the strengthening structure around the exhaust exit and welded in a blanking piece.
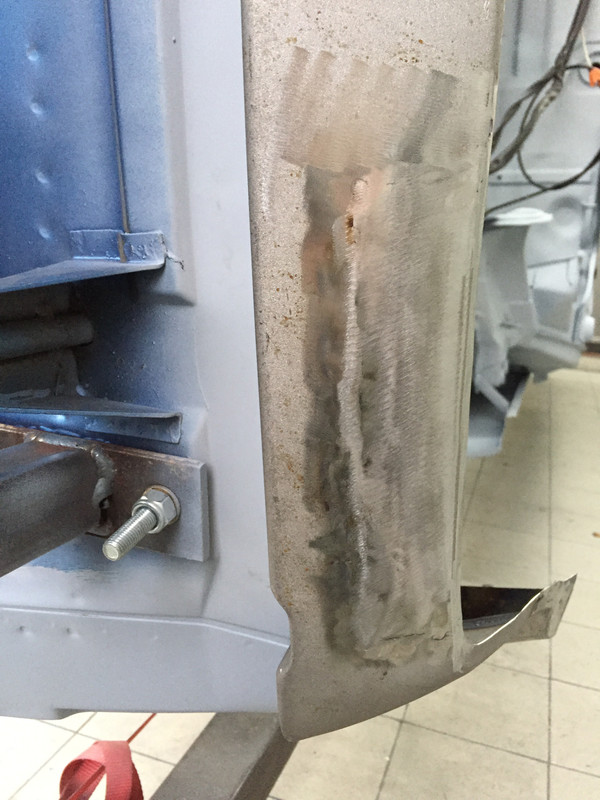
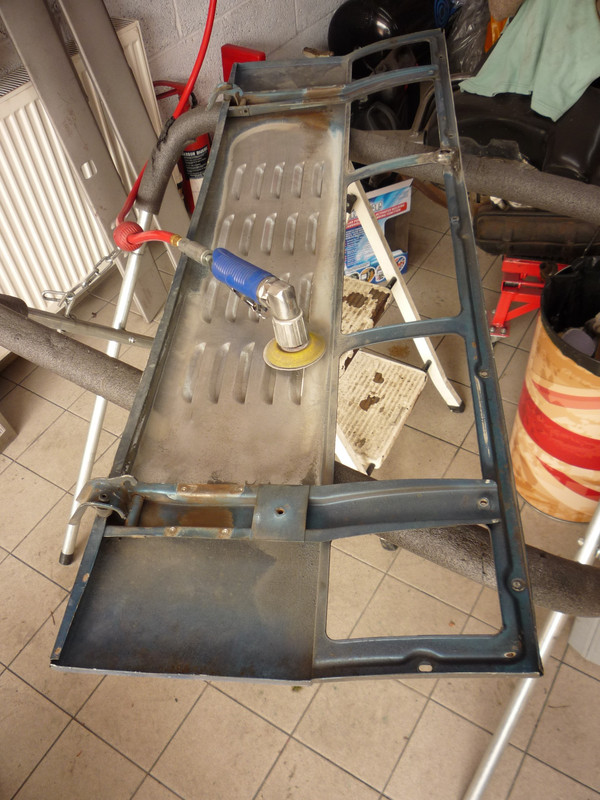
Next phase was the beaten to death front valance. The one I have was very, very poor, but you cannot find these things anymore.
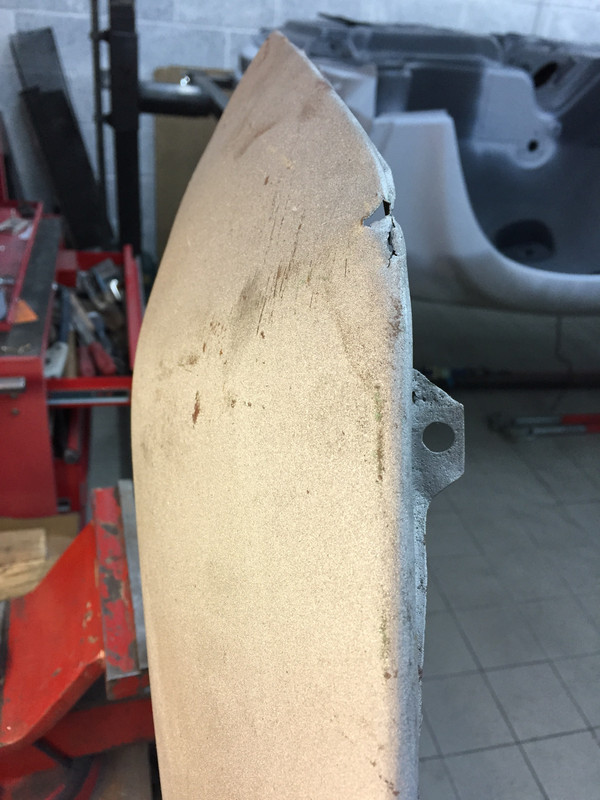
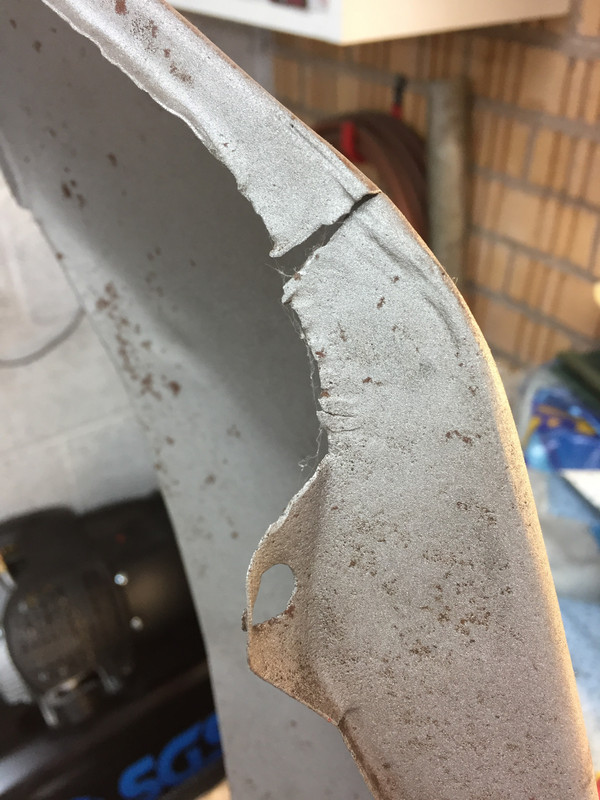
You see what I was up against!
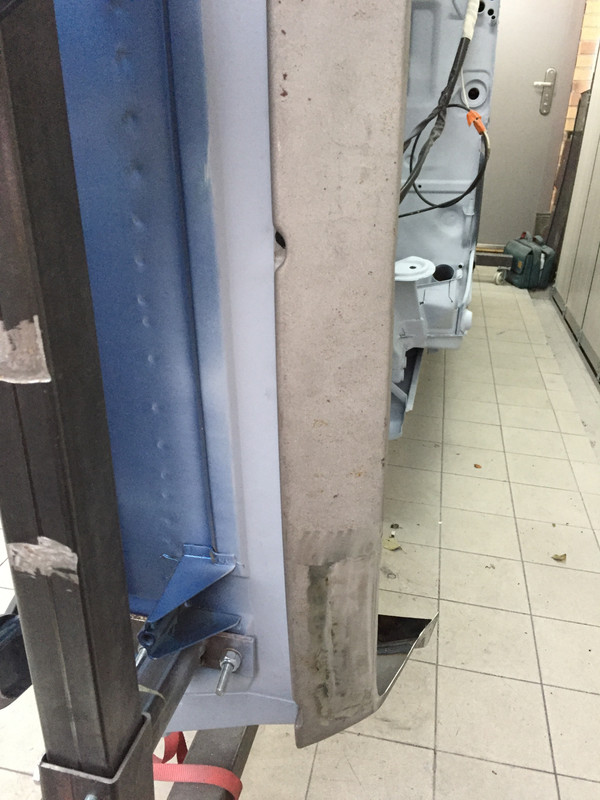
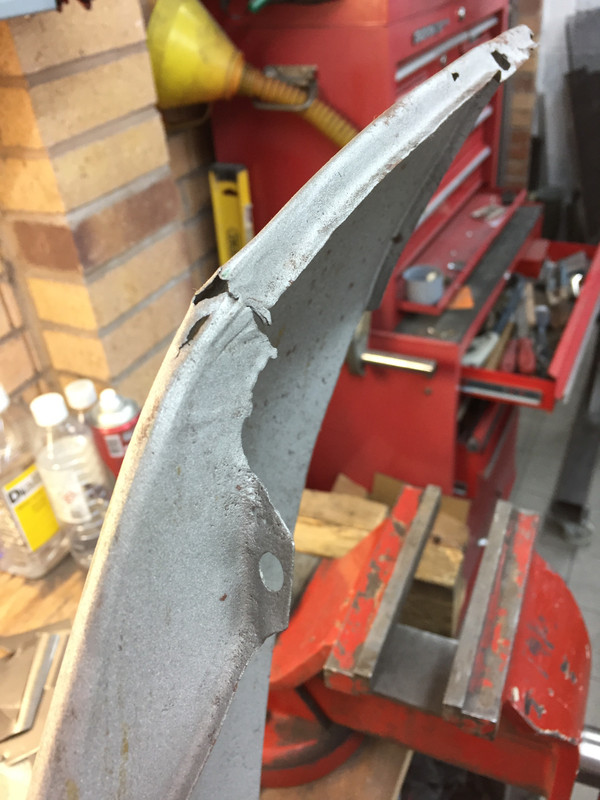
Well, cut out the bad, then weld in the good!
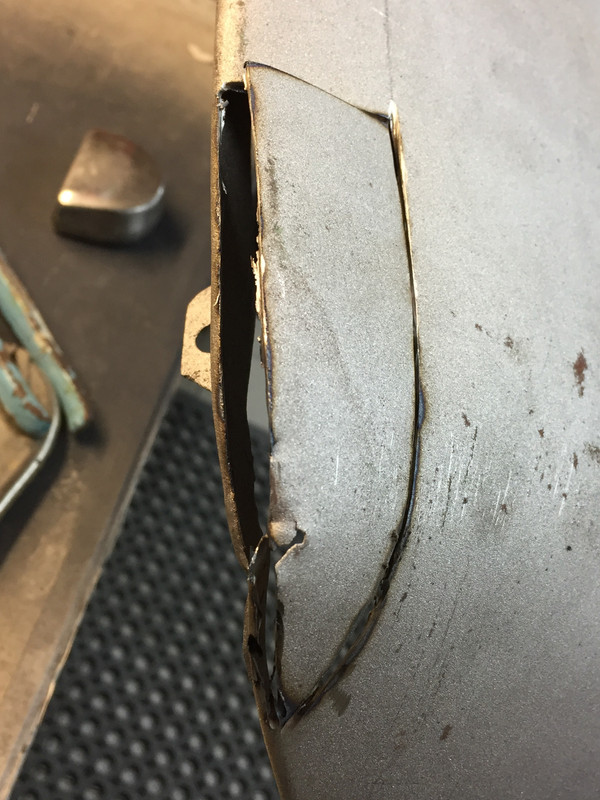
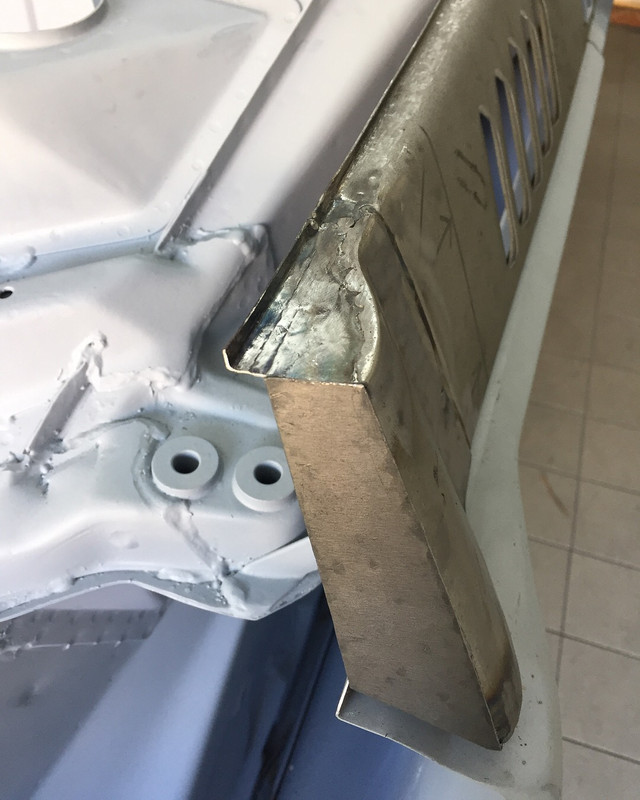
New wider, stronger fitting brackets installed.
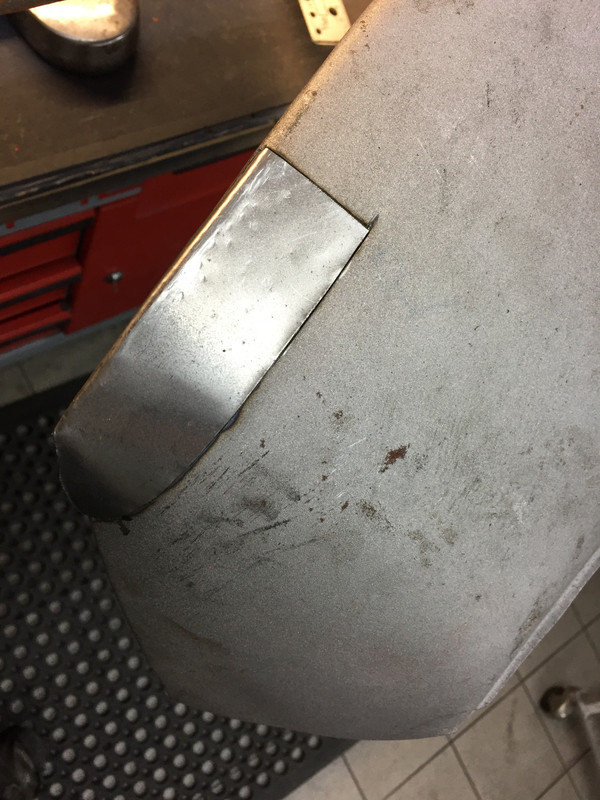
Again, delicate is the way. So very slim wasted 'shoes' here...
TADARRRRRRRRRRR
Finished body parts fitted.
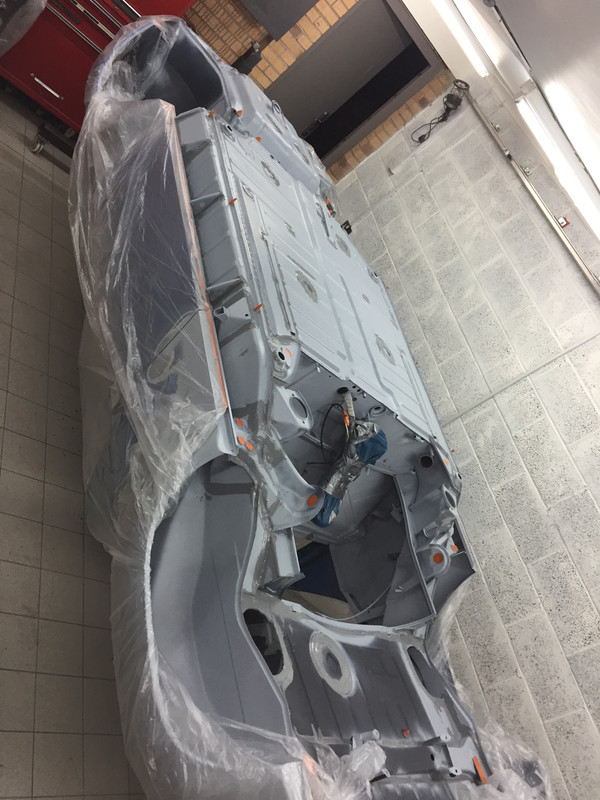
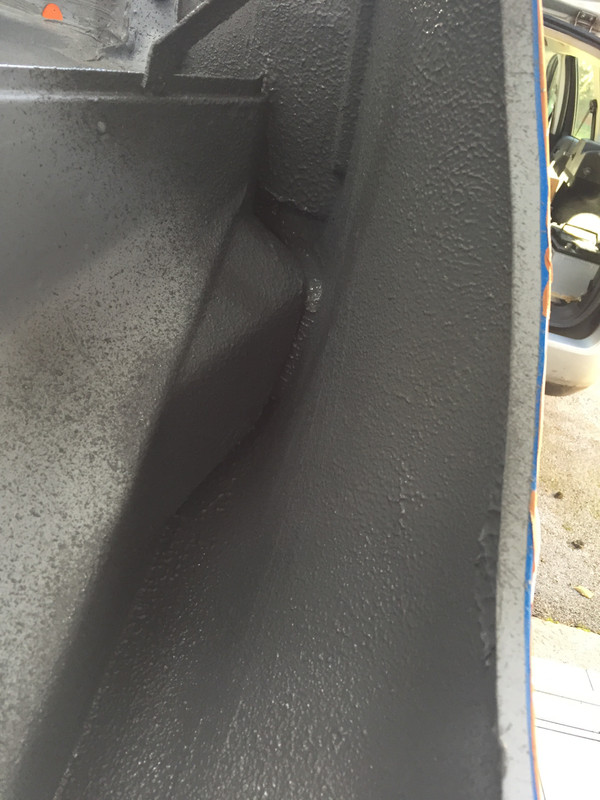
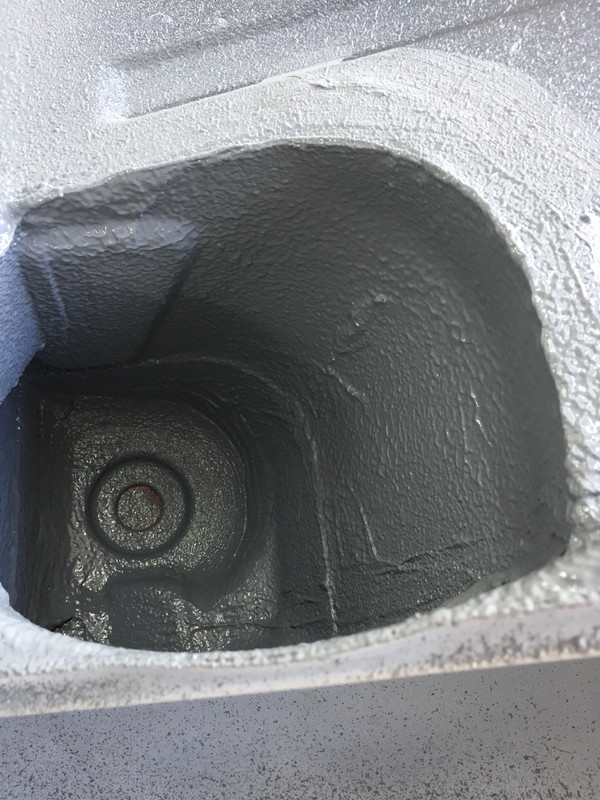
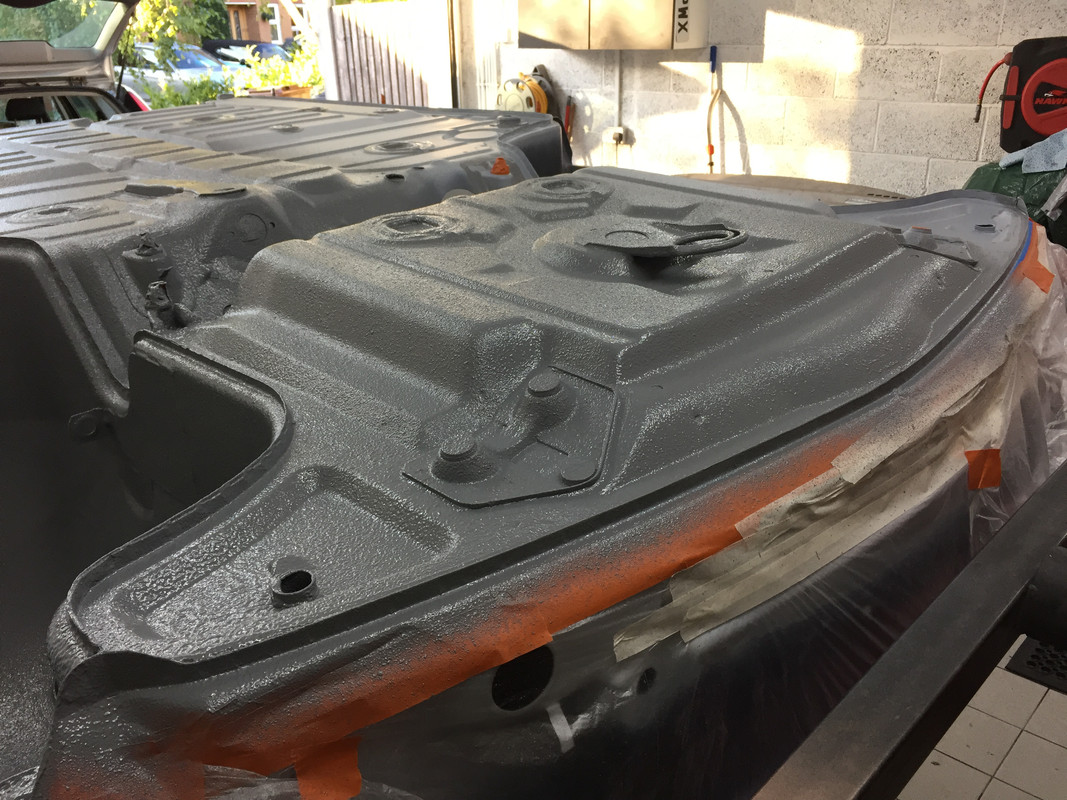
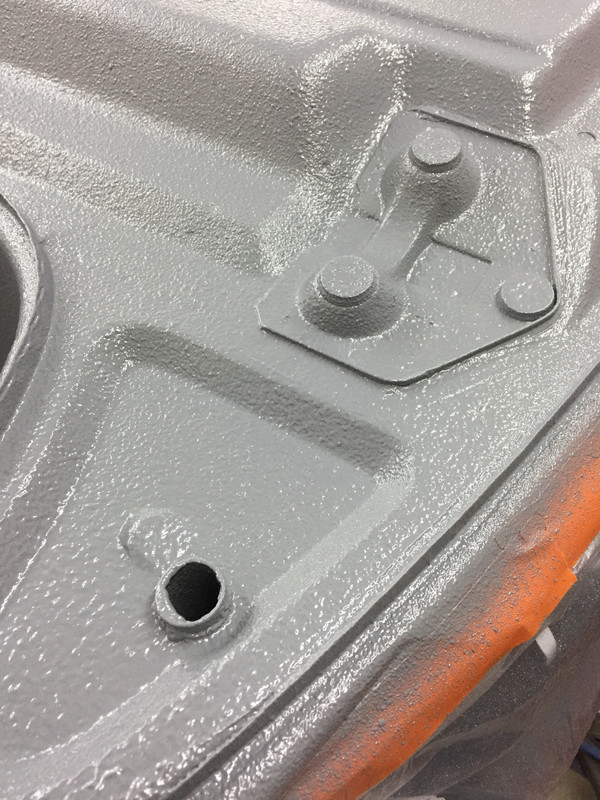
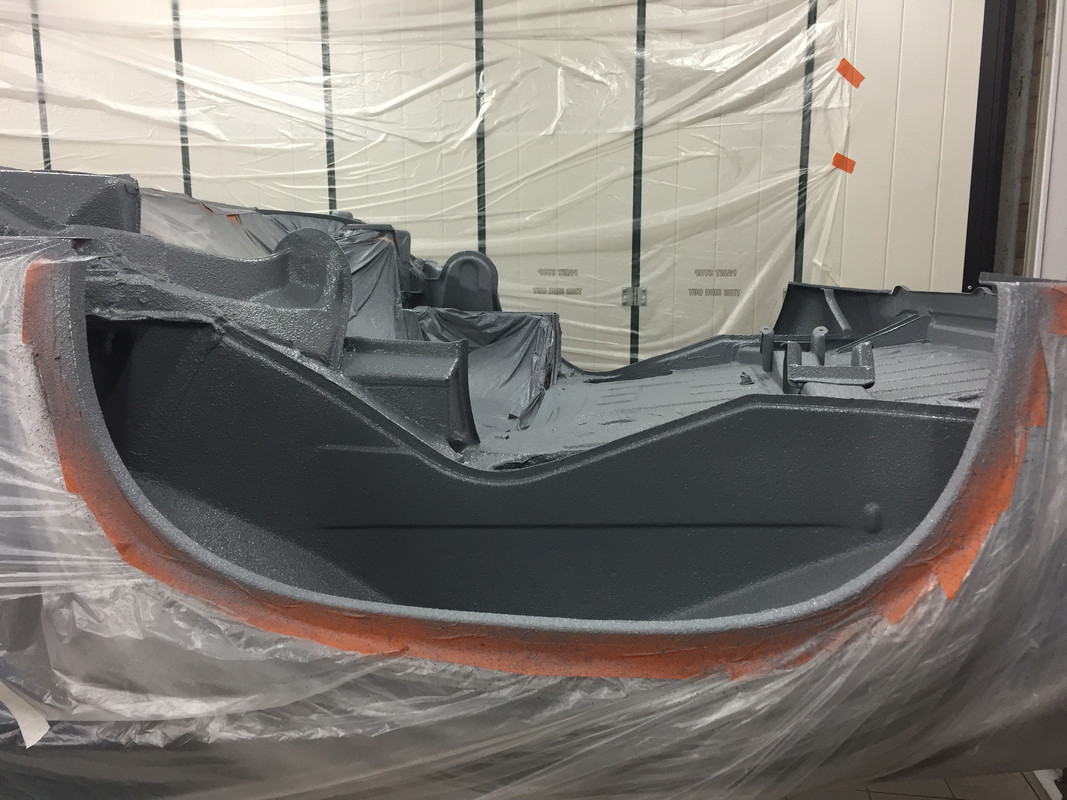
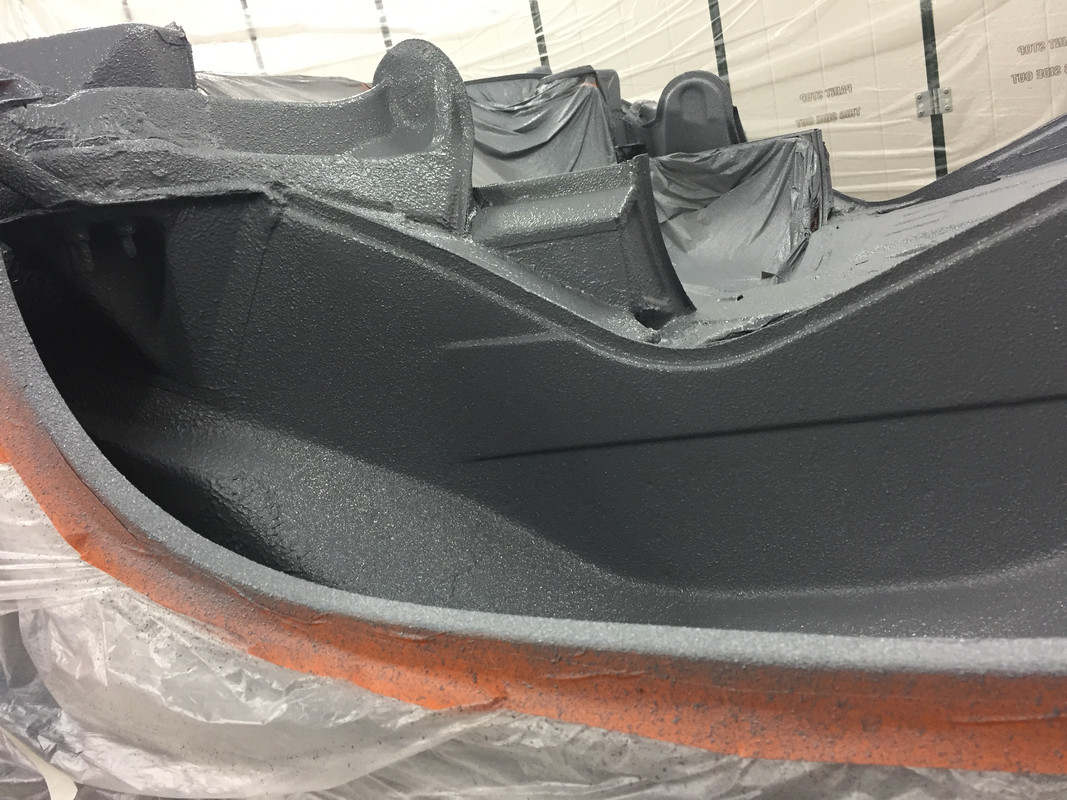
Next, with all the construction finished. Time to clean paint and seam seal.

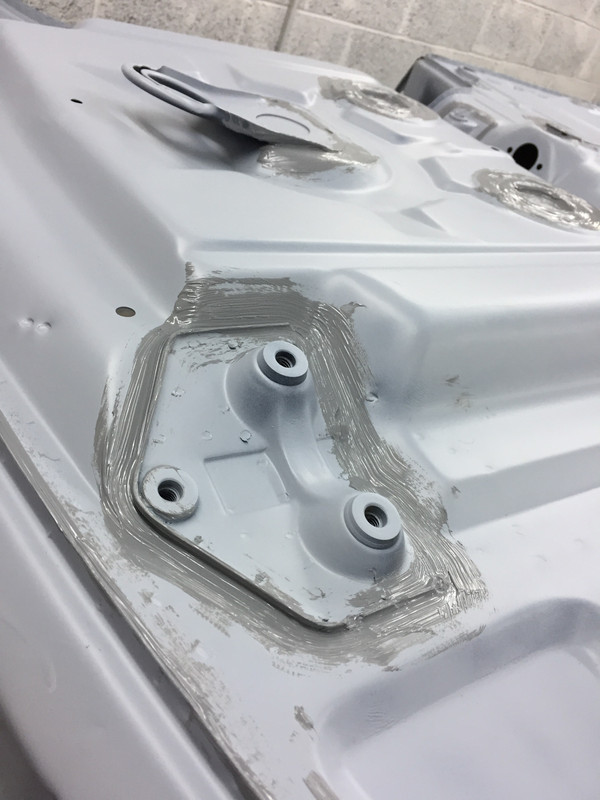
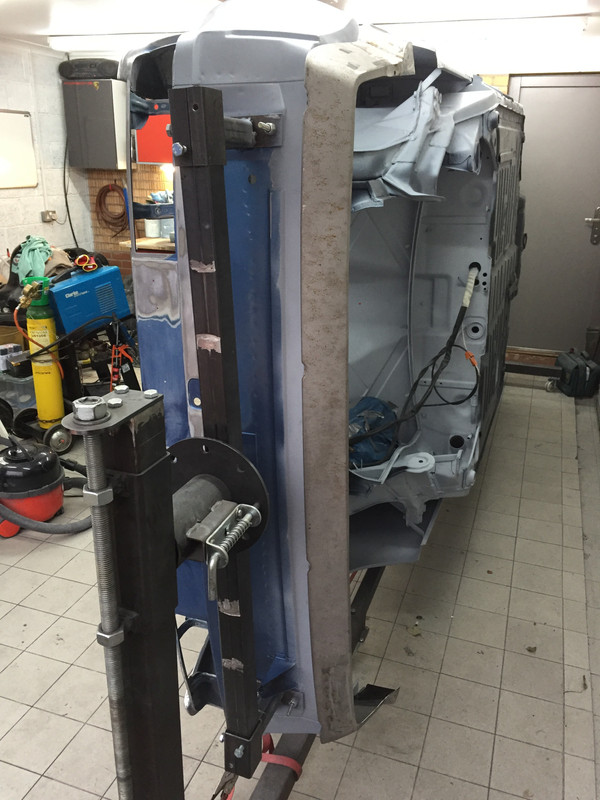
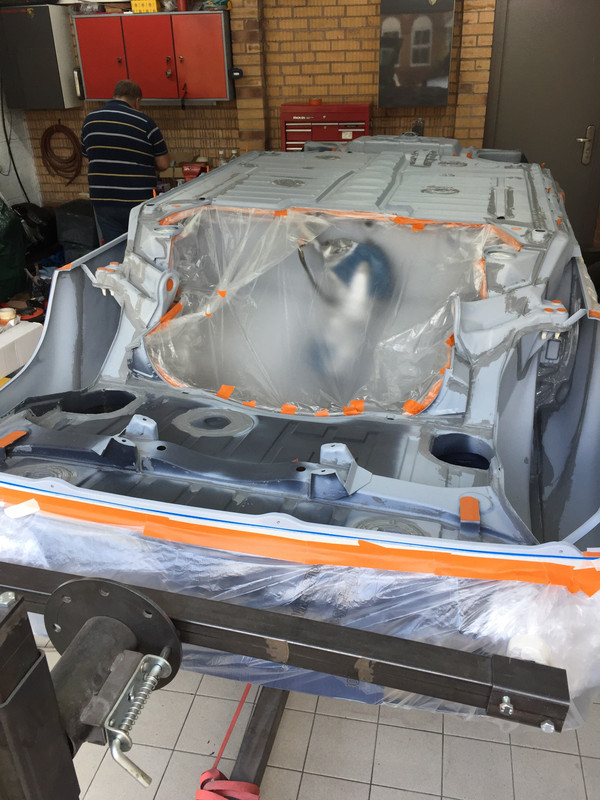
After the sealer was on it was time to mask off all the fitting point for the suspension. We don't want stone chip to interfere with parts fitting after paint.
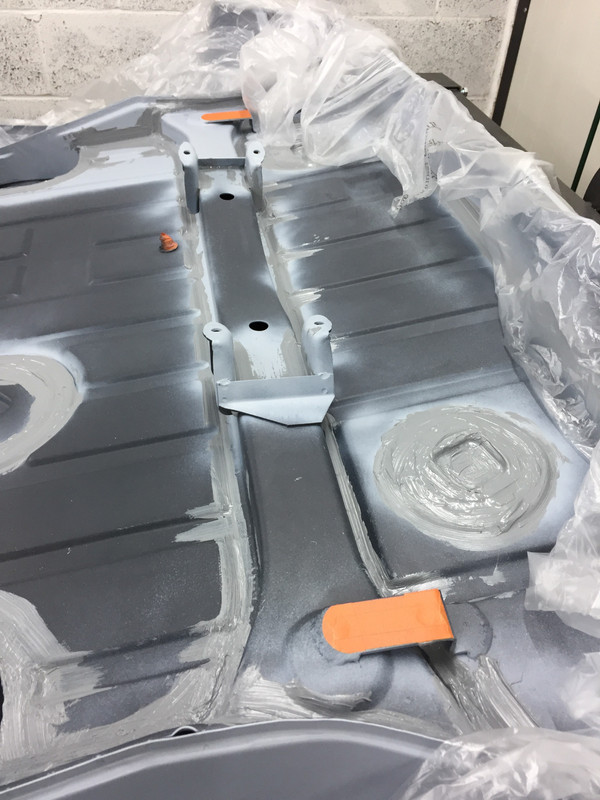
At the moment (when PeterS popped in to see progress) i'm bagging up the body for stone chip tomorrow (Saturday).
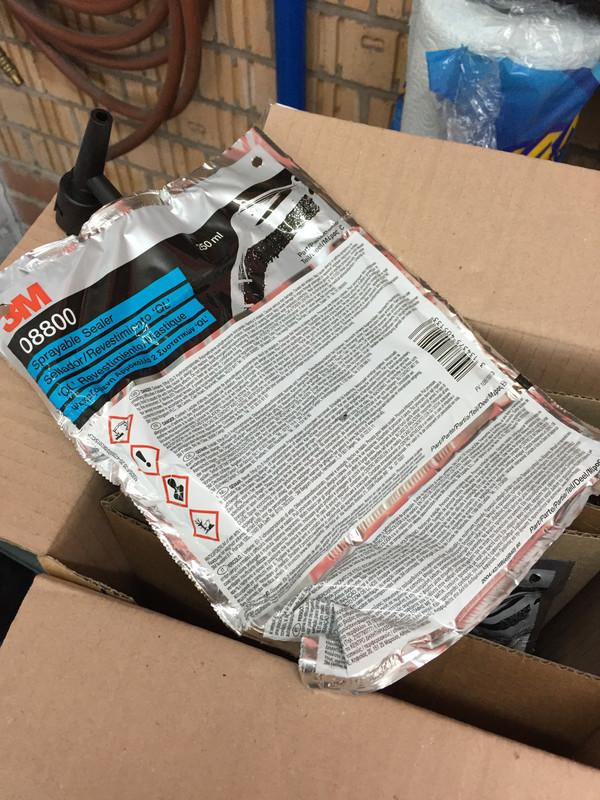
I'm going with the 3M stone chip which has cost a huge amount of money, but I feel only the best will do. Although after paying for it i'm starting to question that decission!
Wish me luck for tomorrow as I prepare to spray 30 bags of 3M's finest.
Peace out,
Chief
Last we left the many and varied hairbrained schemes of our Chief, we had got caught up in a 'War Of The Worlds' theme posting....
Well this time we are just going with the facts.
After putting paint on many of it's underneath body parts it was time to get back to welding and grinding again. The next phase was one I was not looking forward too. This being the side sills and front and rear aprons. There was going to be a lot of measuring, fabrication and head scratching.
Sooo the 914 has had whopping steel arches fitted, now that is not delicate by any means, however the car is slim waisted much like the famous Lamborghini Muria....
Right, so the key here is not to extend those massive arches into the lower metalwork and make them look bulky.
Now the metal sill panel fits against the body at about a 15 degree angle. The arch the extension needs to be at a different angle otherwise the gap from the arch to extension would be huge. This means making up the panel at a jornty angle! I first cut the sill down and pressed a step into the panel to allow me to puddle weld the new piece in place.
After some more welding and grinding we start to see where I was heading.
finished one, then had to replicate it for the other side which is seen above.
A few pictures of how I constructed the 'Shoes' as I have taken to calling them.
Here you can see the odd angles that have to be created.
Now onto the rear valance. This was tricky as it fits the body very differently to the side sills.
You can see here the shape I have managed to achieve. Keeping that slim waist into the ground.
I de-constructed the strengthening structure around the exhaust exit and welded in a blanking piece.
Next phase was the beaten to death front valance. The one I have was very, very poor, but you cannot find these things anymore.
You see what I was up against!
Well, cut out the bad, then weld in the good!
New wider, stronger fitting brackets installed.
Again, delicate is the way. So very slim wasted 'shoes' here...
TADARRRRRRRRRRR
Finished body parts fitted.
Next, with all the construction finished. Time to clean paint and seam seal.
After the sealer was on it was time to mask off all the fitting point for the suspension. We don't want stone chip to interfere with parts fitting after paint.
At the moment (when PeterS popped in to see progress) i'm bagging up the body for stone chip tomorrow (Saturday).
I'm going with the 3M stone chip which has cost a huge amount of money, but I feel only the best will do. Although after paying for it i'm starting to question that decission!
Wish me luck for tomorrow as I prepare to spray 30 bags of 3M's finest.
Peace out,
Chief
h'Project Blue Book' - 'The Red Baron' - Amber Alert!
Re: Project Blue Book
The quality of finish with the 3M stuff makes it well worth the outlay (he says, trying to convince himself....)
Good luck tomorrow
Good luck tomorrow
Porsche 964 1993
Porsche 944 1986 - sold
Porsche 914 1972
Porsche 944 1986 - sold
Porsche 914 1972
Re: Project Blue Book
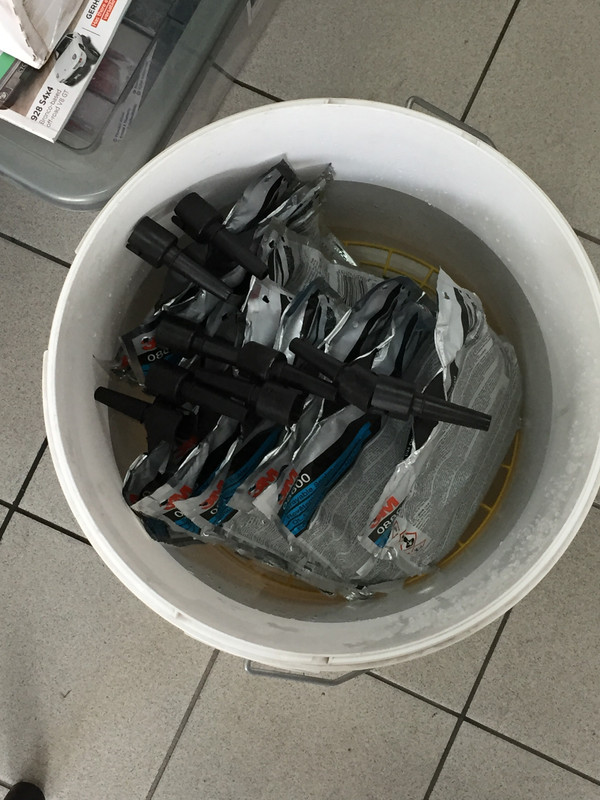
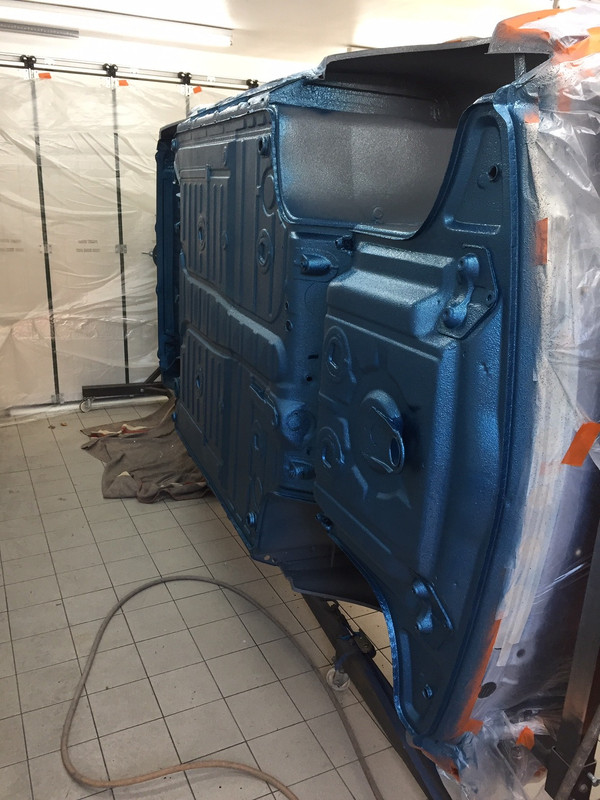
So this is what 30 bags looks like 
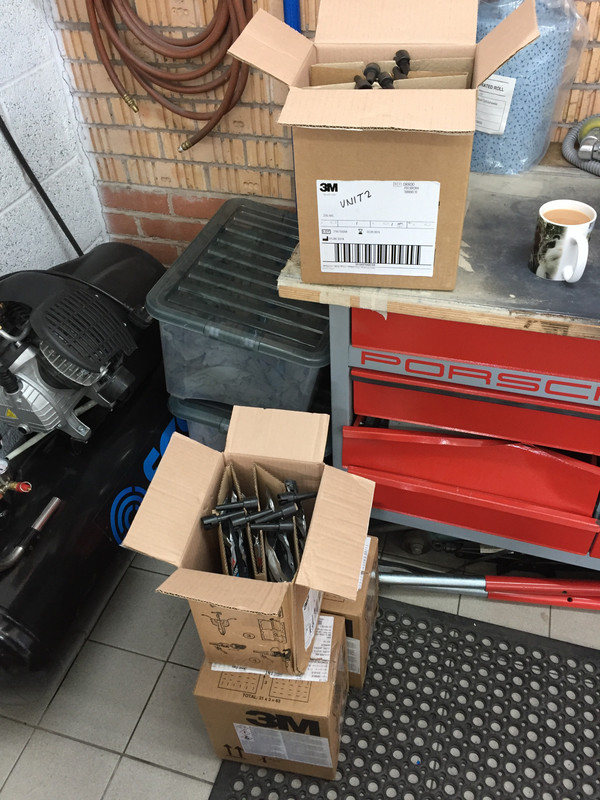
See, it comes in bags....
Into boiling hot water to soften up a bit.
Car masked up ready for the off...
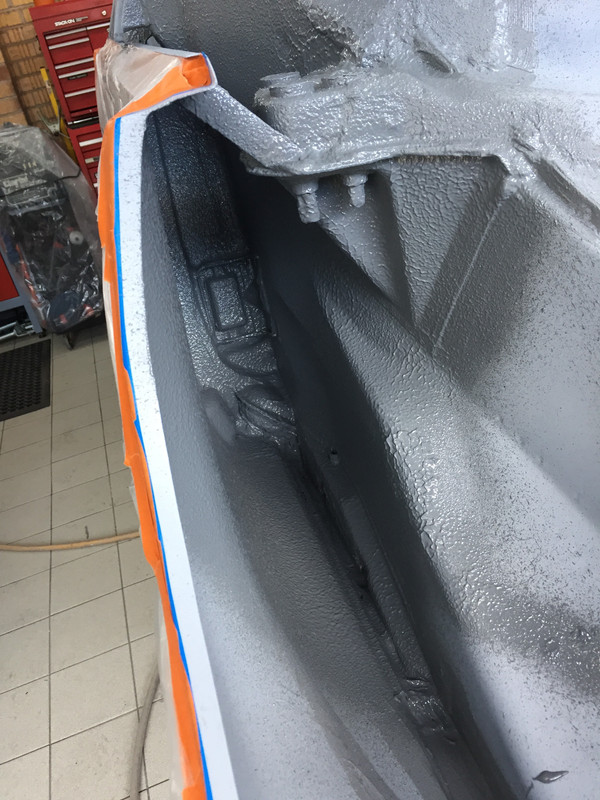

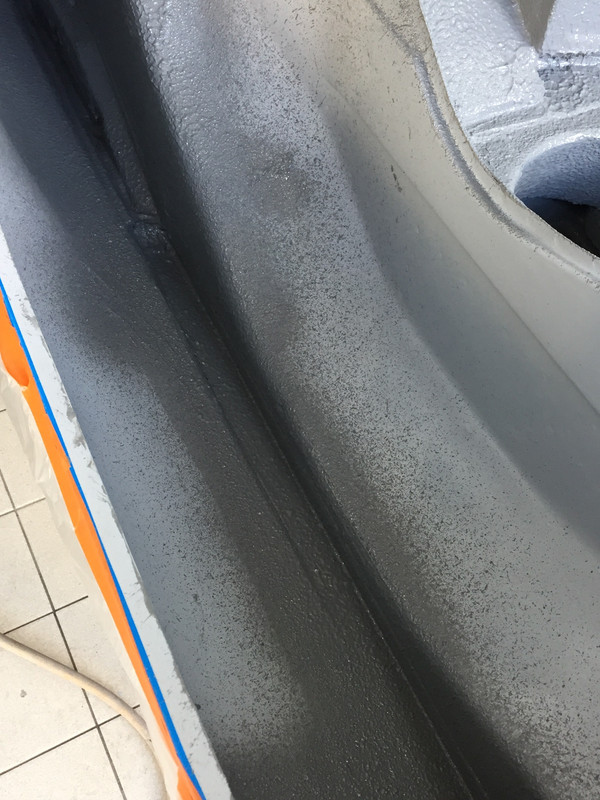
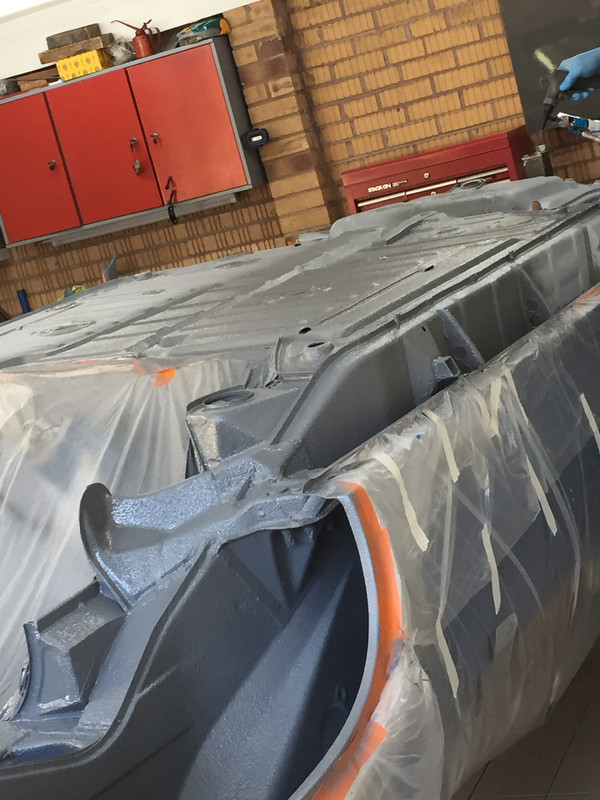
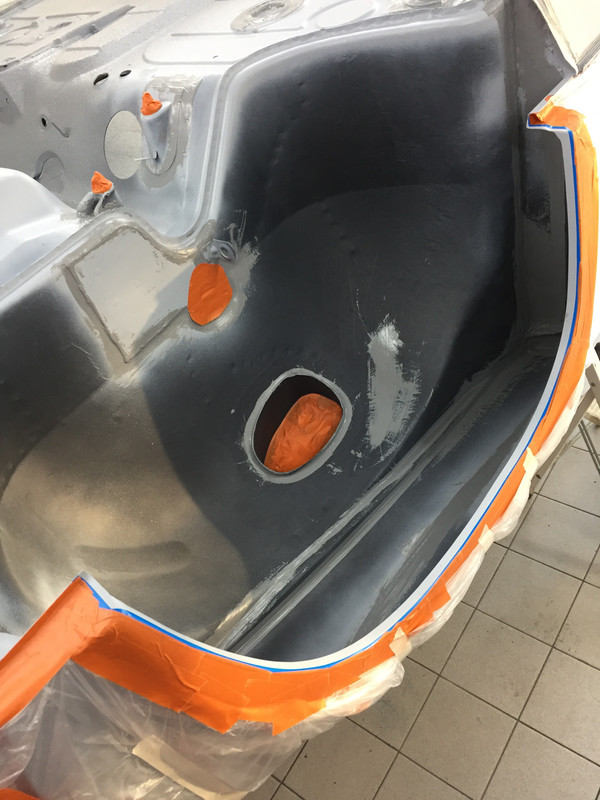

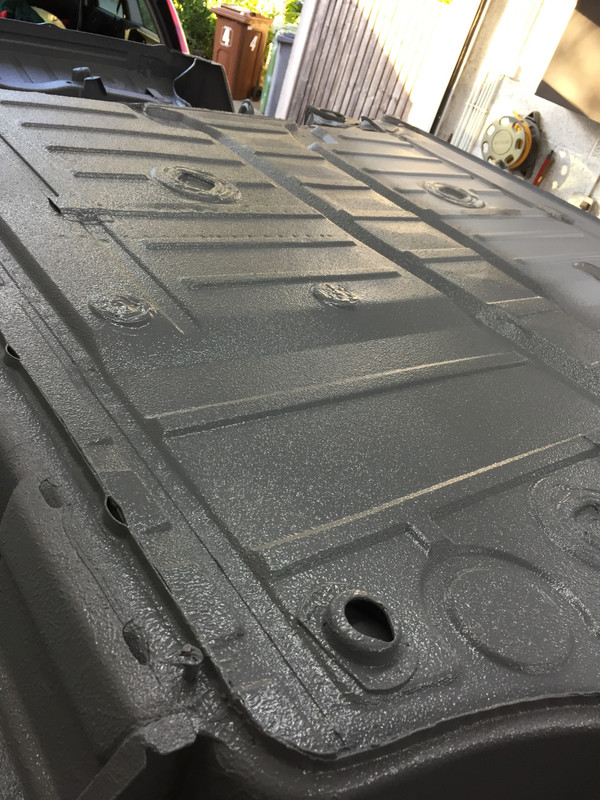
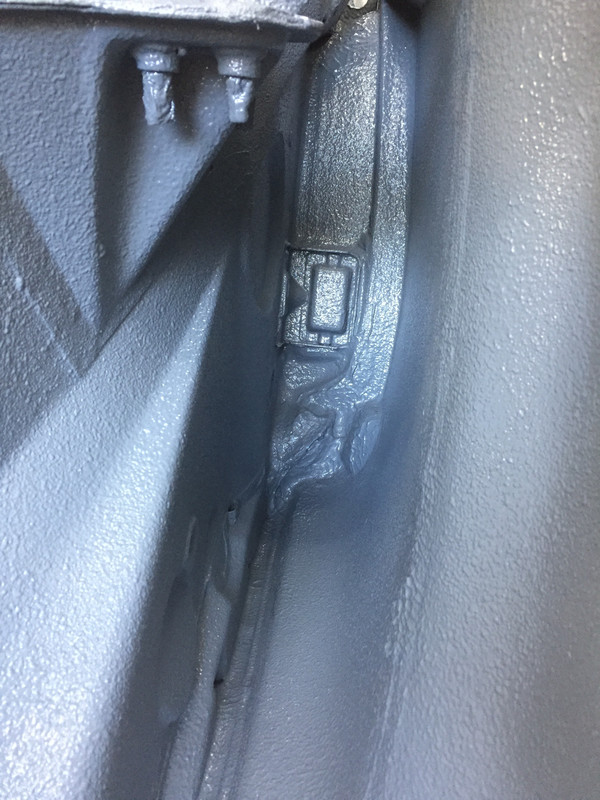
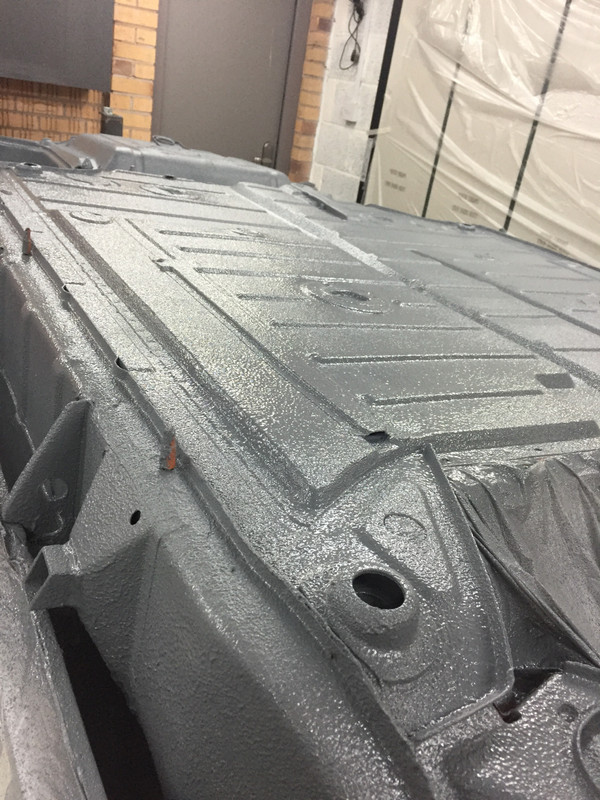
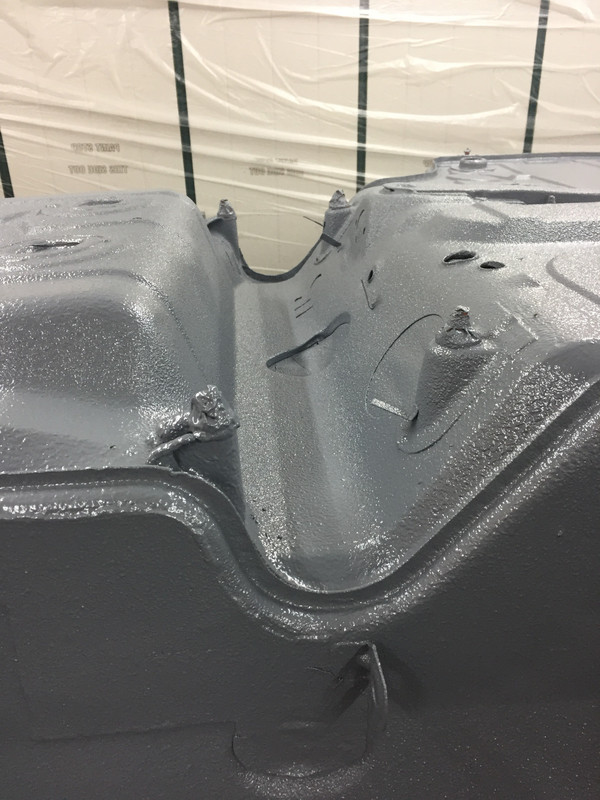
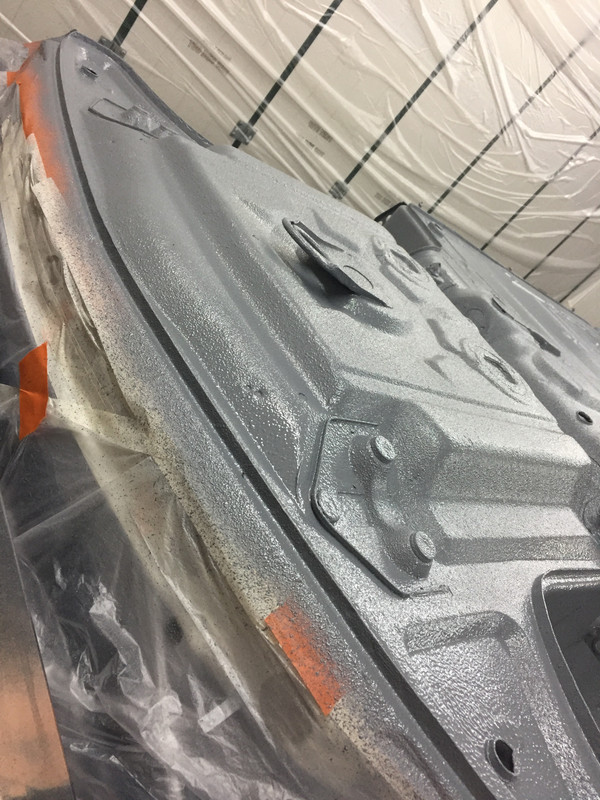
So, ended up using 26 bags at 250ml. Lets see if a stone chan chip that!
I will leave this to dry off until later in the week. I will then take off all the suspension mounting point masking tape and paint body colour L96B....
That is all for now men, as you were. Kirsh.....Chief over and out......
See, it comes in bags....
Into boiling hot water to soften up a bit.
Car masked up ready for the off...
So, ended up using 26 bags at 250ml. Lets see if a stone chan chip that!
I will leave this to dry off until later in the week. I will then take off all the suspension mounting point masking tape and paint body colour L96B....
That is all for now men, as you were. Kirsh.....Chief over and out......
h'Project Blue Book' - 'The Red Baron' - Amber Alert!
-
defianty
- Put a fork in me, I'm done!
- Posts: 1717
- Joined: Sat Aug 05, 2006 7:02 pm
- Location: Rochford, Essex
Re: Project Blue Book
Nicely done Chief, mine has just gone past the same stage and is now finally the right way up!
Re: Project Blue Book
Hi Stephen,
Hopefully top coat will go onto the underneath and the suspension top mounts this week. I can then get it onto it's suspension and onto the floor THE RIGHT WAY UP! Theeeeeeen onto the body work proper. This is the part where you hope that all the tin bashing means the slightest skim of filler
Looking forward to seeing what yours looks like in shiny paint. I should be a real boost after all that time spent learning your welding craft!
h'Project Blue Book' - 'The Red Baron' - Amber Alert!
Re: Project Blue Book
We are in paint people!
Base coat L96B Alaska Blue which is the original paint it left the factory with.
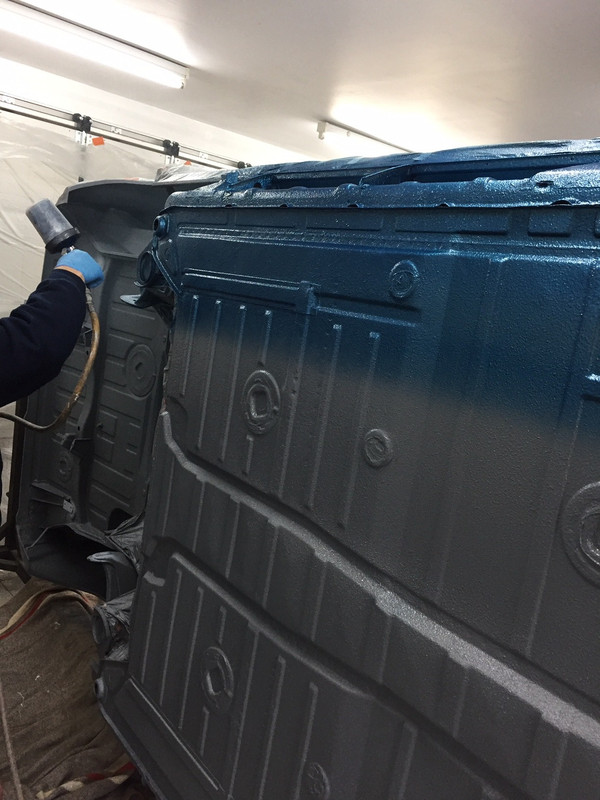
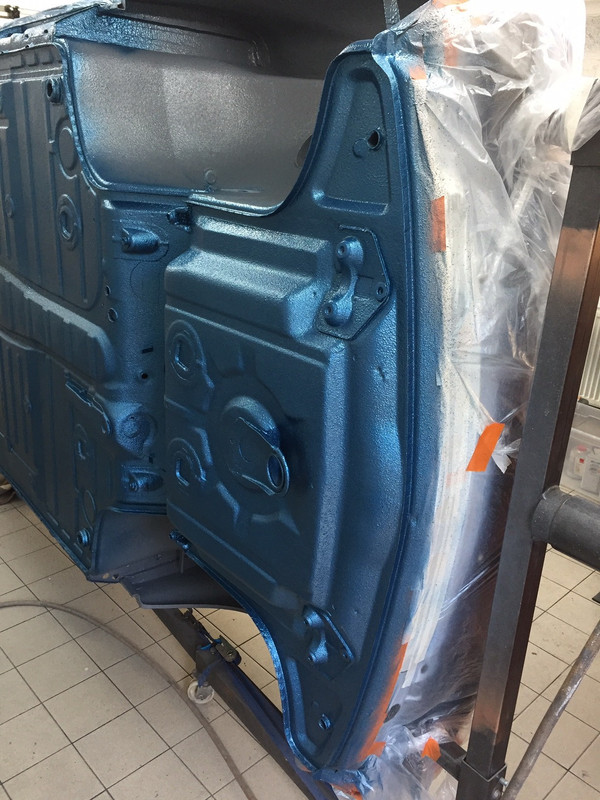
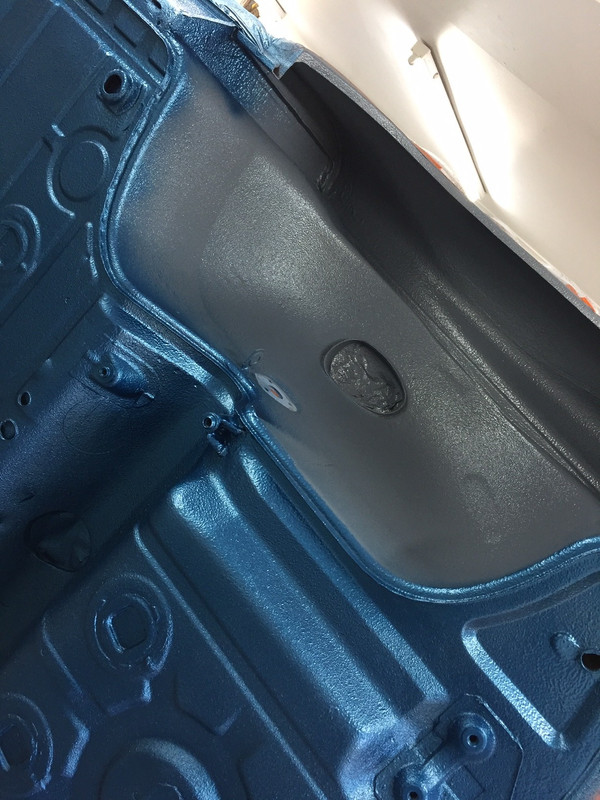
And lacquer over the top!........maybe a bit over the top
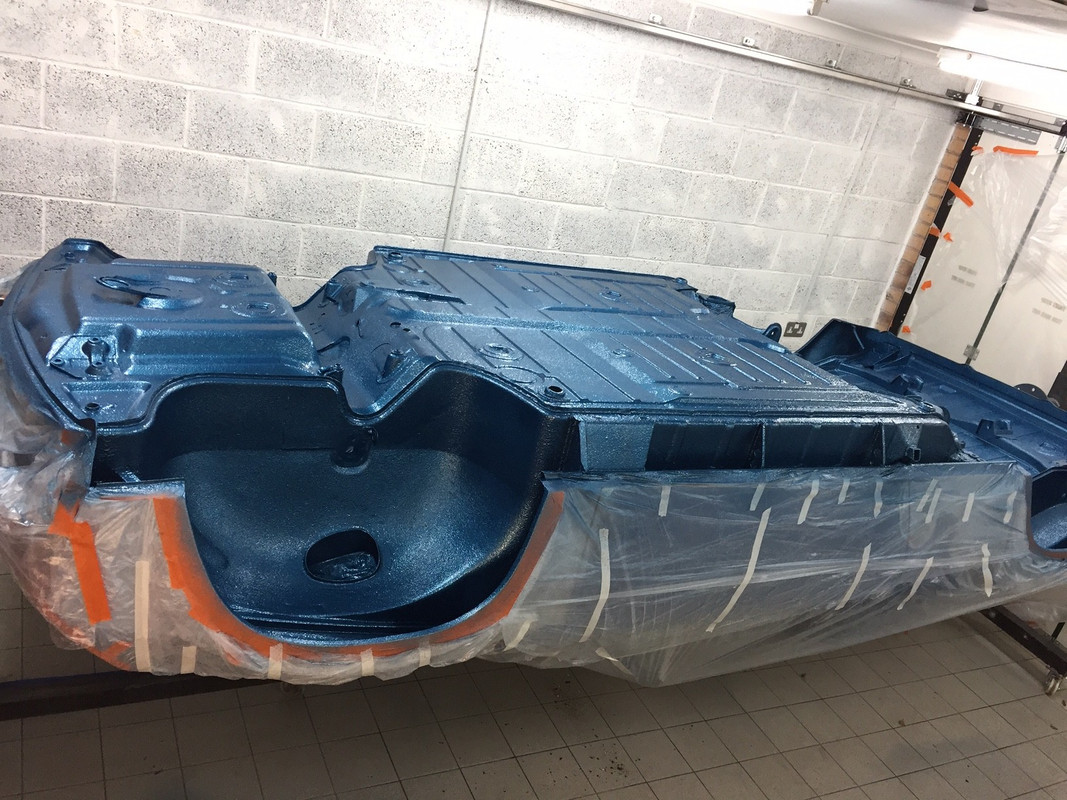
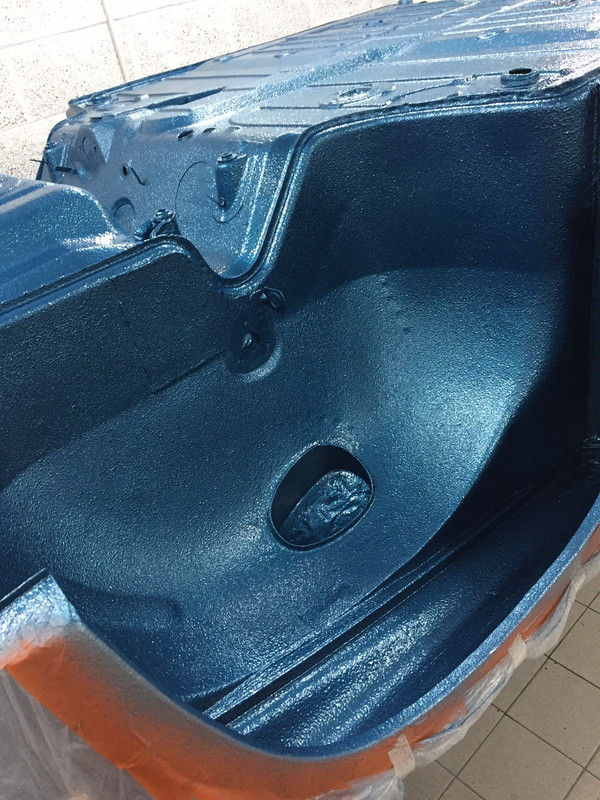
Base coat L96B Alaska Blue which is the original paint it left the factory with.
And lacquer over the top!........maybe a bit over the top
h'Project Blue Book' - 'The Red Baron' - Amber Alert!

Re: Project Blue Book
Fantastic
James
1973 911 2.4S
1993 964 C2
2010 987 Spyder
1973 MGB Roadster
Its not how fast you go, but how you go fast
1973 911 2.4S
1993 964 C2
2010 987 Spyder
1973 MGB Roadster
Its not how fast you go, but how you go fast
-
defianty
- Put a fork in me, I'm done!
- Posts: 1717
- Joined: Sat Aug 05, 2006 7:02 pm
- Location: Rochford, Essex
Re: Project Blue Book
Superb Chief - very tidy!
-
defianty
- Put a fork in me, I'm done!
- Posts: 1717
- Joined: Sat Aug 05, 2006 7:02 pm
- Location: Rochford, Essex
Re: Project Blue Book
About time this was moved to the restoration section Chief don't you think?
-
rhd racer
- DDK 1st, 2nd and 3rd for me!
- Posts: 2069
- Joined: Wed Jun 23, 2004 9:47 pm
- Location: Nottinghamshire
Re: Project Blue Book
That is awesome Chief, well done, amazing finish
93 964 C2
99 Boxster 2.5 > 2.7 hill climber
71 914/6 3.0 - gone
'You see Paul, hill climbing is like making love to a beautiful woman. You get your motor running, check your fluids, hang on tight and WHOA..30 seconds later it's all over!' Swiss Tony
99 Boxster 2.5 > 2.7 hill climber
71 914/6 3.0 - gone
'You see Paul, hill climbing is like making love to a beautiful woman. You get your motor running, check your fluids, hang on tight and WHOA..30 seconds later it's all over!' Swiss Tony
Re: Project Blue Book
Thank you fellas. I’m pleased with the colour and the finish. Just got to get the top side done now!
Stephen, not sure this belongs in with the ‘Resto’s’ I need my own section ‘Hairbrained schemes and other flights of fancy’
Stephen, not sure this belongs in with the ‘Resto’s’ I need my own section ‘Hairbrained schemes and other flights of fancy’
h'Project Blue Book' - 'The Red Baron' - Amber Alert!