Project Blue Book

For all you Porsche 914 fanatics!

Moderators: drummerboytom, MdR

Post Reply
chief
Married to the DDK
Posts: 281
Joined: Fri Jul 18, 2008 6:59 pm
Location: The Middle Lands

Re: Project Blue Book

Post by chief »

Time for some welding...
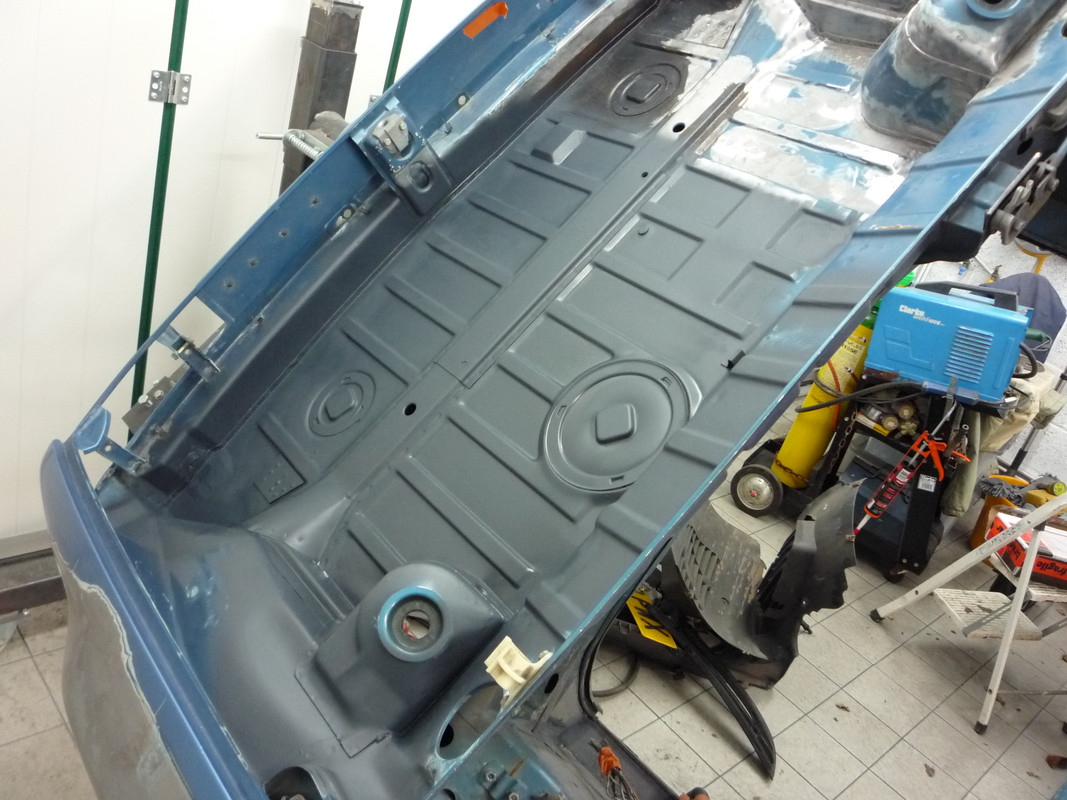
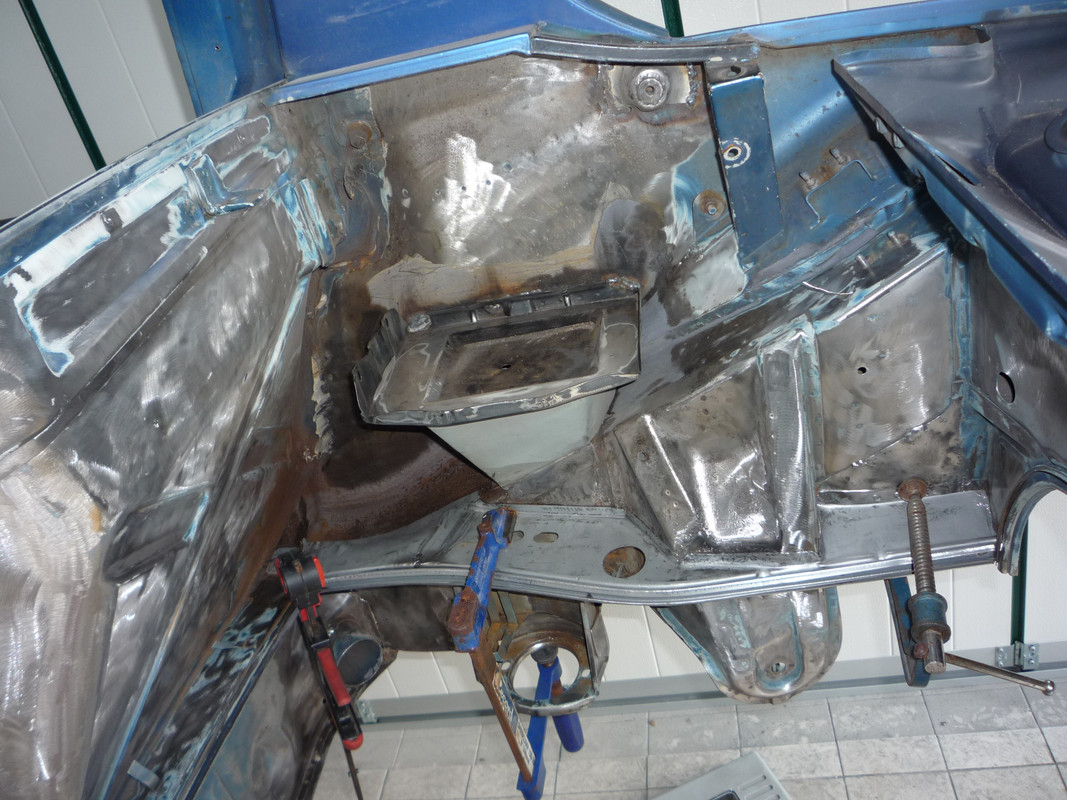
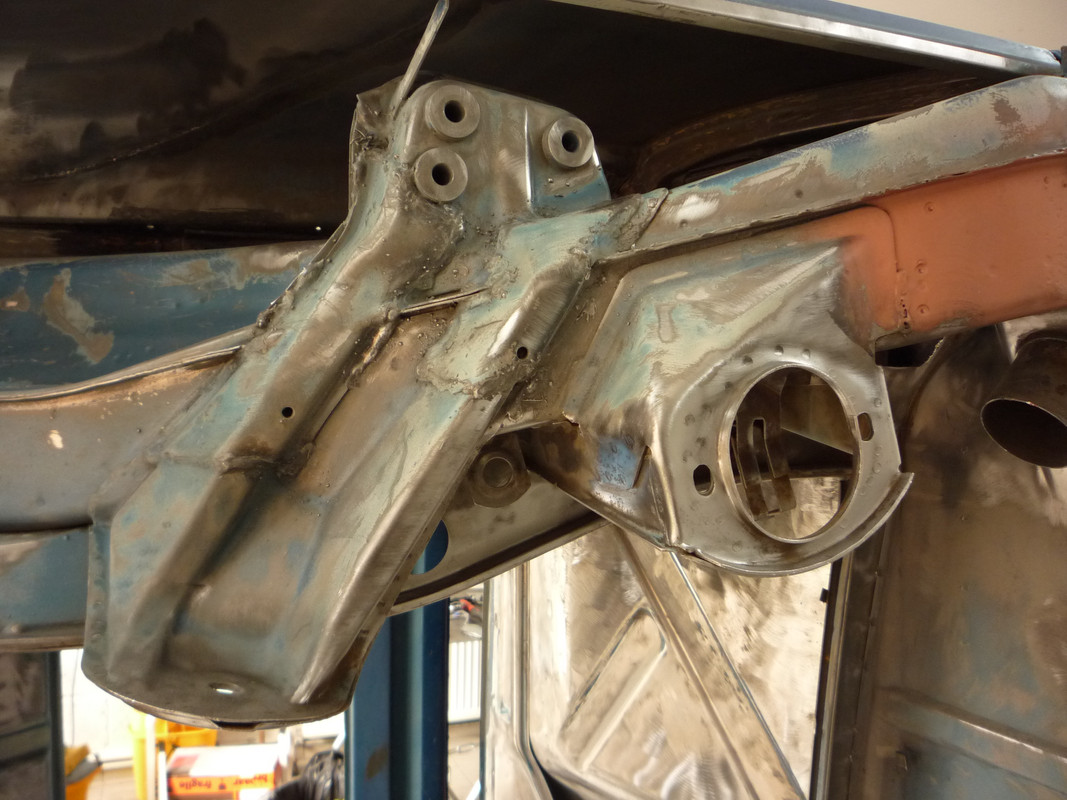
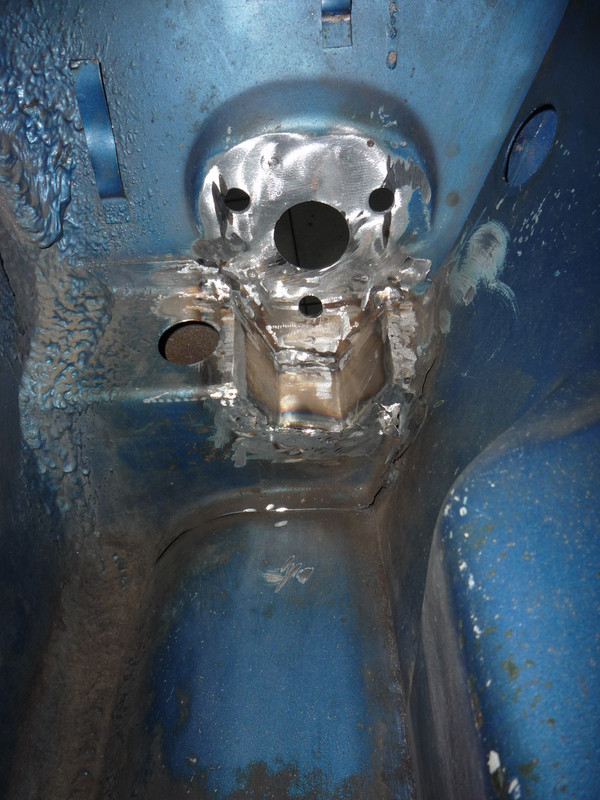
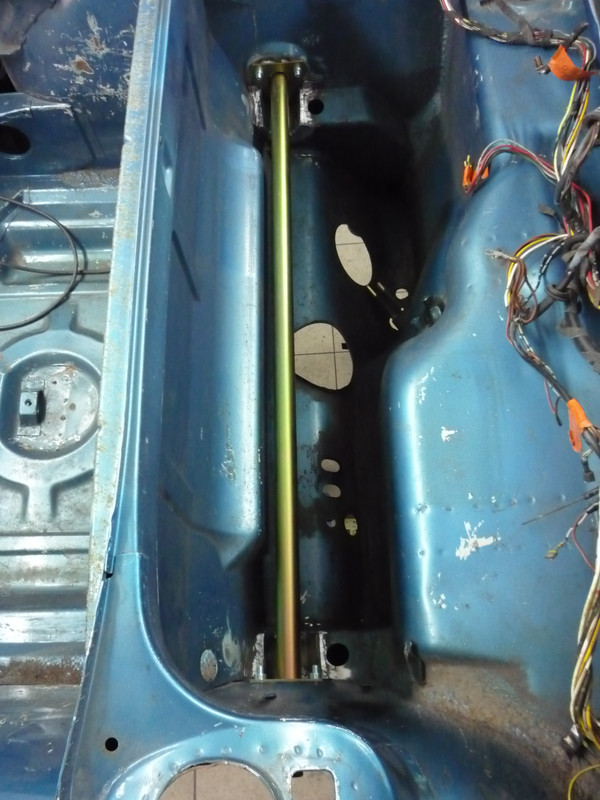
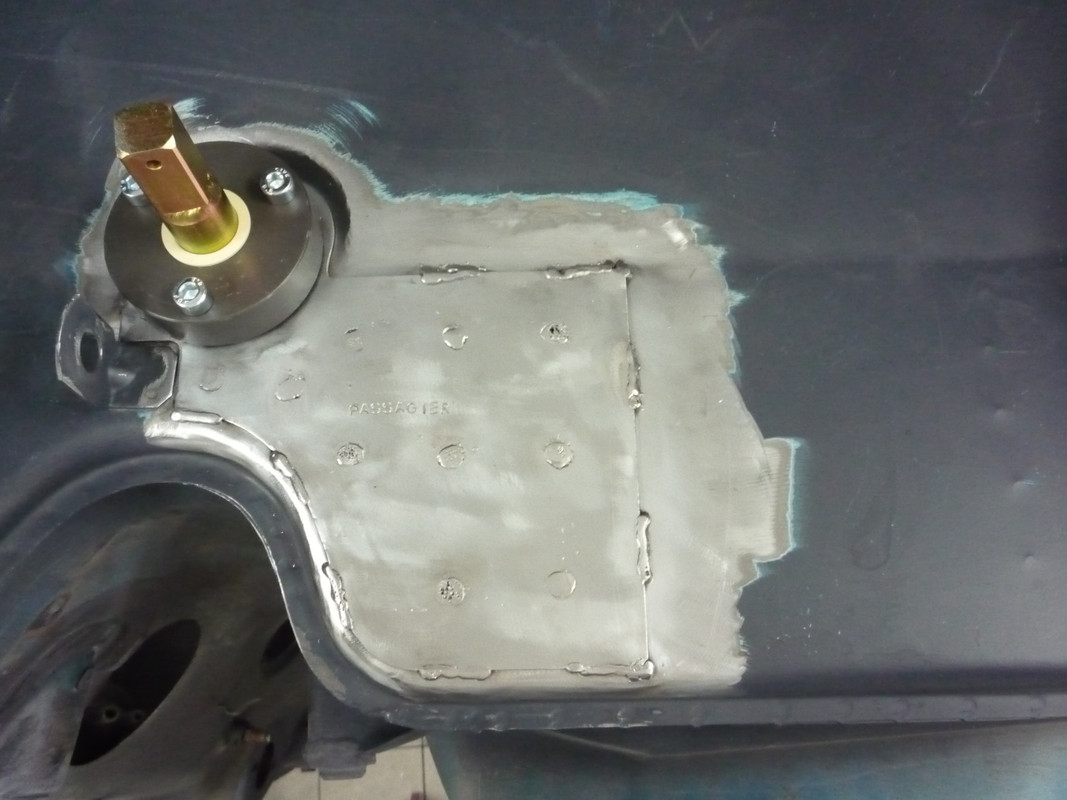
The strengthening panels I made need to be fitted milimetre perfect to not foul the roll bar. So to this end I took a lot of time checking and checking again!
Image

Image

Image

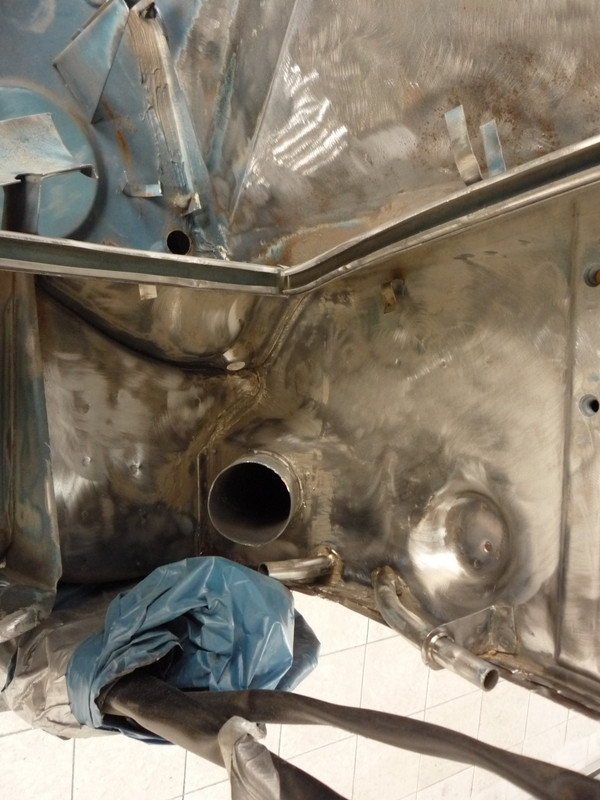
So these bad boys fitted it was time for the other side to be sorted.
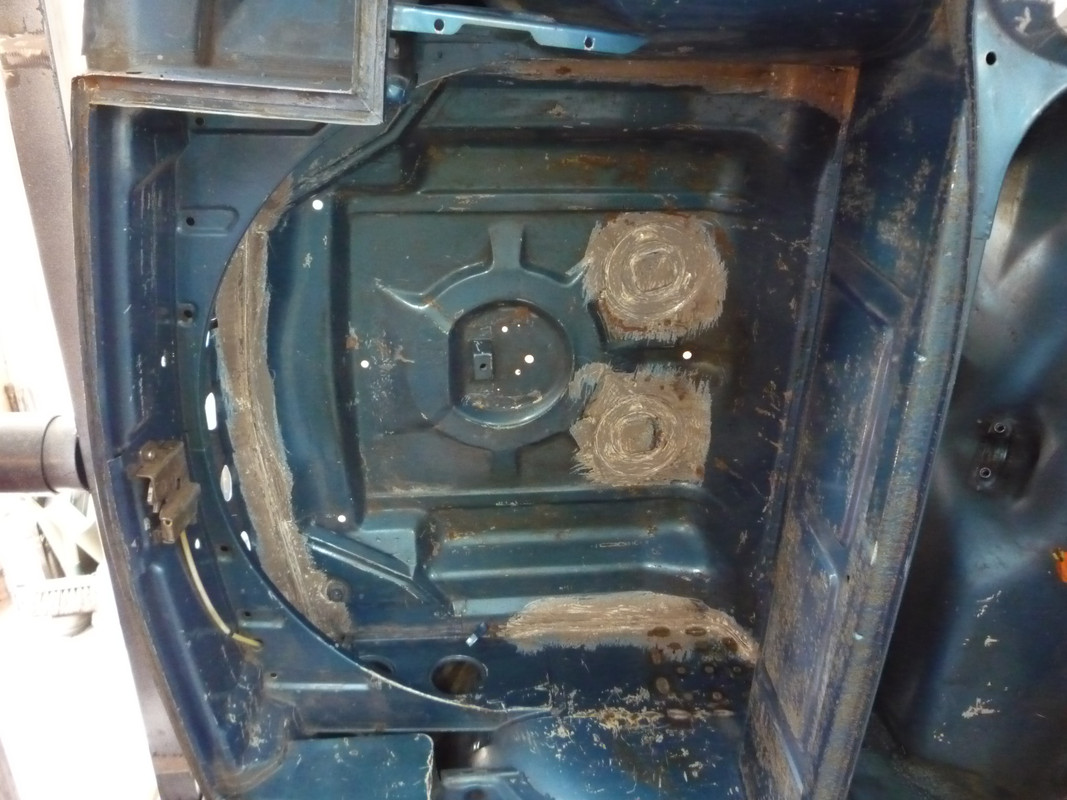
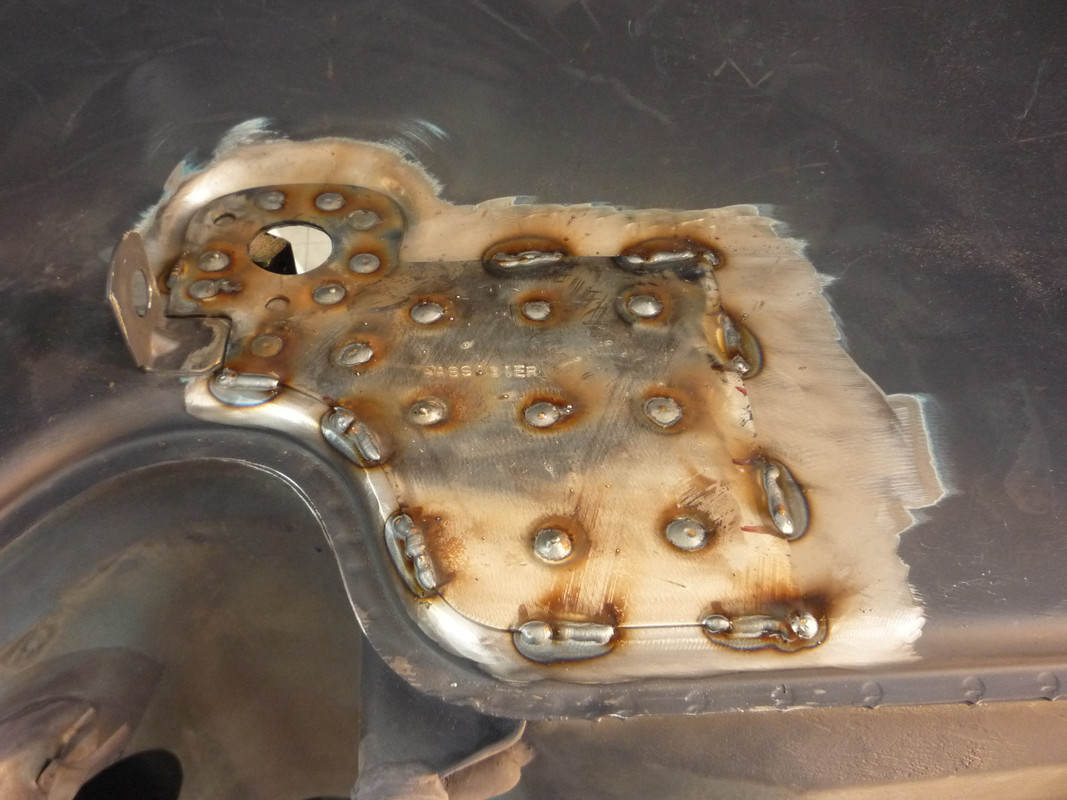
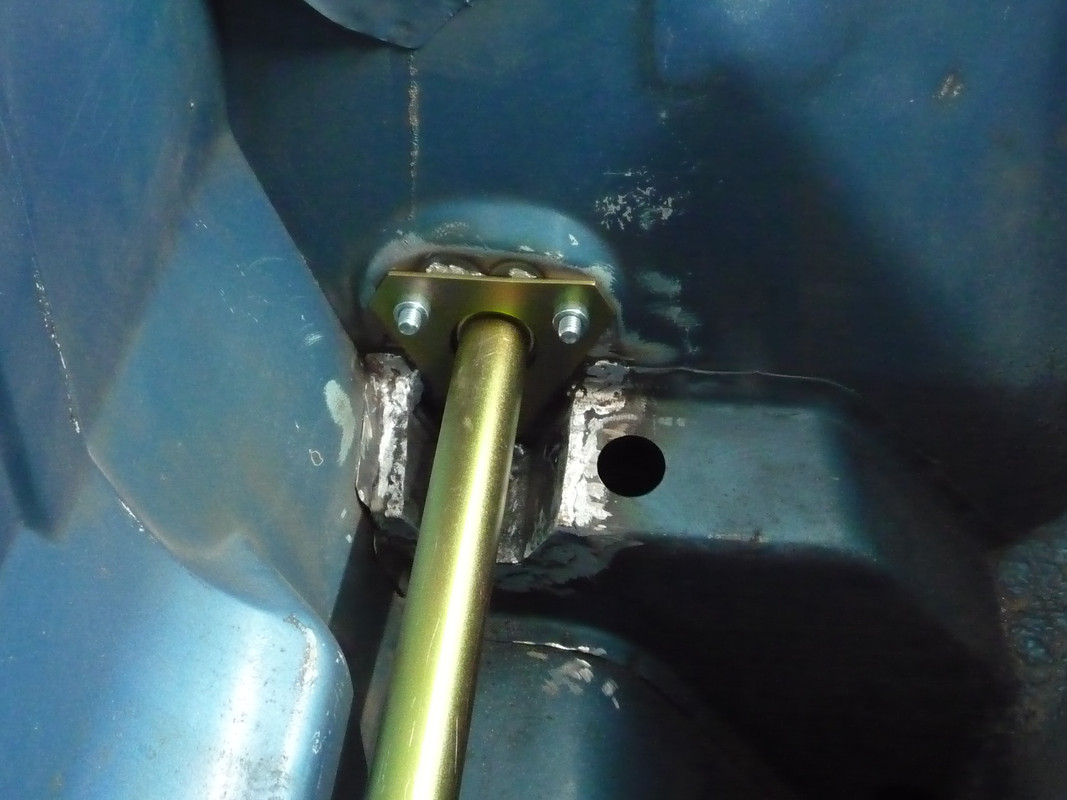
Most peeps just cut a slot to allow the bot spacer to be pushed below the box section panel.

Image

Image

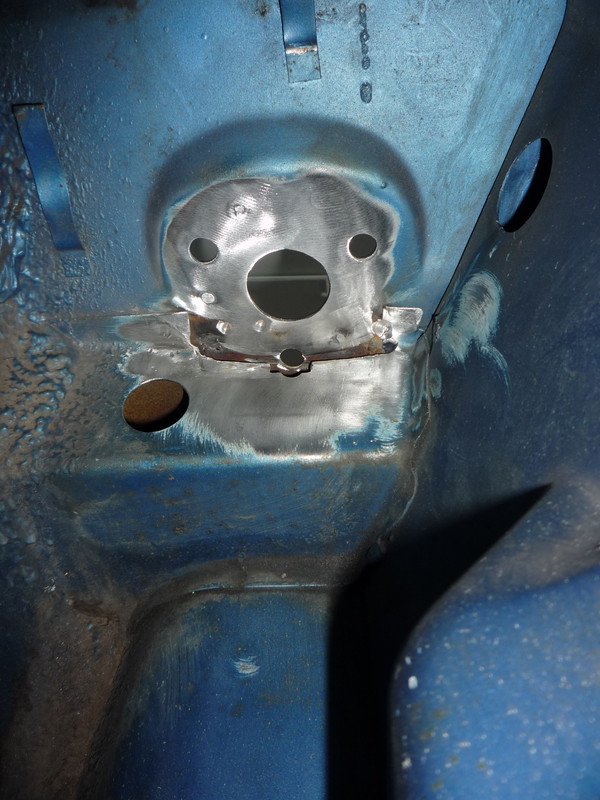
I couldn't in all good concience leave it like this.

Image

Image

Image

Image

Image

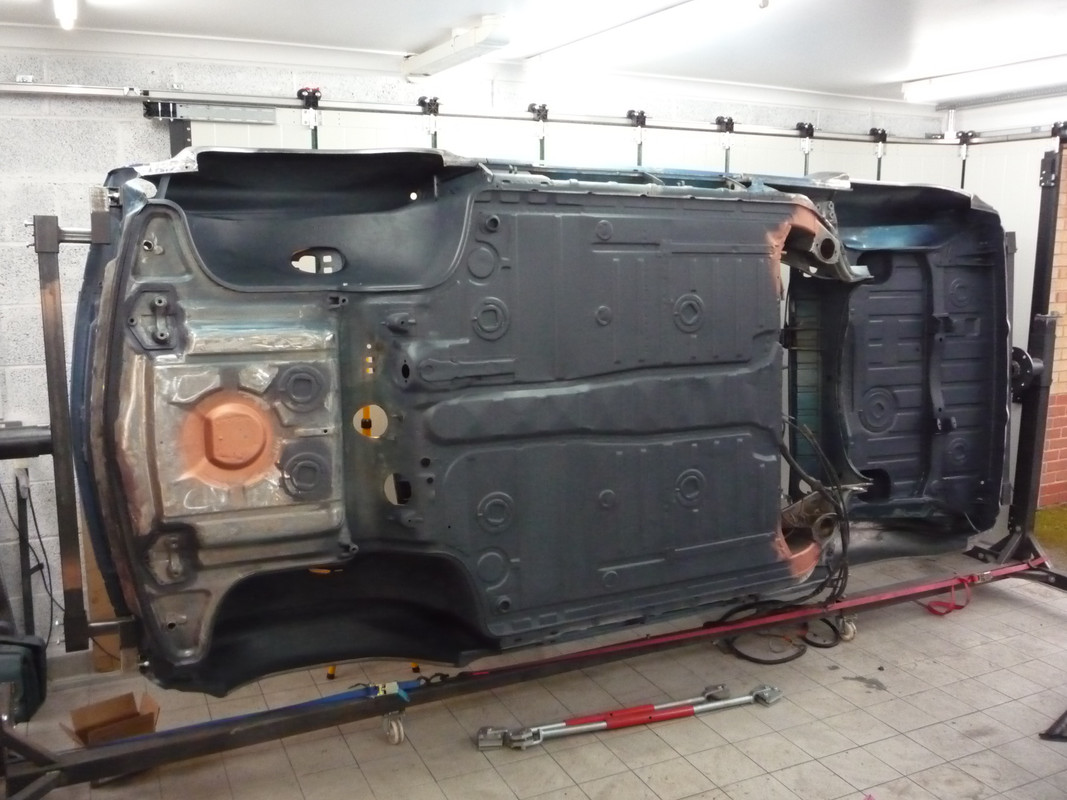
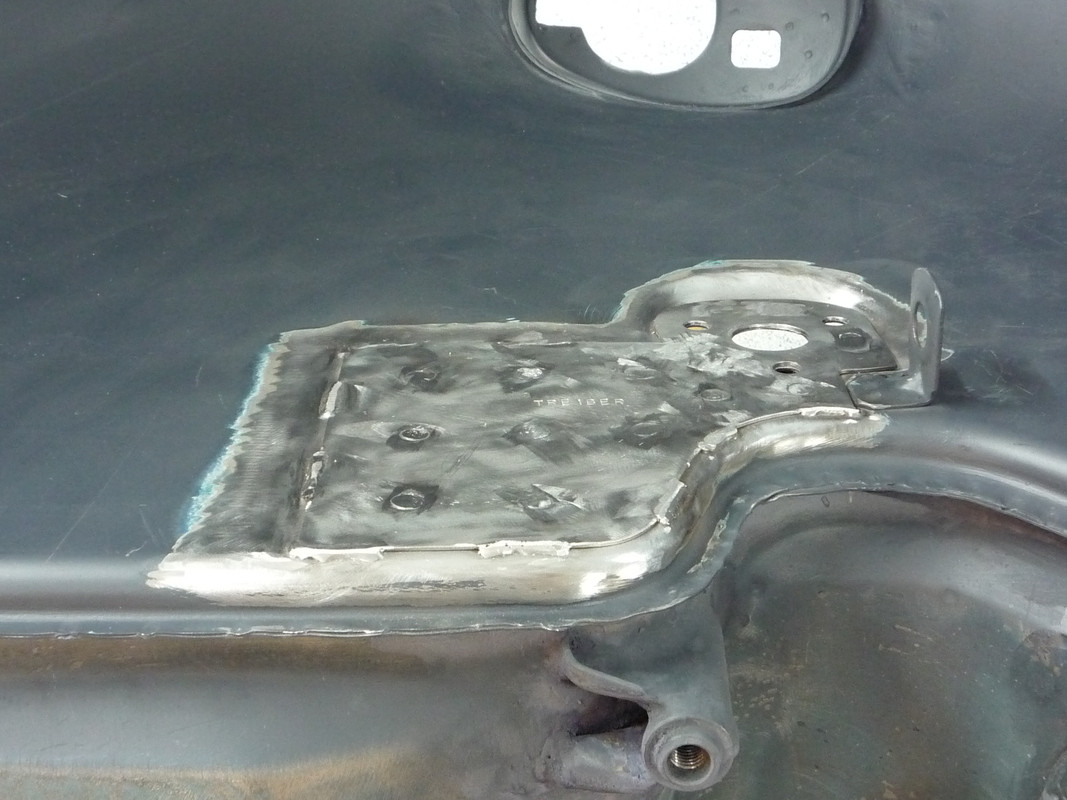
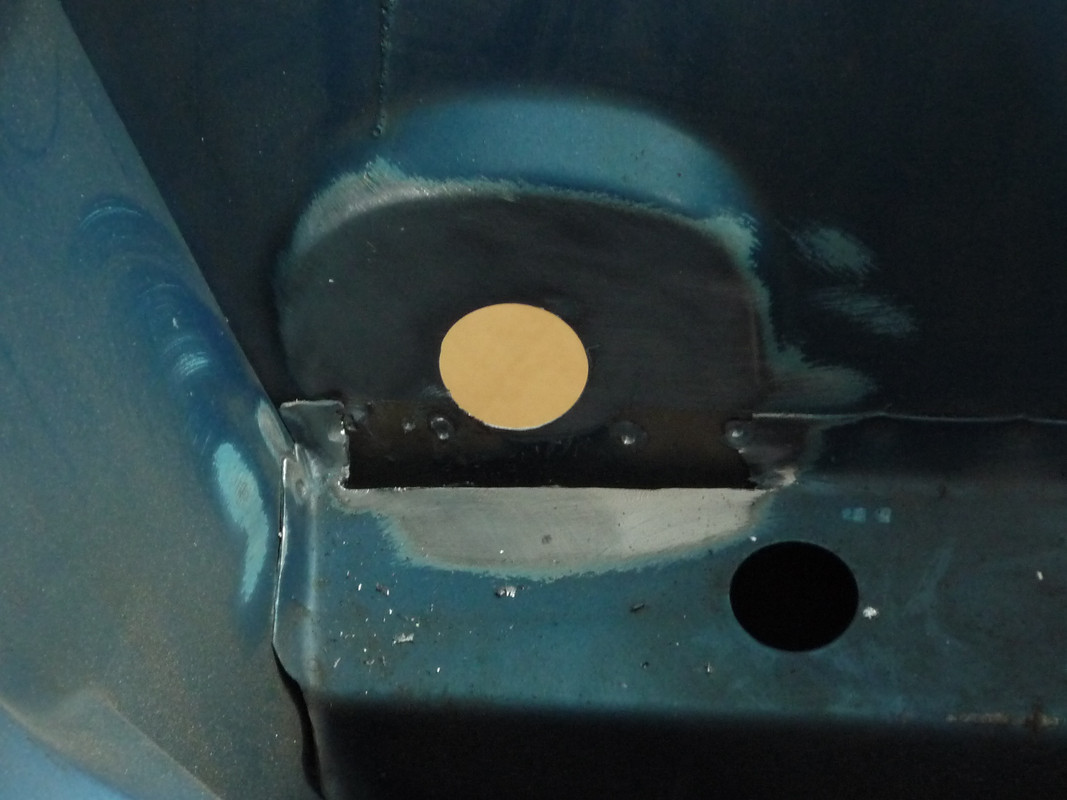
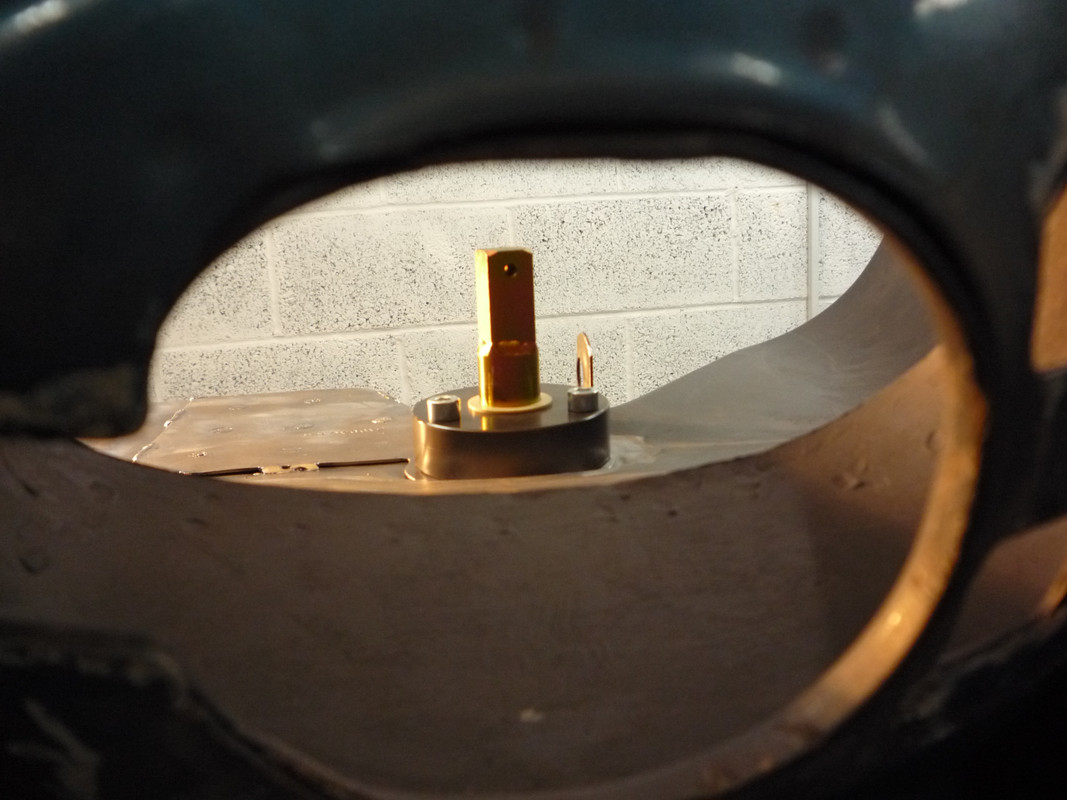
After getting the body level....

Image

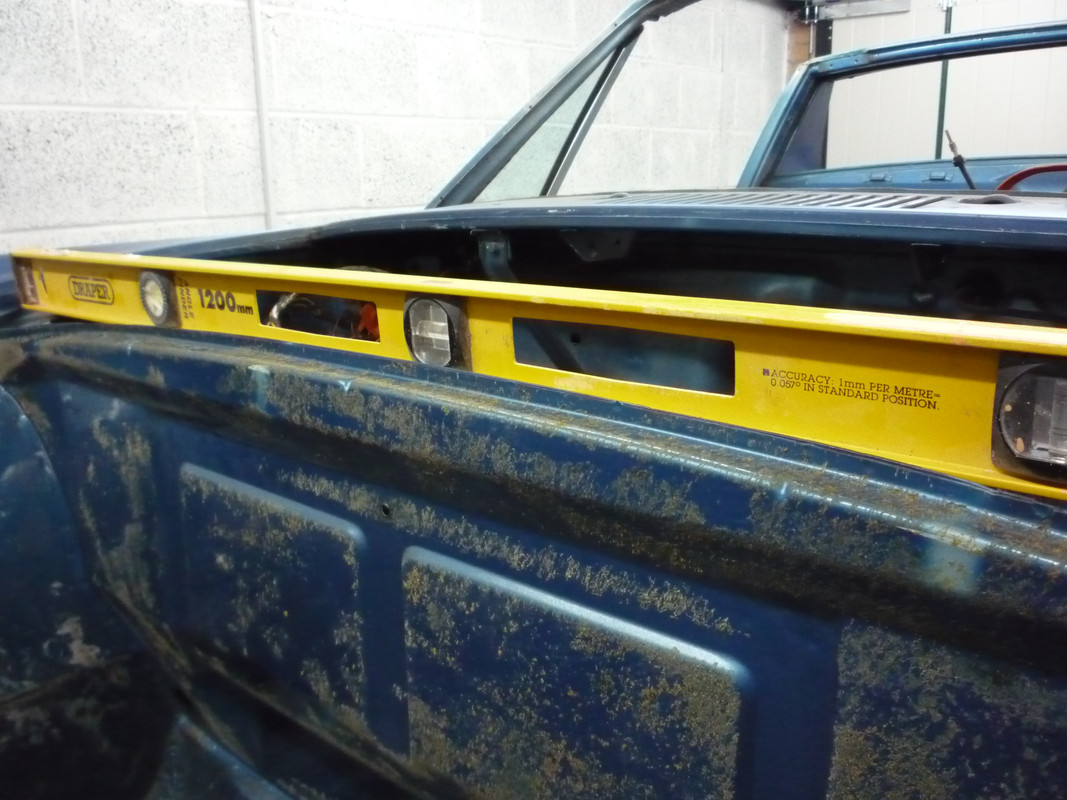
I checked the bar. All bang on!

Image

Image

Image

Image

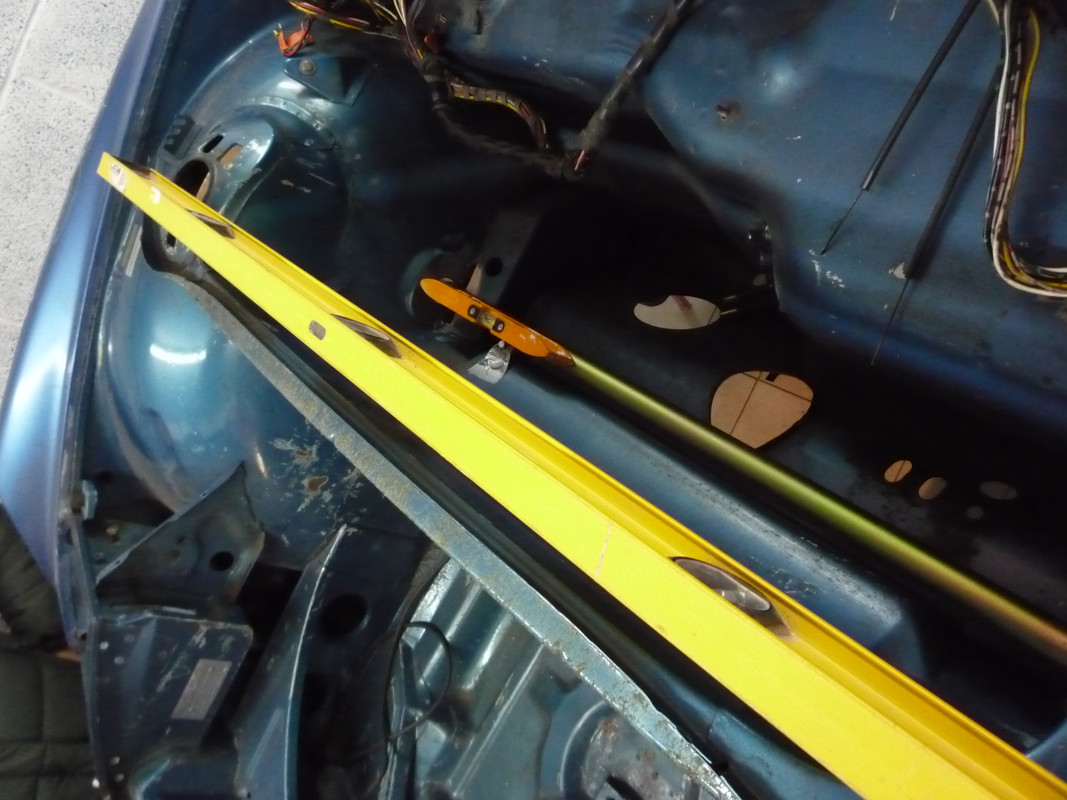
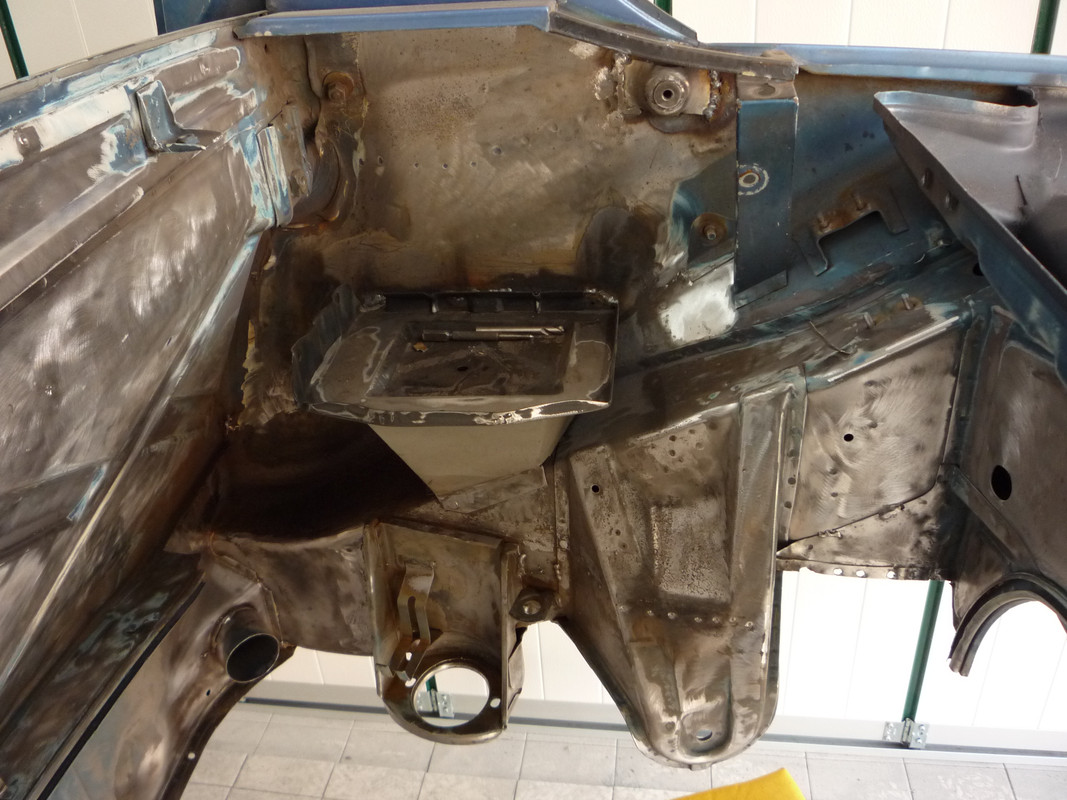
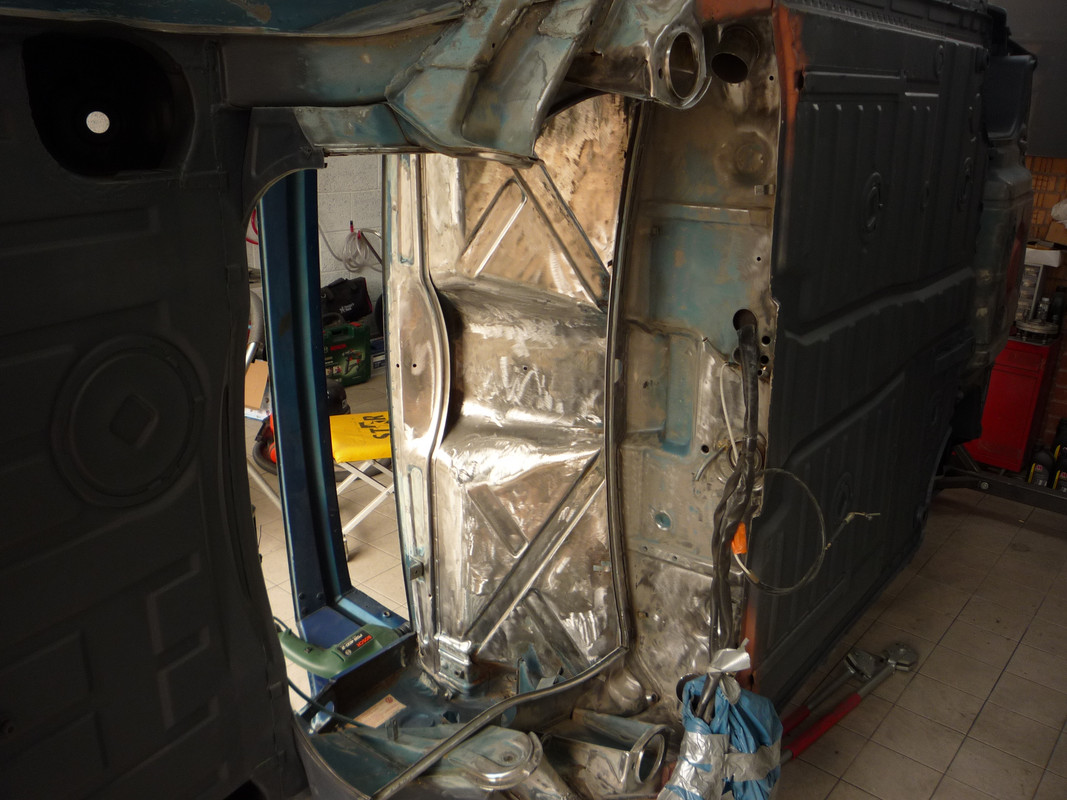
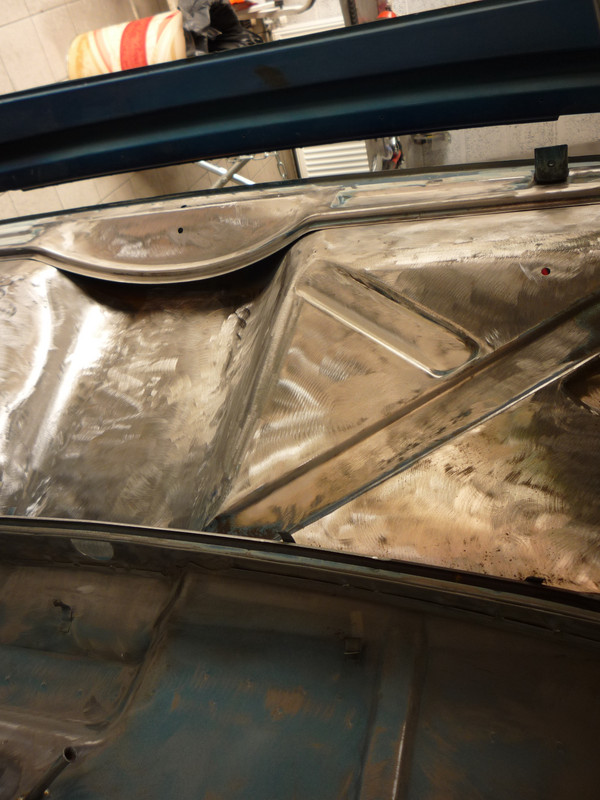
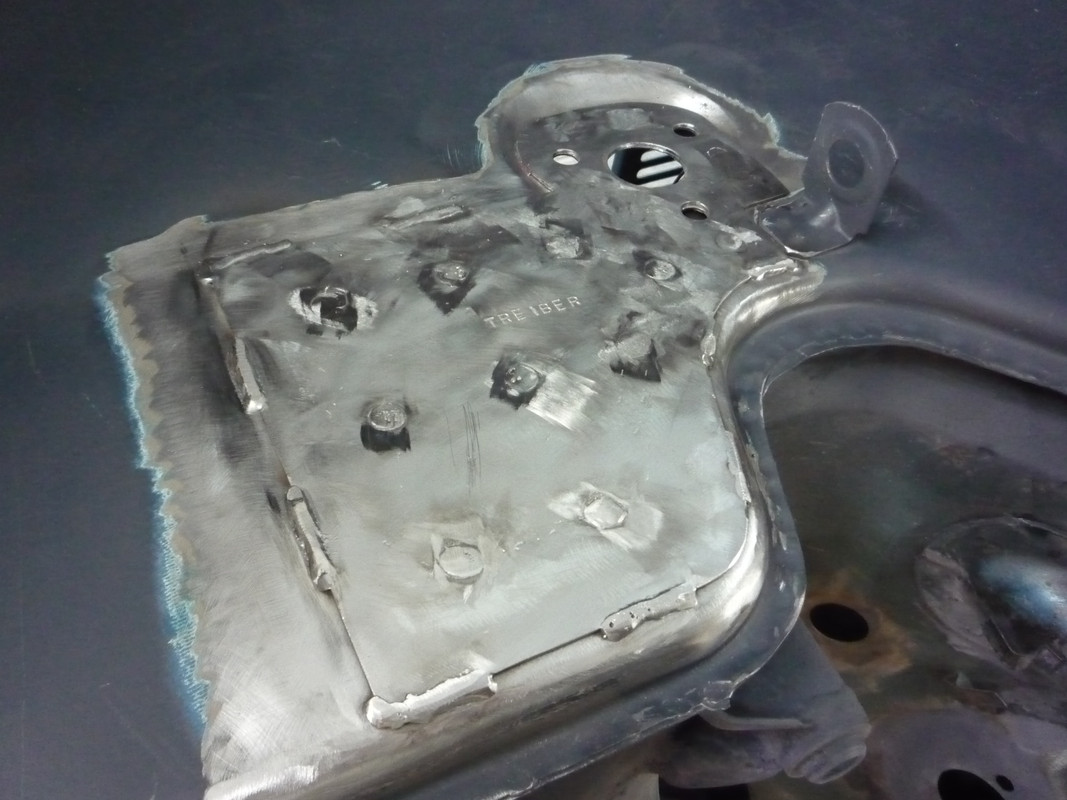
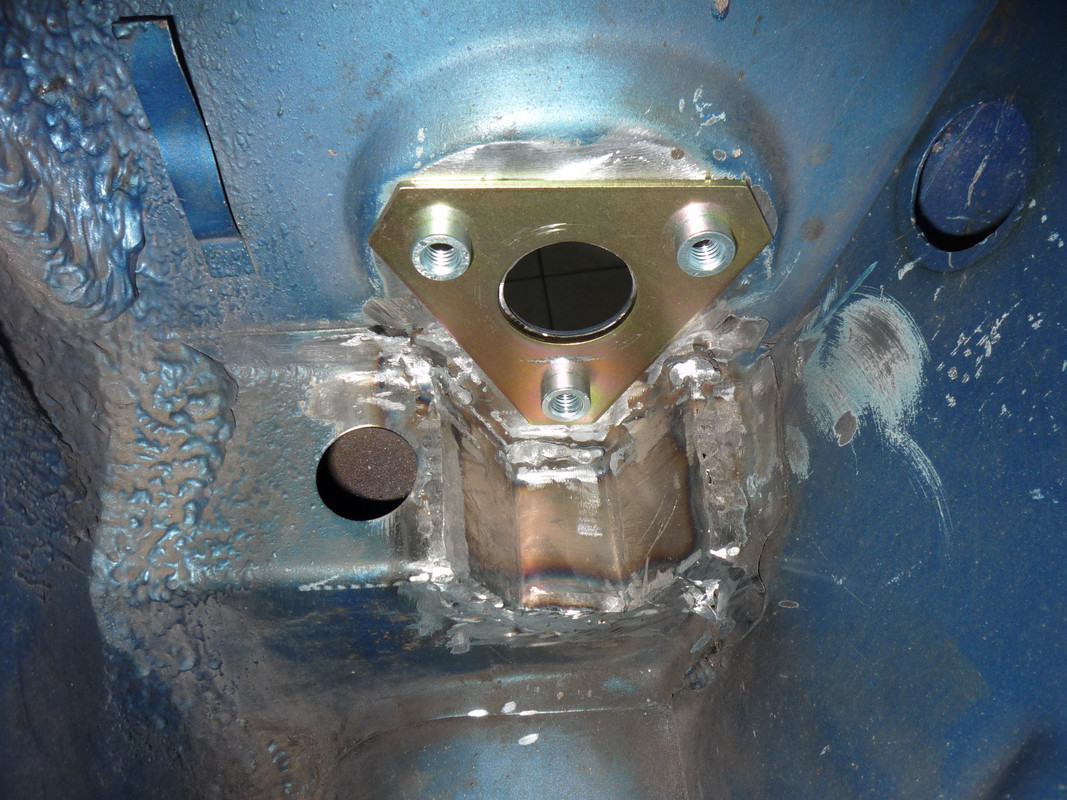
And the finished job.

Image

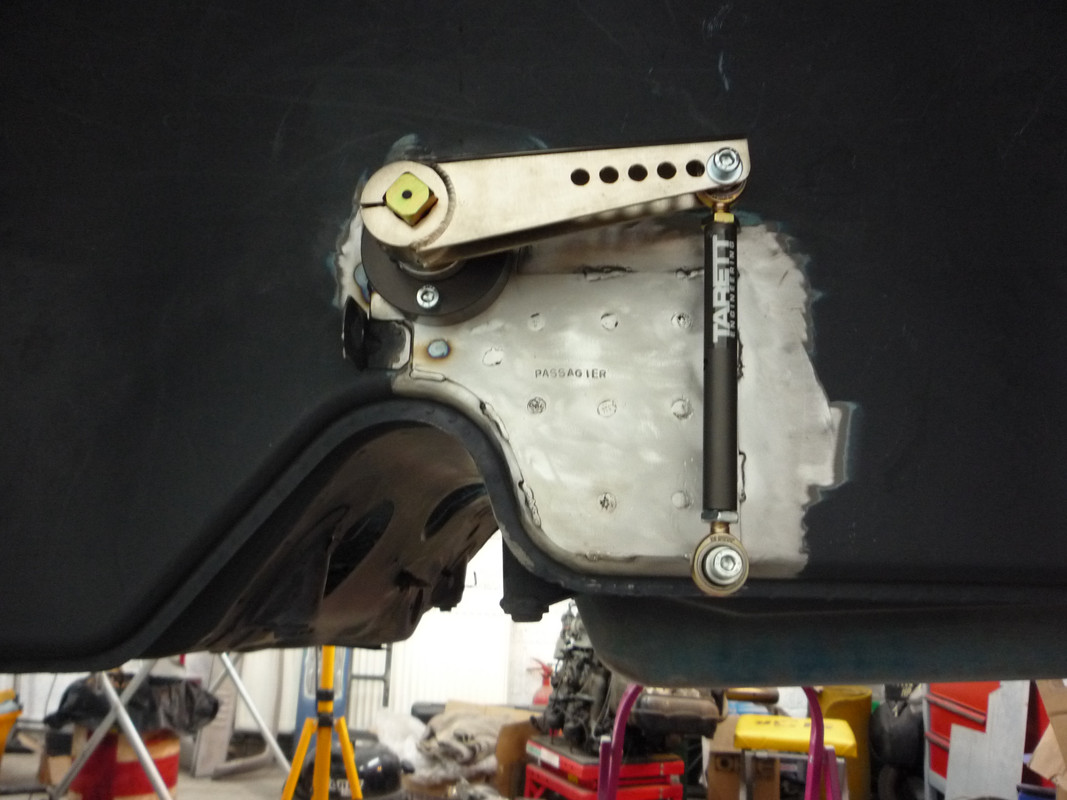
So onto the next chapter!
All the best,
Chief
Last edited by chief on Fri Apr 20, 2018 2:16 pm, edited 3 times in total.
h'Project Blue Book' - 'The Red Baron' - Amber Alert!
defianty
Put a fork in me, I'm done!
Posts: 1717
Joined: Sat Aug 05, 2006 7:02 pm
Location: Rochford, Essex

Re: Project Blue Book

Post by defianty »

Nice job Chief!
Stephen

1973 914 3.0 GT Build Progress
1974 TR6

914 Rear Alignment Shims
chief
Married to the DDK
Posts: 281
Joined: Fri Jul 18, 2008 6:59 pm
Location: The Middle Lands

Re: Project Blue Book

Post by chief »

Thank you Stephen. You wouldn't believe the amount of strength put back into that saddle strengthener by creating that 'V' insert.
I made the outer strengtheners in that shape to cover the weakest part of the inner flitch. Many use a piece that goes off to the rear of the car as well, but 'I' feel that there are so many spot welded bulkhead panels going back, it's just adding weight!

Do you feel like you are getting on top of yours now?
h'Project Blue Book' - 'The Red Baron' - Amber Alert!
defianty
Put a fork in me, I'm done!
Posts: 1717
Joined: Sat Aug 05, 2006 7:02 pm
Location: Rochford, Essex

Re: Project Blue Book

Post by defianty »

chief wrote:Thank you Stephen. You wouldn't believe the amount of strength put back into that saddle strengthener by creating that 'V' insert.
I made the outer strengtheners in that shape to cover the weakest part of the inner flitch. Many use a piece that goes off to the rear of the car as well, but 'I' feel that there are so many spot welded bulkhead panels going back, it's just adding weight!

Do you feel like you are getting on top of yours now?
I've had a couple of weeks off to be honest. I messed up a part on the car because I so cold my concentration lapsed. Nothing huge and easily fixed, just time wasted. However I'll be back out in a few days as I'm running out of time before it goes off to paint! :shock:
Stephen

1973 914 3.0 GT Build Progress
1974 TR6

914 Rear Alignment Shims
chief
Married to the DDK
Posts: 281
Joined: Fri Jul 18, 2008 6:59 pm
Location: The Middle Lands

Re: Project Blue Book

Post by chief »

Hmmm, been there done that pal....
I learnt a long time ago, if you don't enjoy it that day. Leave it and do something fun!!!

I usually end up down The Potting Shed with Phil (LMR)
h'Project Blue Book' - 'The Red Baron' - Amber Alert!
LMR
DDK slapper chatter
Posts: 456
Joined: Tue May 05, 2015 10:05 pm
Location: Solihull

Re: Project Blue Book

Post by LMR »

Great work Chief. I am thinking of setting up a therapy group for 914 owners who's attention to detail is distracting them from real life....!!!

Potting shed was blooming cold this weekend, even with topping up with tea - I did the same as Stephen, temperature was a distraction, so locked the door and went home.
Porsche 964 1993
Porsche 944 1986 - sold
Porsche 914 1972
chief
Married to the DDK
Posts: 281
Joined: Fri Jul 18, 2008 6:59 pm
Location: The Middle Lands

Re: Project Blue Book

Post by chief »

I must admit my garage is luxury by comparison. Fitting the lovely insulated Horman door has been worth it's weight in gold! Having a big radiator helps too!

I thought you were at Goodwood Members Meeting this weekend Phil. That's why I didn't call you...
h'Project Blue Book' - 'The Red Baron' - Amber Alert!
LMR
DDK slapper chatter
Posts: 456
Joined: Tue May 05, 2015 10:05 pm
Location: Solihull

Re: Project Blue Book

Post by LMR »

I was aiming to go, but didn't fancy camping in that weather. I may have had winter training in the potting shed, but Goodwood looked severe...
Porsche 964 1993
Porsche 944 1986 - sold
Porsche 914 1972
chief
Married to the DDK
Posts: 281
Joined: Fri Jul 18, 2008 6:59 pm
Location: The Middle Lands

Re: Project Blue Book

Post by chief »

I watched it on the tellybox Sunday and it looked bloomin freezin!
h'Project Blue Book' - 'The Red Baron' - Amber Alert!
chief
Married to the DDK
Posts: 281
Joined: Fri Jul 18, 2008 6:59 pm
Location: The Middle Lands

Re: Project Blue Book

Post by chief »

More grueling dirty work to day...

Image

Heatgun and more seam sealer to scrape off!

Image

However I did manage to put a little back on at last!

Image

Managed to get some primer on the rear floor inside and out...

Image

Image

It helps kid myself that there is real progress. However it does keep that bare metal sorted, especially with the wet weather of late.

Image

I then moved onto wire brush on drill action to remove the last of that ugly seam sealer.
I them movered to the engine bay to start cleaning. There is some welding to be done here, so cleaning up everything first is good practice.

Image

You can see here I have started to cut out the skirt metal under the battery tray. I shall drop a piece in here tomorrow.

Image

Back ache has now stopped play, so i've called it a day.
See you all tomorrow. Don't eat too many Easter Eggs!
Chief
Last edited by chief on Fri Apr 20, 2018 2:12 pm, edited 1 time in total.
h'Project Blue Book' - 'The Red Baron' - Amber Alert!
chief
Married to the DDK
Posts: 281
Joined: Fri Jul 18, 2008 6:59 pm
Location: The Middle Lands

Re: Project Blue Book

Post by chief »

Okay, so more missing images care of Postimage. If anyone can give me an idea how I fix this I would appreciate it!
So a few pictures of progress...
Image
So I started cutting out the panel that divides the engine. i.e the cold top side and bottom hot side. These are available for Restoration Design.
Image
So this is it removed and as you can see i'm starting to get the old paint off.
Image
After a lot of tin bashing I managed to get the panel to fit very tight.

The opposite side has faired much better. Again just cleaning off paint.
Image

I then moved onto the firewall.
Image
Image
A tedious task, but will make paint later soooooo much easier!
And finally cleaning up the suspension console. 50 years young and still looking great!!!!
Image

So don't forget to let me know how to fix the postimage links if you can, PLEASE?
All the best,
Chief
h'Project Blue Book' - 'The Red Baron' - Amber Alert!
defianty
Put a fork in me, I'm done!
Posts: 1717
Joined: Sat Aug 05, 2006 7:02 pm
Location: Rochford, Essex

Re: Project Blue Book

Post by defianty »

Lovely tidy work Chief!

Edit the picture links and replace the .org with .cc

I've got to go thought my entire thread and do the same :evil:
Stephen

1973 914 3.0 GT Build Progress
1974 TR6

914 Rear Alignment Shims
chief
Married to the DDK
Posts: 281
Joined: Fri Jul 18, 2008 6:59 pm
Location: The Middle Lands

Re: Project Blue Book

Post by chief »

Thanks Stephen.
Just spent a wonderful hour relinking all the images as per your advise. Let's just hope that they don't do the same again!
I find this whole internet shernanagans tedious enough as it is......
h'Project Blue Book' - 'The Red Baron' - Amber Alert!
RichardJ
DDK Fanatic
Posts: 65
Joined: Fri Feb 02, 2018 6:24 pm

Re: Project Blue Book

Post by RichardJ »

Awesome work - inspiration for what I have to come. Those recesses so the lower front anti roll bar bolt is accessible must have been really tricky to access.

I hope you don't mind a question about your rotisserie / rotator? I'm looking to buy one at the moment, and was going to go for one of the ones with an adjustable centre of gravity height, i.e. so you can set it to match the shell C of G so it'll stop in any position. I had planned to make one, but having just made an adjustable body shell forklift stillage from scratch, I can't justify the time it'd take to make a rotisserie too.
I see your rotisserie does not have this C of G height adjustment. With the pivot centre just half way between the bumper mounts, is that quite close to the shell centre of gravity? Can you easily rotate the shell on your own, or do you need some one / something to hold the shell at the angle you want while setting the locking pins at each end? I'll mostly be working alone on my body shell, so I'm keen to have it rotating roughly around it's centre of gravity so it's easy / safe to rotate the shell on my own. If the pivot being between the bumper mounts is close enough to the centre of gravity, I'll maybe be able to save a few £ on a lesser spec rotisserie. Thanks,
Regards,

RichardJ

1975 California spec 914 1.8 restoration project
chief
Married to the DDK
Posts: 281
Joined: Fri Jul 18, 2008 6:59 pm
Location: The Middle Lands

Re: Project Blue Book

Post by chief »

Good Morning Richard,
The rotissery was off ebay. The chap takes a while to make them but the price is keen. I can rotate it by myself as I am Billy No Mates! There are holes set every so many degrees which has a spring loaded locking pin. If i'm going to let the weight go over the vertical I tend to just let the pin spring in each segment so it cannot overpower me. A very useful piece of kit (It actually belongs to LMR Phil) who kindly loaned it to me. I really couldn't have done this kind of work without it. I think it cost about £400.00 delivered.
Good luck with your project, I shall be watching closely!
h'Project Blue Book' - 'The Red Baron' - Amber Alert!
Post Reply