66 LHD 'Doctors Car' restoration begins

Ongoing and archived Porsche (and other marques) restoration threads from DDK members

Moderator: Bootsy

Post Reply
MT
DDK rules my life!
Posts: 1247
Joined: Wed Nov 10, 2010 5:42 pm
Location: Gatwick

66 LHD 'Doctors Car' restoration begins

Post by MT »

Hello all - I suspect this could be a long thread, so perhaps a few words of introduction. If you look under new members for a thread entitled 'New member looking for a proper car to restore' (or something very like that) you'll see that I acquired not one but two pre-73 911's, both with their own little challenges and opportunities. I plan to share my experience, and am seeking technical and experience-based input and observations. So if you see me heading down the wrong route please say so.

Anyway back to restoration. My plan was/is to try and keep the restorations separate, and to as far as possible complete one car before going too far with the other - mainly as a consequence of the logistics/organisation that doing both in parallel would entail. I am not short of space to work or store, but I am not a natural planner/organiser and am prone to 'putting things in a safe place', and only finding them after I have sourced a replacement. Plan A was to complete IKEA car (ex Bob Watson RHD 72E) before starting Doctors car (LHD 66 time-warp).

Well that plan has gone already because while completing my current resto (57 Morris Convertible - nearly done!) an opportunity arose to get some expert help to remove the engine/box from the Doctors car and get an engine/box assessment, and then rebuild, scoped, and possibly completed. So this thread is going to cover the potentially very extended, certainly dis-continuous restoration of that car. When I start on IKEA I will start another thread.

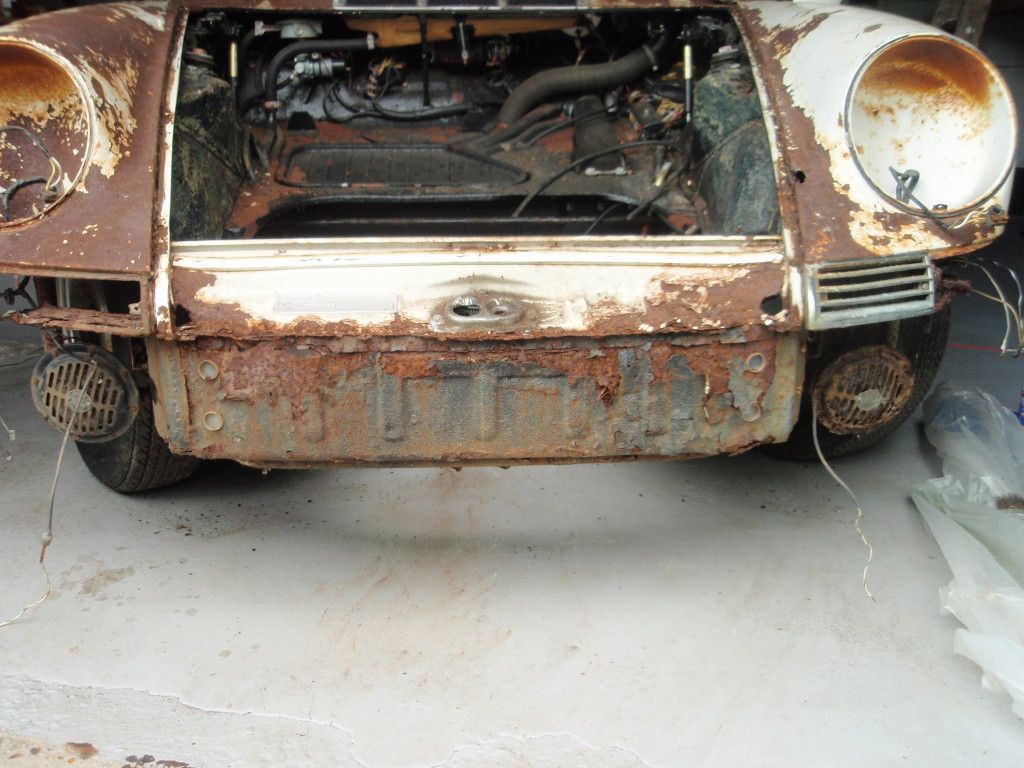
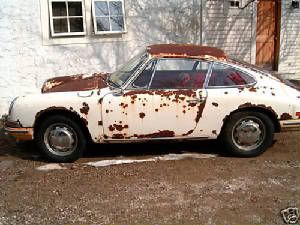
As a reminder the car in question looks like this outside
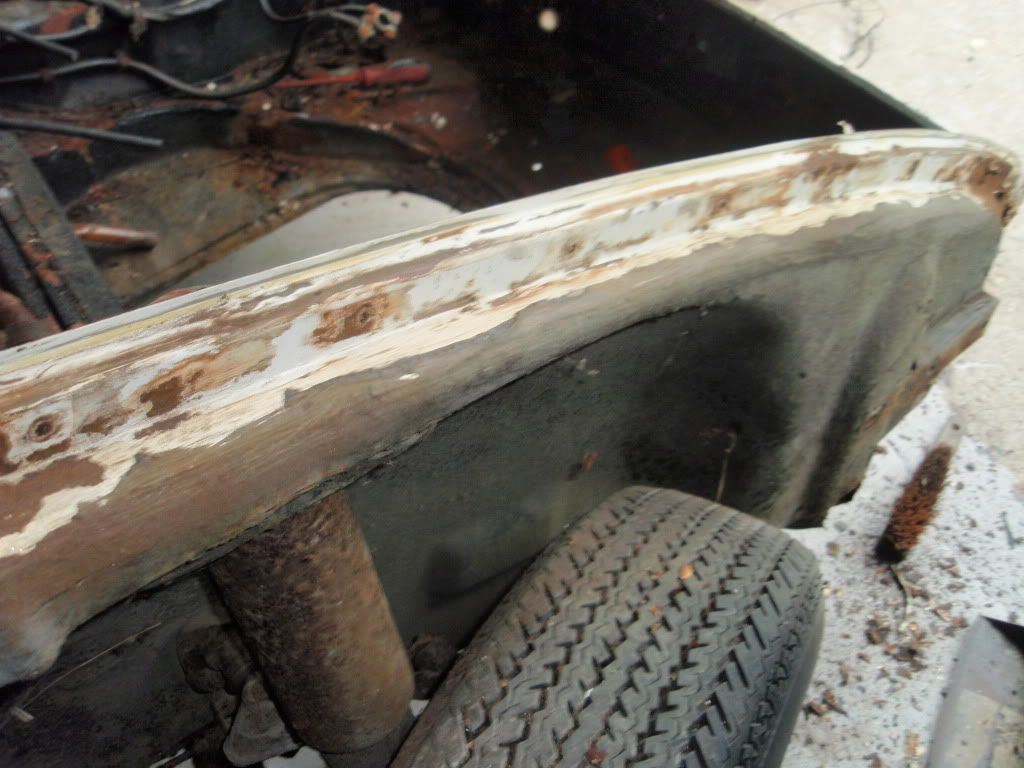
Image

but this inside
Image
Image

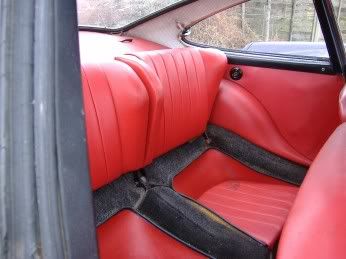
and was left unused from 1977 (when said doctor died in NY state). My plan is to restore it using as much of the original car (esp the interior) as possible, but I am not obsessive re originality. I plan to use modern materials esp to treat bodywork/panels.

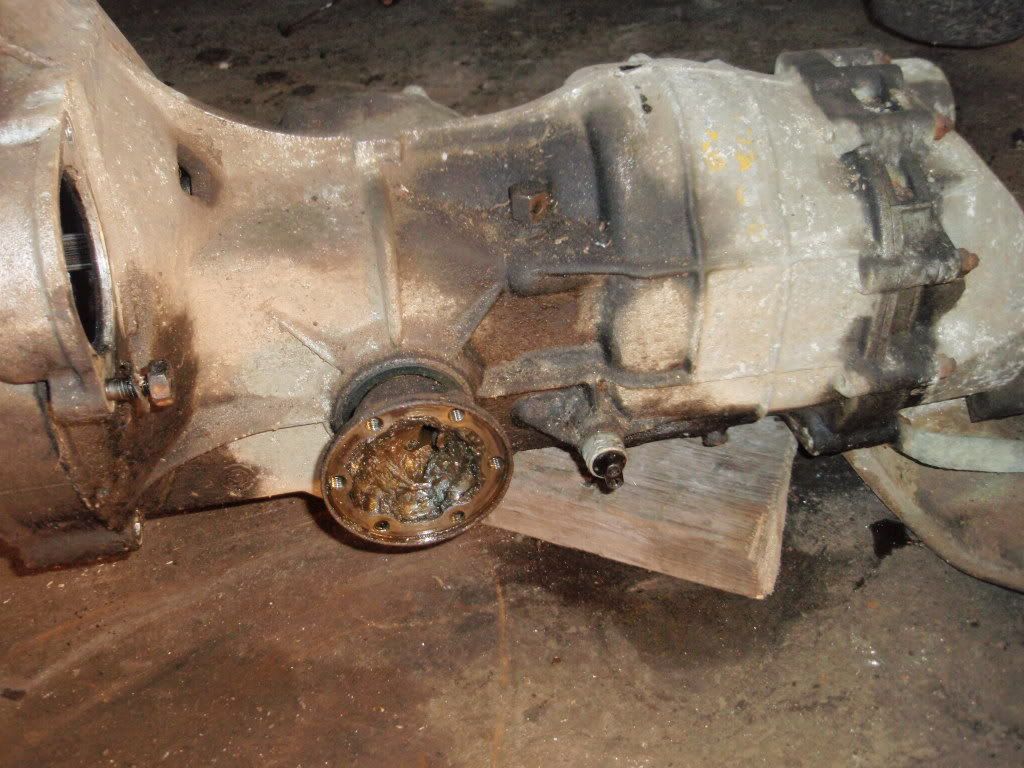
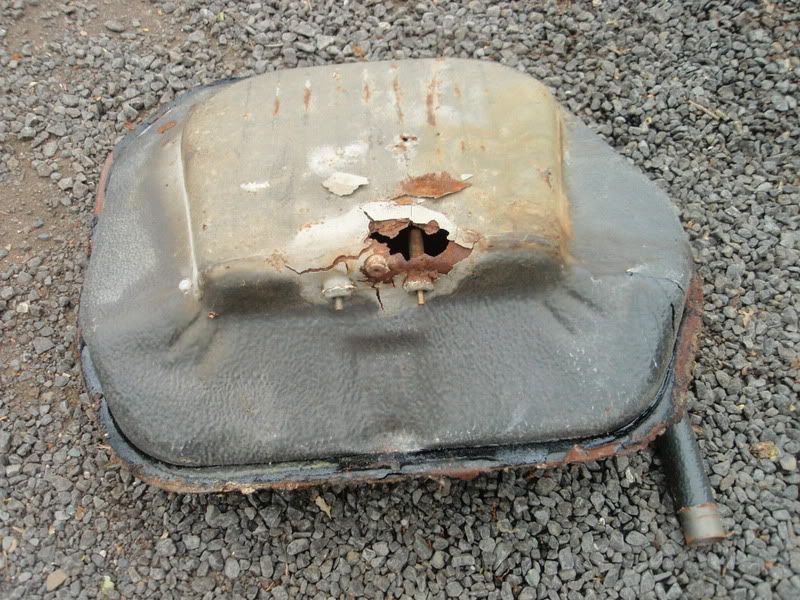
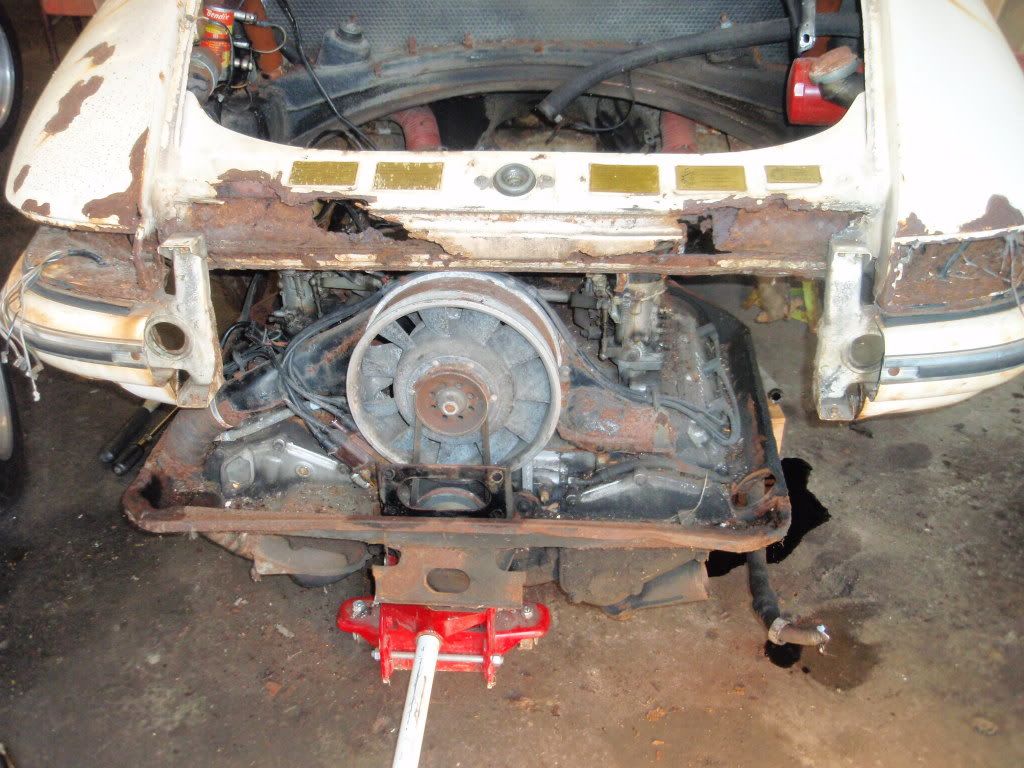
A couple of weeks ago we removed the engine and box (the only thing of note during the removal was that the driveshaft bolts were finger tight!). Engine was full of oil, but is seized. No 5 cylinder was full of water. Evidence of long term occupation under the engine cover by various North American rodents. Not surprisingly the heat exchangers were corroded and much of the heater piping turned to dust. Apart from that the tinware and ancillaries (starter, distributor, alternator, fan etc) looked reasonable - time will tell. Triple webers look ok, but the inlet shrouds were u/s. Loom and electrics as new (ish!)

Image

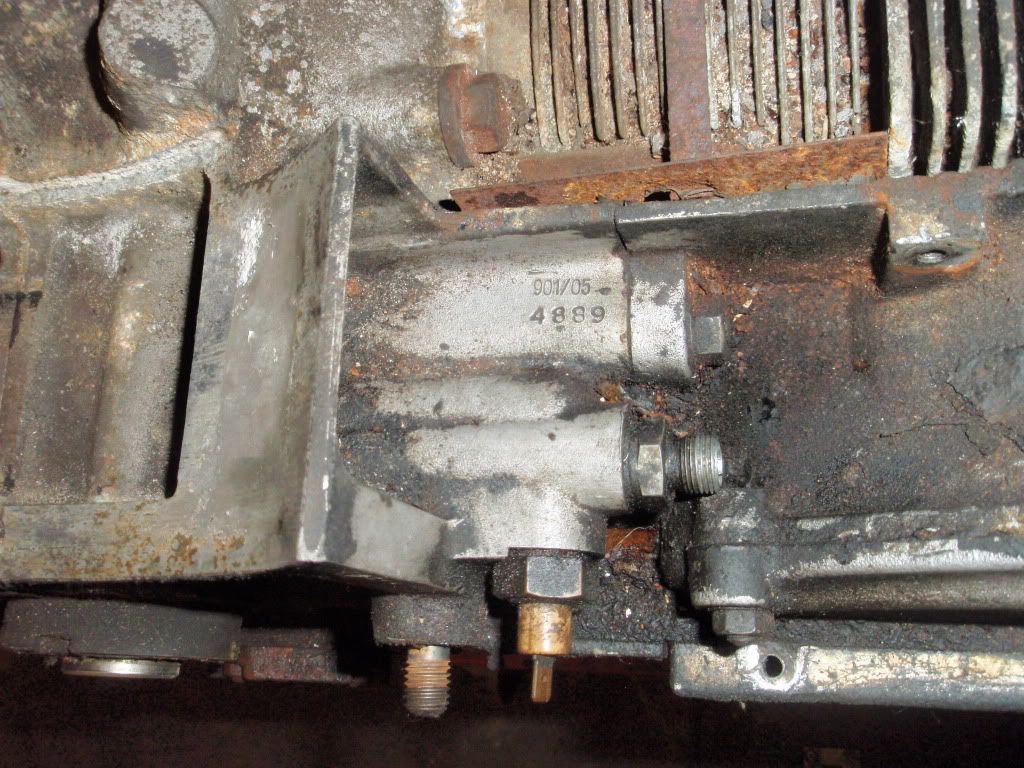
I have a CoA. Engine number tallies, but the box is different. 128477 on the box, 231609-902/1 on the CoA. (Any input on this much appreciated - see next post)

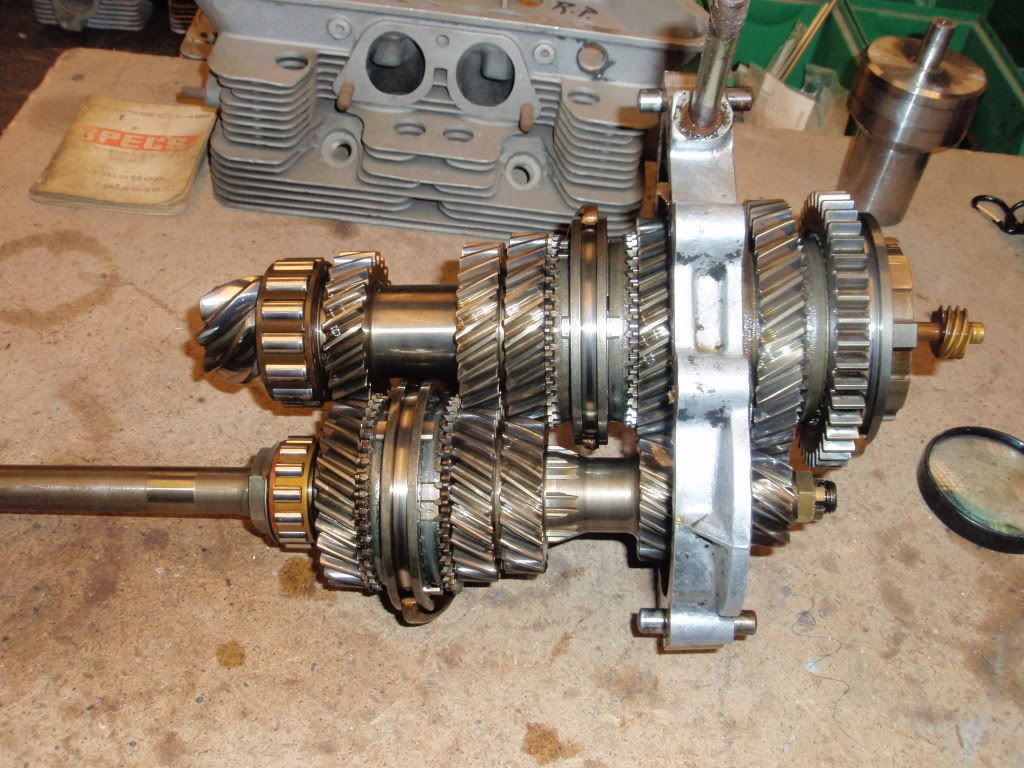
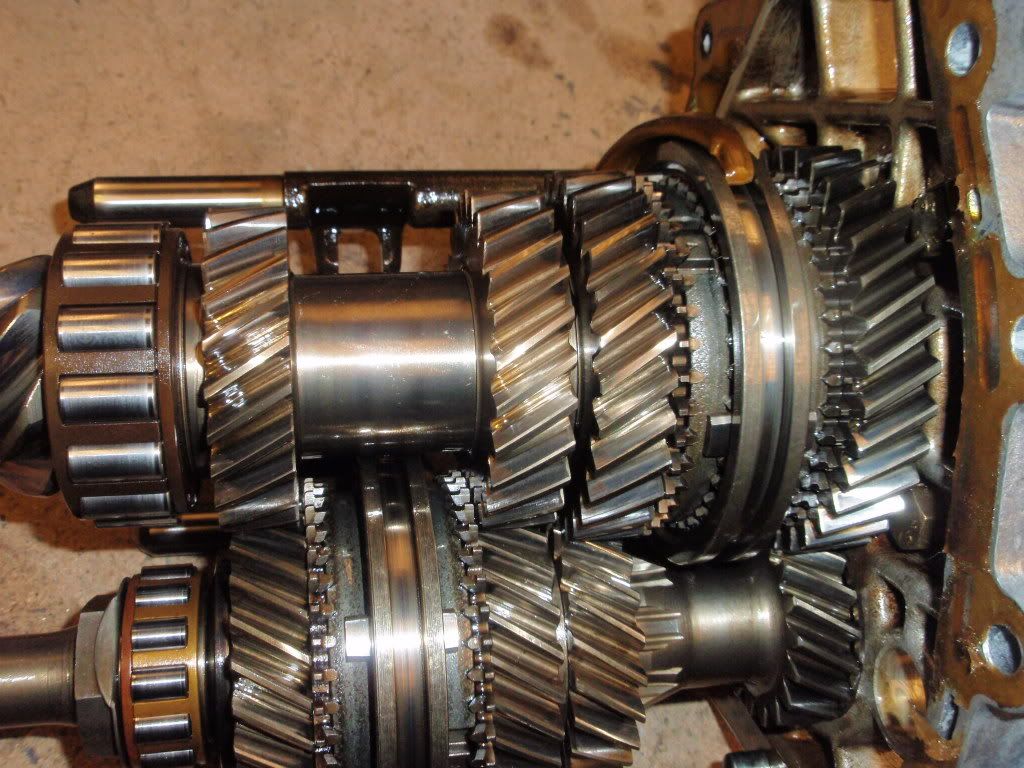
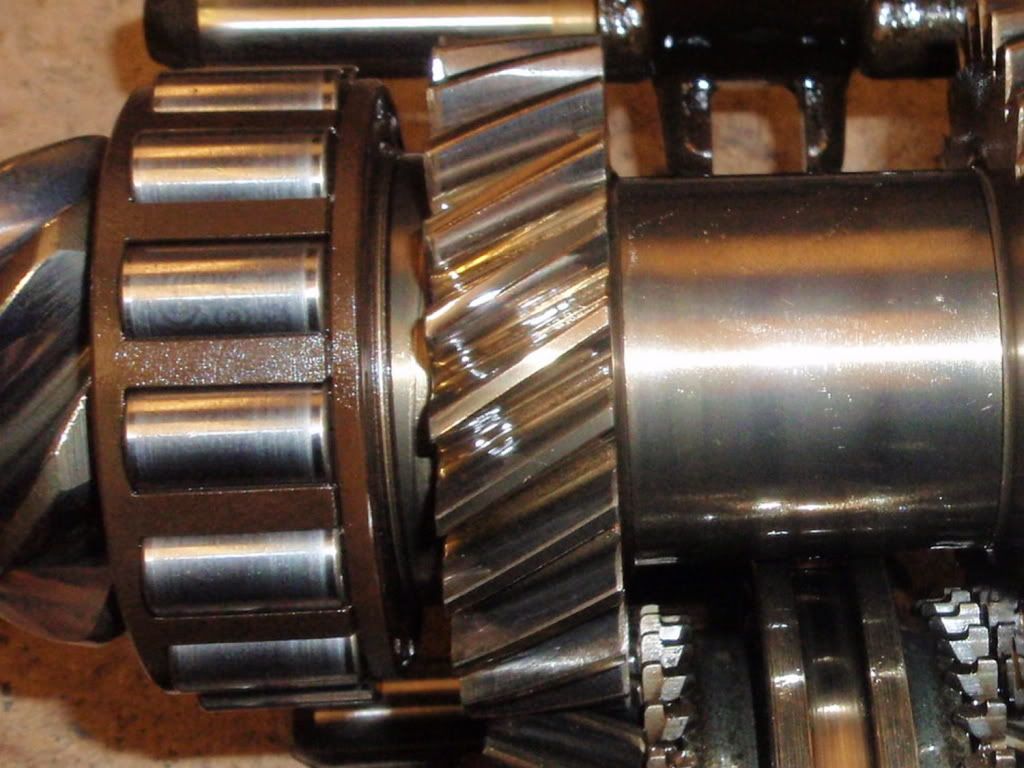
I will post the gearbox initial open up as another post in a minute.

Mick
Last edited by MT on Thu Aug 30, 2012 7:00 pm, edited 1 time in total.
MT
DDK rules my life!
Posts: 1247
Joined: Wed Nov 10, 2010 5:42 pm
Location: Gatwick

Post by MT »

Now for the gearbox. Looks to conform with all the descriptions I've seen to be a 901 box (as would have been fitted? - any significance to the 902 subscript on the CoA number?)

Image

On removal of the rear cover the internals seem to be in very good condition. No chipped teeth, and little or no wear evident on mating faces. The synchro rings look largely ungrooved and unworn - they are certainly not new, but nor have they seen much use, or not hard use at least I would suggest.

Image

Image

In fact the only problem we could detect was some pitting on two of the rollers on the output shaft/diff bearing (the larger of the two roller bearings on the left of the photo above.)
I have zoomed in on this bearing below, but it looks like the offending two rollers are not in the picture
Image

Now I understand to replace this bearing (an eye-watering £200+vat from Porsche) you have to strip the whole shaft, and once you do that other replacements need to be considered. It also seems likely (circumstantial evidence only) that this box is a new/recon replacement for the original, that was installed not too long before the car was laid up (see comment re driveshaft bolts in first post above). So what are your views on:

1. Replacing this bearing at all
2. If yes to the above replacing the other, smaller roller bearing on the input shaft.
3. Replacing the sychro rings regardless of how good they look (relatively cheap, never be a better time, etc etc)
4. Any others in category 3 above

At the moment my plan is to replace both roller bearings, and take a final decision on the rings when the box is apart ...... but the temptation to just clean the casing, measure the gaskets and box the whole thing up without stripping it is significant. I have much experience of the 'bath-tub' failure phenomenon in my engineering/ops mgmt past..........

Thanks, Mick
MT
DDK rules my life!
Posts: 1247
Joined: Wed Nov 10, 2010 5:42 pm
Location: Gatwick

Post by MT »

..... oh and another thing. The engine has this stamped on it just to the right of the fan.

Image

it reads 901/05 and underneath the serial no 4889

The guy who helped me with the removal had done many 911's and had never seen (or never noticed) it before.

Mick
visualfx
I luv DDK!
Posts: 756
Joined: Sun Mar 07, 2010 6:59 pm
Location: Newdigate Surrey
Contact:

Post by visualfx »

Hi Mick,

Good to see someone on my doorstep getting stuck in....

901/05 denotes a 1967 type 911 so it fits

If you need any SWB parts I seem to have aquired quite a few :shock:

By the way have a rebuilt 902/1/224034 box if it helps

Thanks
Last edited by visualfx on Thu Feb 03, 2011 5:28 pm, edited 1 time in total.
davep
I luv DDK!
Posts: 905
Joined: Fri Apr 23, 2010 2:41 pm
Location: Canada

Build numbers

Post by davep »

read this thread of mine and enjoy:

http://www.early911sregistry.org/forums ... ne-Build-s
MT wrote:..... oh and another thing. The engine has this stamped on it just to the right of the fan.
it reads 901/05 and underneath the serial no 4889

The guy who helped me with the removal had done many 911's and had never seen (or never noticed) it before.

Mick
Porsche historian & researcher, contact me for Kardex through 1969 model year.
Addicted since 1975
MT
DDK rules my life!
Posts: 1247
Joined: Wed Nov 10, 2010 5:42 pm
Location: Gatwick

Post by MT »

If I understand the listing I see my car listed - the engine no is 908021.
Is there anything further i can find from this?

Thanks
Mick
User avatar
mrg3.6
DDK rules my life!
Posts: 1175
Joined: Wed Jan 17, 2007 1:08 pm
Location: South Wales

Post by mrg3.6 »

MT wrote:If I understand the listing I see my car listed - the engine no is 908021....is there anything further i can find from this?
1966 - 901/05 series - 1991cc / 130bhp / Engines 907001 to 909000 / Weber 40 IDA / 902-1 transmission.

Martin
davep
I luv DDK!
Posts: 905
Joined: Fri Apr 23, 2010 2:41 pm
Location: Canada

Post by davep »

MT wrote:Looks to conform with all the descriptions I've seen to be a 901 box (as would have been fitted? - any significance to the 902 subscript on the CoA number?)
The 902/1 transmission was the standard 5 speed box fitted to both 911 & 912 in 1966; A,F,M,S,X gear-set. The 902 designation refers to the 912 as the original application in 1965 model year. The 901 and 902 were essentially the same boxes just differing in the ratios.
On the side of the case near the diff cover is a casting number and a date code. That date code would be nice to know.

On the aluminum case engines there are date codes for each case half behind the crank pulley. The 2 digit year is surrounded by a circle of dots, one per month. Those dates would also be useful to know.
Porsche historian & researcher, contact me for Kardex through 1969 model year.
Addicted since 1975
MT
DDK rules my life!
Posts: 1247
Joined: Wed Nov 10, 2010 5:42 pm
Location: Gatwick

Good News Bad News

Post by MT »

Well I have finally finished (and sold) the Morris Convertible, and tarted up my workshop a bit, so it is time to start of the 'Doctors Car' in earnest. I spent today stripping out the petrol tank, front bumper and front wings. As with all restoration there is good and bad news, usually more of the latter...

Anyway any comments please let me know. This will be my sixth classic car restoration (all from wrecks), but my first Porsche (or similar) so I welcome any advice or opinions - what worked for a Landrover or a TR4A might not work, or be best for a Porsche.

So first the tank - came out easily, and looked good from what I could see above and below before I started, but a prod from a screwdriver ...
Image

... so I'll be looking for one of those. My car is fitted with the wonderful Webasto patio heater, so it has two fuel outlets. Do all tanks have 2, or do I need to be careful in my search for a good replacement?

Then off with the bumper. I knew it was shot, and the Hella fogs have broken lenses and are tatty, but one over-rider was good - and the lead weights are in A1 condition! So good news there, eh! It revealed
Image
... a front panel (just), so I'll be needing one of them as well. (What are the four 20mm plastic inserts near each corner for?)


Then after playing 'seek the bolt' and 'how to get 6 wires down a tube that really only is big enough for 5' for an hour or so I had both wings off to find ....
Image
Image
Image

... a RH inner wing that was in very reasonable condition once I got rid of all the sealant, underseal and remnants of the outer wing. Only one section at the front that will be bigger once its been media blasted, but still well within my metal-working/welding comfort zone.

Image
Image
Image

and a LH that is not much worse (mainly the A post wing support bracket)
... so OK there.

What I have found is that under the original underseal the paint is 'as new' - see this close-up
Image

..... so I had originaly planned to do the heatgun/blowtorch/scraper marathon and take it all off, but I'm now thinking should I not just remove the damaged/repaired sections and then recoat. What do you think?

See what tomorrow brings
MT
DDK rules my life!
Posts: 1247
Joined: Wed Nov 10, 2010 5:42 pm
Location: Gatwick

Post by MT »

And another thing ...

I have managed to borrow a chassis jig from my local garage for a few months, so my question is when is the best time to use it. With the Triumph (where you have a separate chassis and body shell) it was important to do all the major bodywork repairs (sills, crossmembers etc) while the body was still attached to the chassis and with the engine/box still weighing it down, then you remove it and get it media blasted and fix all the hundred other holes and defects.

Given I will have to replace the front crossmember and front panel for instance is it best to do this with the front suspension in place and before the car is blasted, then put it on the jig, ...... or strip it all down, blast clean, put it on the jig and work from there?

Experience and guidance please
Thanks, Mick
911hillclimber
Nurse, I think I need some assistance
Posts: 18921
Joined: Mon Mar 10, 2008 6:26 pm
Location: West Midlands

Post by 911hillclimber »

Look at how Barry does it, the absolute 911 master:

Torn down shell and onto the jig with local bracing added above the jig if required.

Great project and a heap of work, but will be nice when done!
Look forward to more reports, makes DDK what is is today.

The floor will be interesting...

Graham.
IanMcLeod
DDK rules my life!
Posts: 1345
Joined: Fri Jan 14, 2005 8:33 pm
Location: Cornwall

Post by IanMcLeod »

Strip it down to a bare shell and then onto the jig. From memory the jig attaches to rear engine mounts, rear suspension towers, rear torsion tube ends, gear box mounts, front suspension towers, front suspension mounts and front panel.

Ian.
A sponge and a rusty spanner

2.4E RHD, 2.4E RHD, 993 Carrera RHD
jury
I need to get out more!
Posts: 3417
Joined: Mon Apr 16, 2007 9:06 pm
Location: Portland, Oregon, USA

Post by jury »

Look forward to seeing this progress....can't believe how nice the interior looks compared to the shell :shock:


Chris
# 465

1967 912 Polo Red
1968 912/11 RAL 7001 ' MOD ROD '
1990 964 C2 Velvet Red
1991 VW Vanagon GL (SOLD - Vanagone)
2017 Coleman CT200U

“It’s not where you’re from, it's where you’re at”
MT
DDK rules my life!
Posts: 1247
Joined: Wed Nov 10, 2010 5:42 pm
Location: Gatwick

Post by MT »

can't believe how nice the interior looks compared to the shell
I agree, and the body is a real mix as well, with some parts rusted through and other equally vulnerable bits looking ok (we shall see!). The floor pan, kidney bowl area and windscreen base all look solid for example, although the base of the A B posts and the sills are badly corroded .... but the door bottoms look solid.

Also I cannot figure out the paintwork - as you can see whole areas of the car have no paint left, yet the exposed metal is not pitted, or wasted to any significant degree. I'd have speculated it had been left in the desert if it weren't for the rotted sections and the interior condition. A mystery to me - any ideas out there ....???
Barry
Nurse, I think I need some assistance
Posts: 4319
Joined: Tue Aug 24, 2004 8:50 pm
Location: East Sussex

Post by Barry »

Hi Mick, looks like you are getting on with it well :) .

I'm amazed at just how variable the corrosion is: that view of the rear slam panel for instance, compared to most of the front inner wings. Frankly the corrosion that is on them is the sort of thing you now see on SC's and even 3.2's.

Anyway, to answer the jig question: before blasting usually you'd remove the outer sills (and the heater pipes) and kidney bowls.

It would be highly unusual not to replace the kidney bowls, whatever their apparent condition, as a) by time you remove the outer sill you'll disrupt the KB anyway, b) there's usually corrosion underneath the bowl, on the front of the rear inner wing. You'll be cutting into this anyway to replace the inner sills properly. Again, these are always worth replacing unless perfect, as they allow a good look into the structure beneath. On even very good cars now you'd reckon to do some sort of repairs to all four inner wings where they ajoin the sill structure.

As for bracing, I really wouldn't bother. Being a coupe, it's so stiff compared to it's weight, they don't shift. Even if it did, as you'll be using a jig, it's a doddle to correct this later.

So yes, strip out, taking references where you can for anything that is being removed, including pictures of all gaps if it's not too late, very valuable later on. After that blast, and pop on the jig and off you go.

One jig-tip: I've got a nice accurate engineer's spirit level, and although my workshop floor is pretty good, whenever I'm going to weld anything structural, I just quickly check the jig. Being an engineer's level, it has a series of lines either side of the bubble. I don't bother to level the jig, but simply make sure the front and rear are taking the bubble to the same line. 7/10 times it's fine, but if it happens to be in a slightly lumpy area, I just lift the offending corner of the jig. To put this in context, I probably never jack the jig by more than 3mm I would guess, but does give piece of mind.

Anyway, best of luck with the next stages: keep in touch, I'd be delighted to help in any way I can, being a big fan of DIAH (do it at home) restorations as I am 8) .
DDK Member1243 07741 273865. Now booking Spring '24. Home of the RY Austin 7 Trophy's
Post Reply